

TL;DR
You can fix Windows 10/11 updates stuck at 0% with these methods:
-
Quick Fixes:
-
Restart PC, check internet, run Update Troubleshooter.
-
-
Common Causes:
-
Corrupt files, low disk space, slow internet, firewall blocks.
-
-
Advanced Fixes:
-
Clear update cache (
SoftwareDistribution). -
Reset components via Command Prompt.
-
Disable antivirus/firewall temporarily.
-
Install updates manually (via KB number).
-
-
Other Solutions:
-
Run
sfc /scannow,chkdsk, or use Media Creation Tool.
-
-
Enterprise Tip:
-
Use Action1 for automated, reliable update management.
-
When a Windows Update is stuck at 0%, it’s usually because of your unstable internet connection, insufficient storage space, corrupted files, or problems with the Windows Update service itself. To fix it, you must start with the basics: First, try restarting your computer, check your internet connection and speed, run the Windows Update troubleshooter, or restart the Windows Update service. Most of the time, these simple yet effective steps will resume the update process successfully.
Stuck Windows Updates are more common than you think, both on Windows 11 and Windows 10, and that’s why in this article, we’ll provide you with quick fixes and some advanced solutions that work in solving stuck updates in no time.
Let’s get started.
Quick Fixes to Try First
Fixing stuck updates on Windows 11 or 10 doesn’t have to be difficult or time-consuming. In most cases, you can solve the problem quickly with the fixes below.
Restart Your PC and Try Again
Restarting your computer can fix stuck Windows 11/10 updates, because, as we all know, software bugs tend to happen more frequently than we’d like, and the Windows Update service is no exception. Restarting your computer properly reloads your entire OS and clears basic issues, so give it a try.
Check Your Internet Connection
An internet connection problem is among the most frequent reasons for a Windows 11/10 update to get stuck or fail entirely. If your download speed is slow or the connection itself is unstable, Windows updates are going to keep getting stuck either at 0, 20, 50, or 80%.
Disconnecting and reconnecting to your local network is the first step; if that doesn’t help, try testing your internet speed by using applications like Ookla that will give you detailed information about your ping, idle, download, and upload latency. Spotting issues with these metrics would require you to call your internet provider to diagnose and repair the problem.
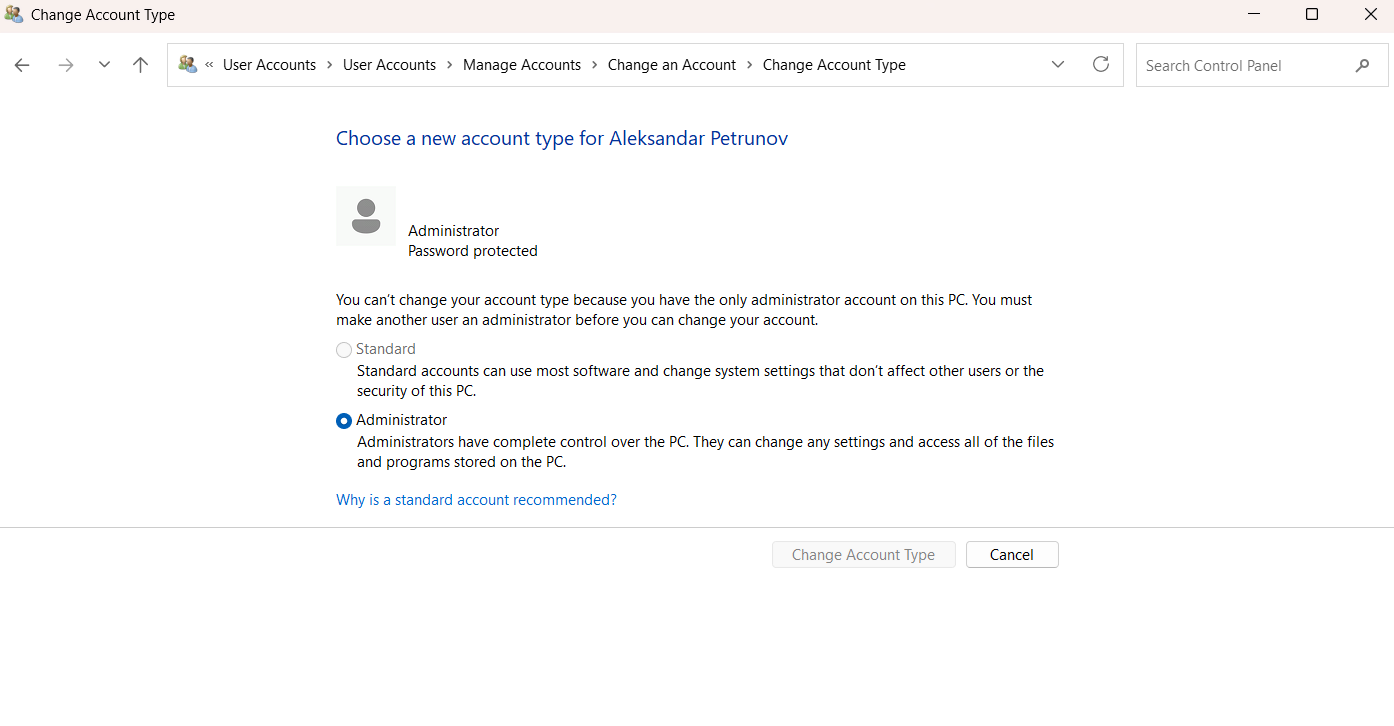
Make Sure You Have Administrator Access
If your user account doesn’t have administrator rights, updates are very likely to fail or get stuck. Here’s how to check that on both Windows 11 and Windows 10:
-
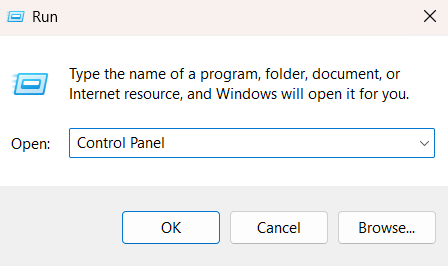
Step 1. Press the Windows key + R to open the Run dialog box, type “control panel,” and hit Enter.
-
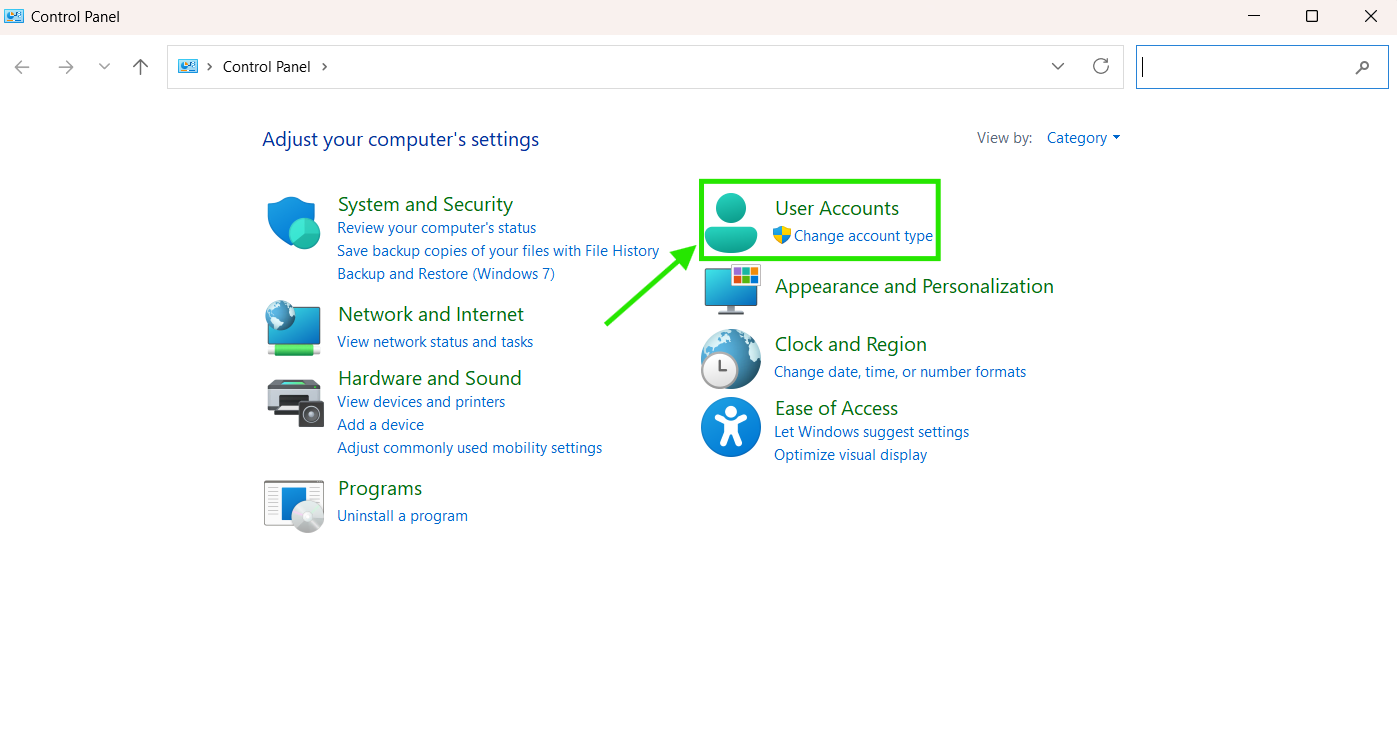
Step 2. Go to User Accounts.
-
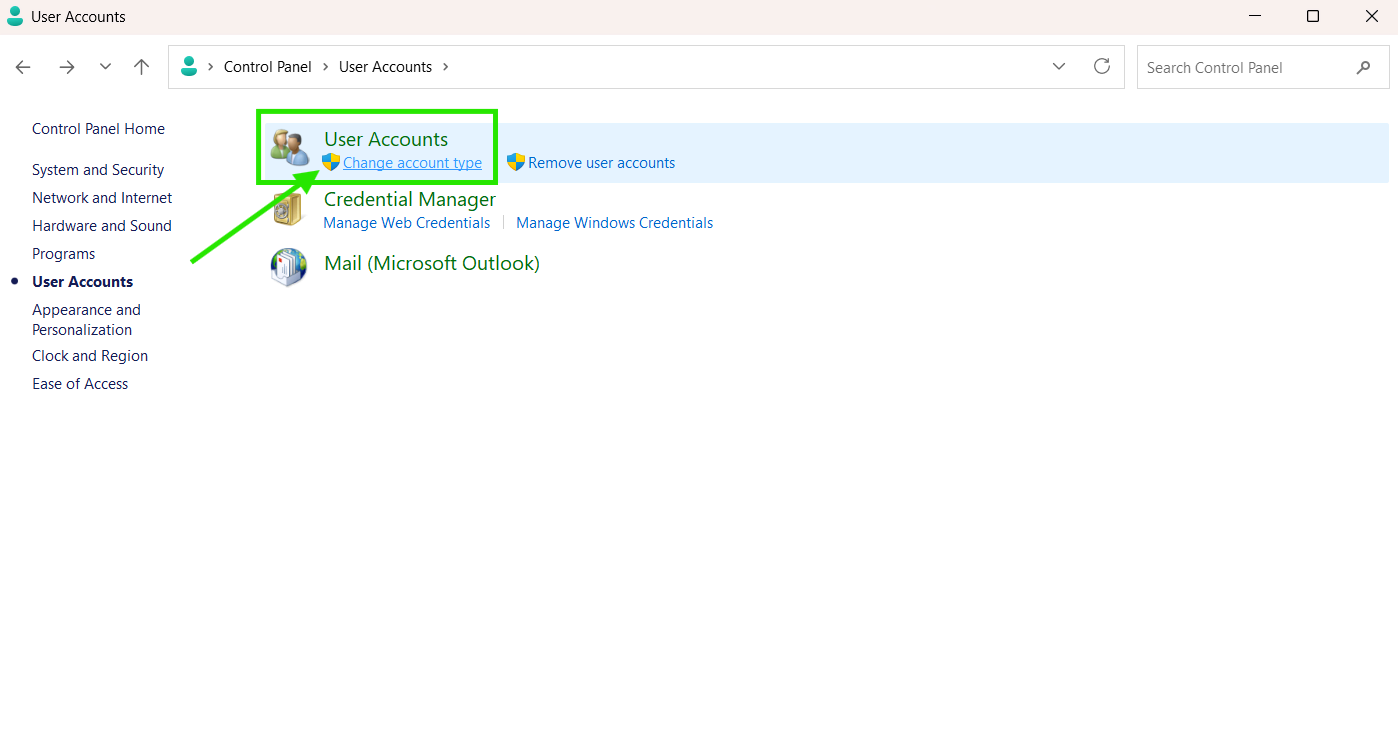
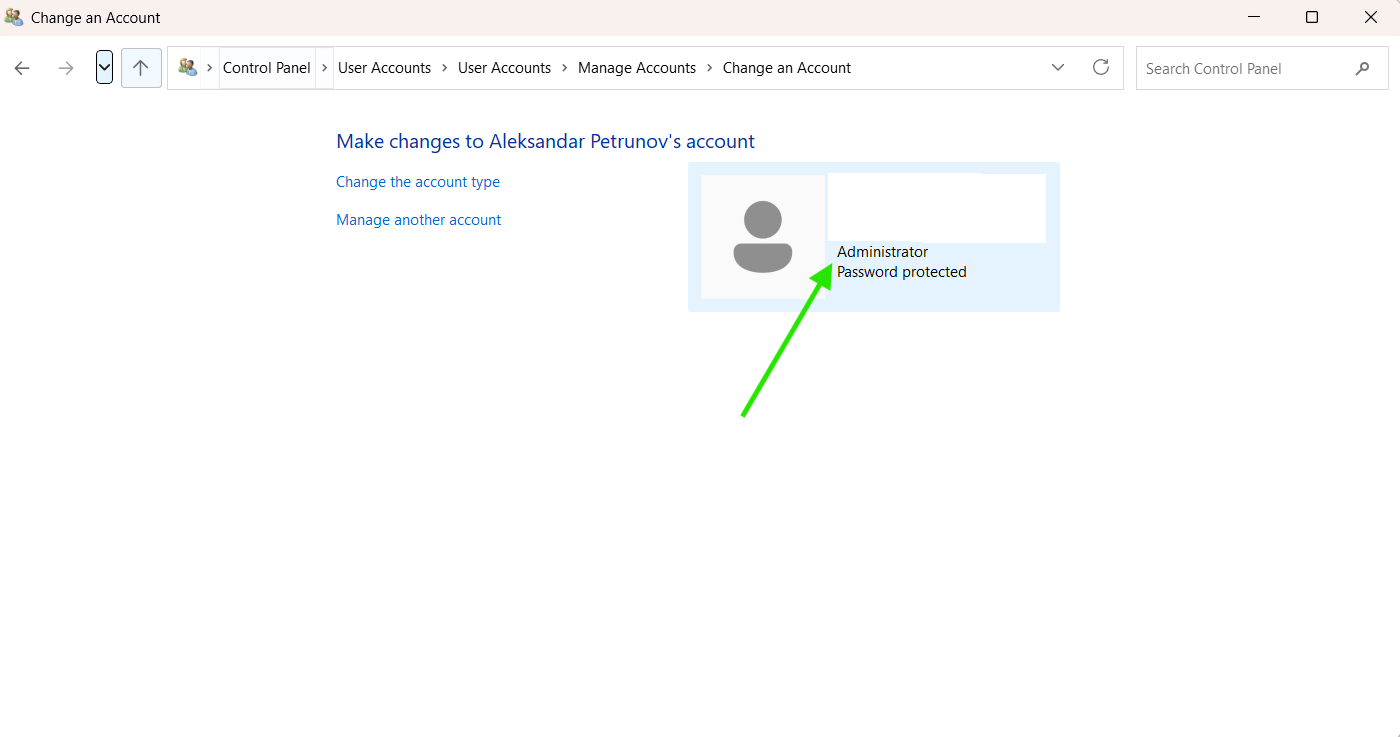
Step 3. Click “User Accounts” again, then click “Change account type.” This will show you whether your account has Standard or Administrator rights, and you can change it directly from there.
-
Step 4. If you changed it to Administrator, restart your computer and try running the update again.
Disconnect External Hardware
USB drives, external hard drives, printers, scanners, and other peripherals connected to your computer can sometimes create conflicts during the Windows update process, causing the installation to get stuck at 0%. Disconnecting unnecessary devices before running the update eliminates that potential issue. Here’s how to do it:
-
Step 1. Save any open files like documents, PDFs, or photos and close all running apps.
-
Step 2. Safely eject any USB drives or external storage devices by right-clicking them in File Explorer and selecting “Eject” before pulling them out of the USB port.
-
Step 3. Try running the Windows update again. If the update completes successfully, you can reconnect them one by one.
Run the Windows Update Troubleshooter
The Windows Update Troubleshooter is an effective tool that can successfully resolve multiple issues related to Windows 11/10 stuck or failed updates and here’s how to use it:
Windows 11
-
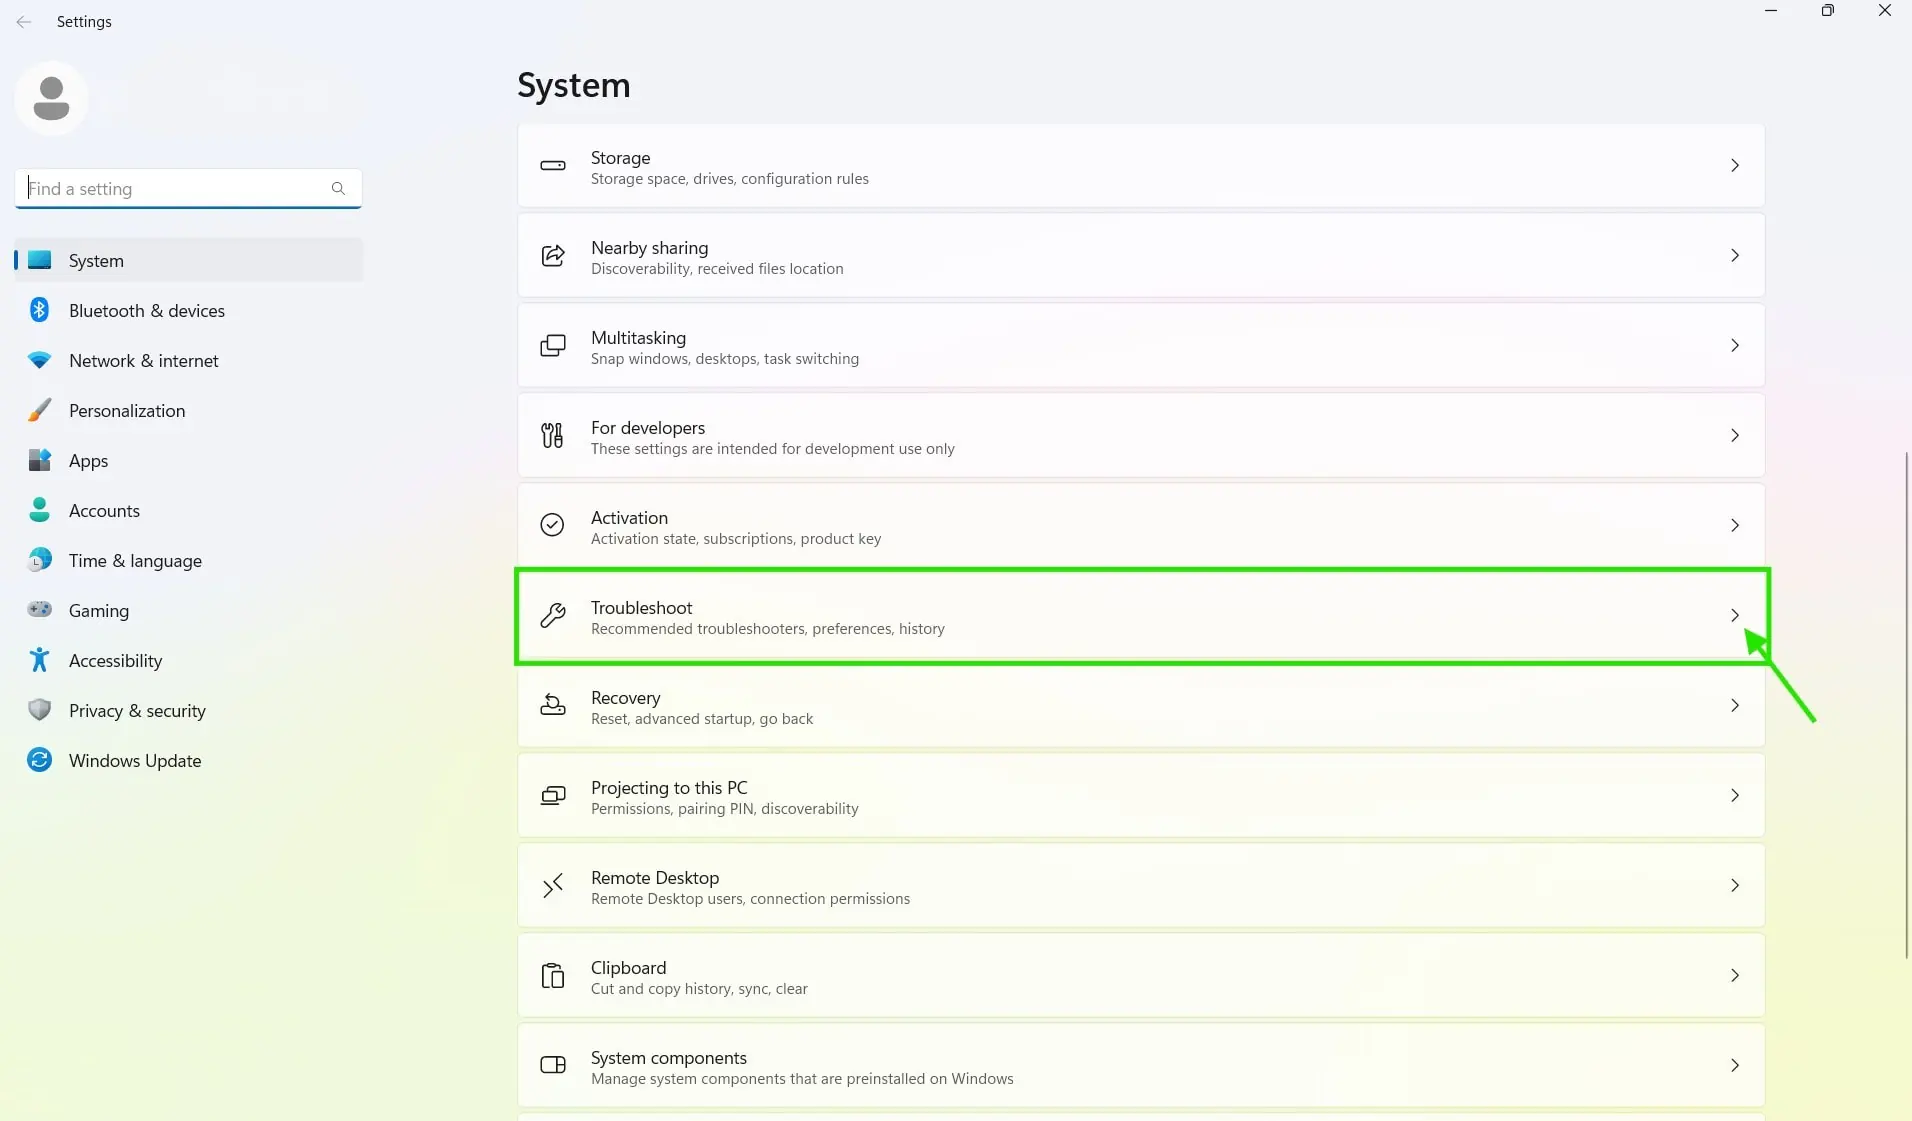
Step 1. Open Settings from the Start menu, or alternatively press the Windows key + I.
-
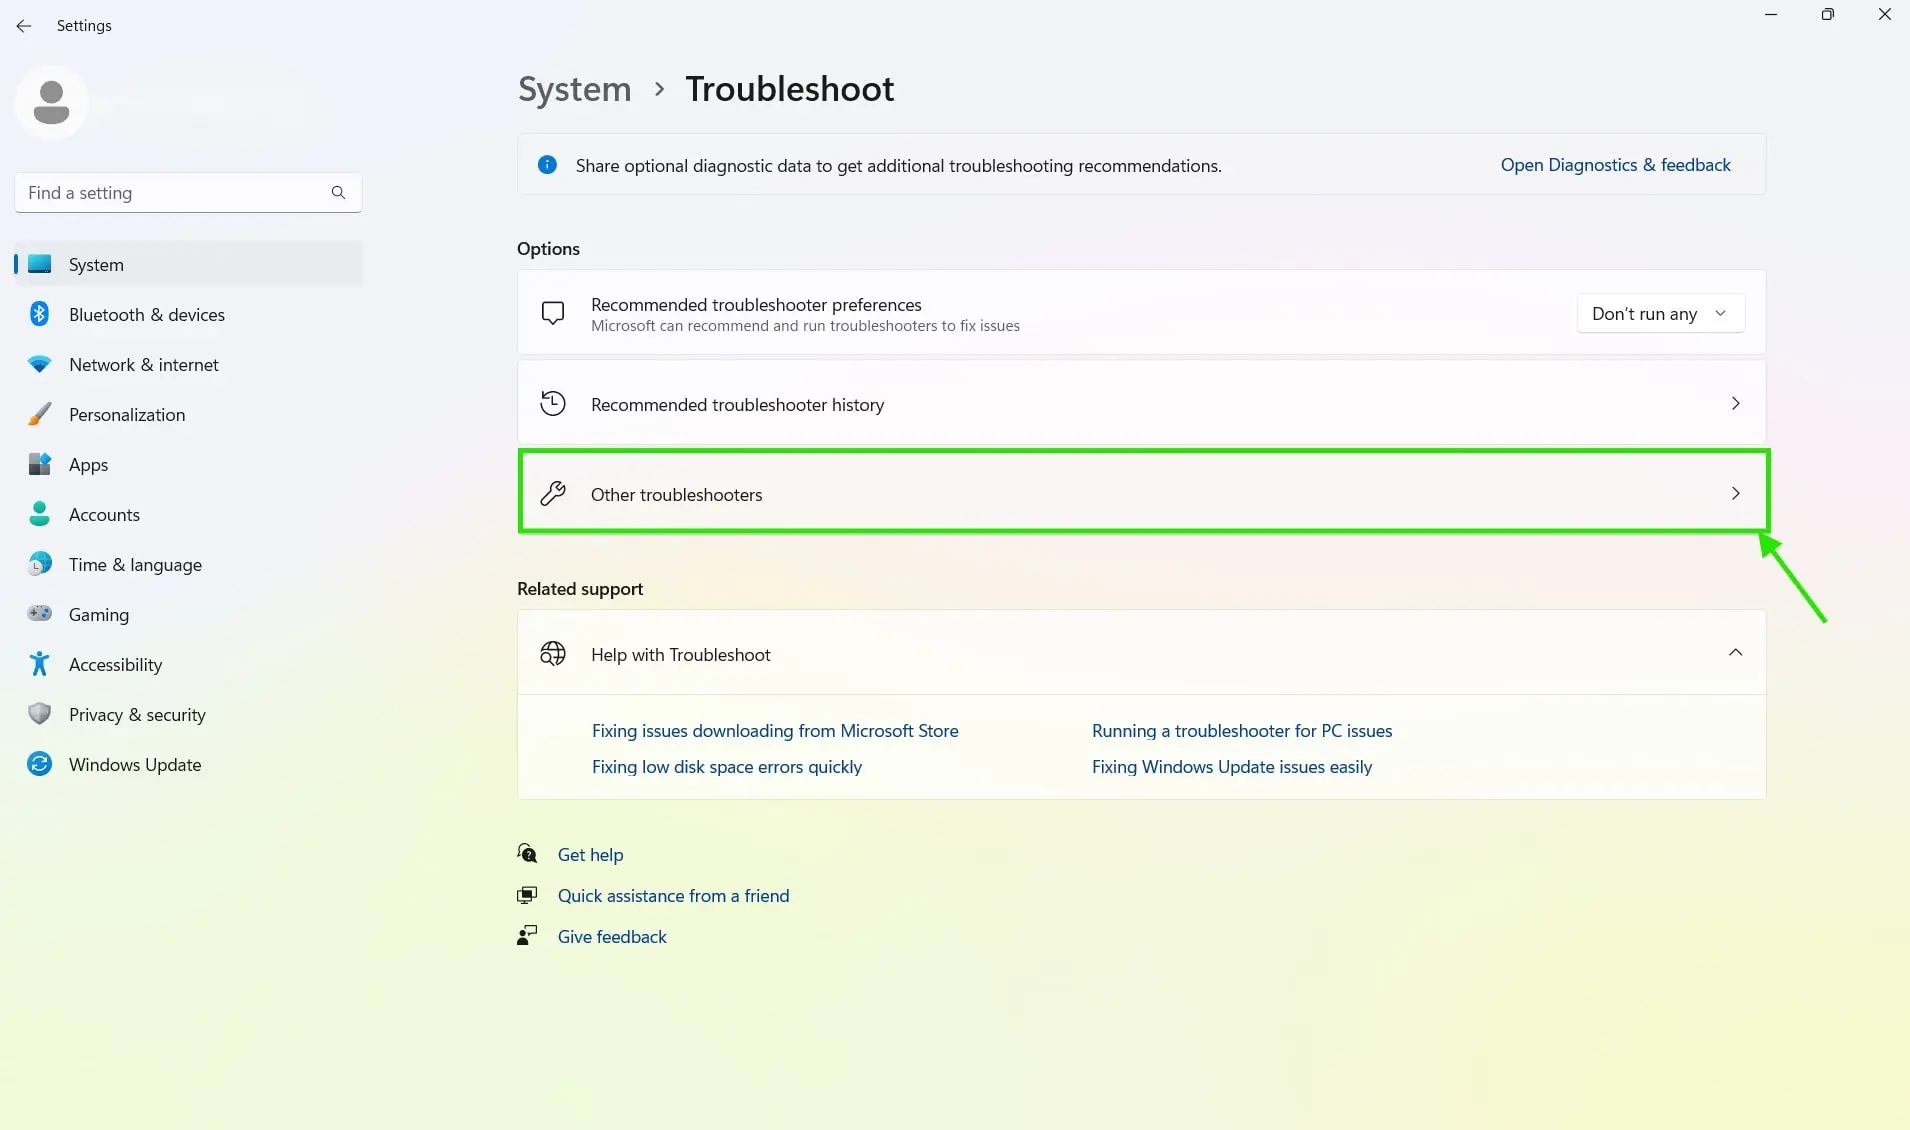
Step 2. Scroll down and click “Troubleshoot,” then select “Other troubleshooters.”
-
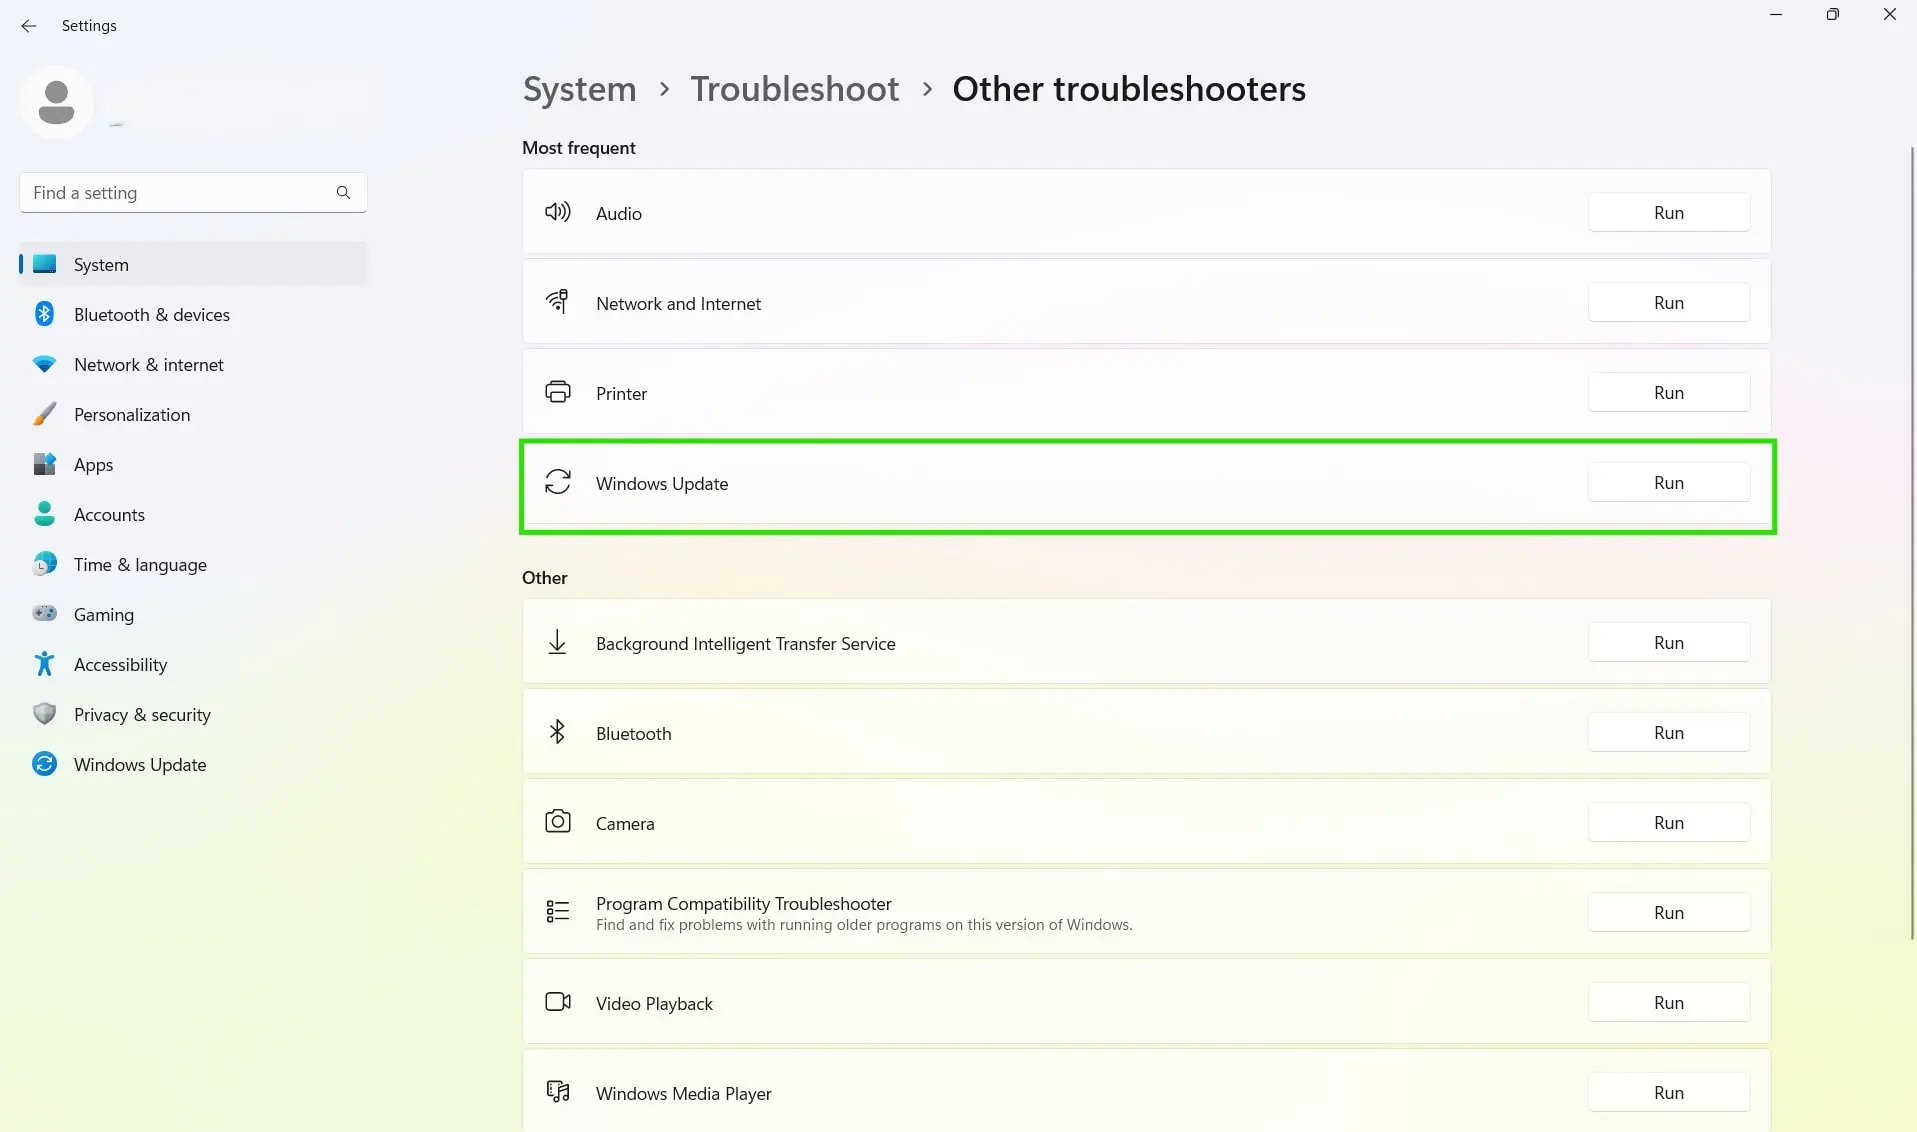
Step 3. Click the “Run” button next to “Windows Update.”
-
Step 4. Wait for the process to complete, then check the results to see if any issues were detected and resolved.
-
Step 5. Restart your computer and try updating your system again.
Windows 10:
-
Step 1. Open Settings from the Start menu, or press the Windows key + I.
-
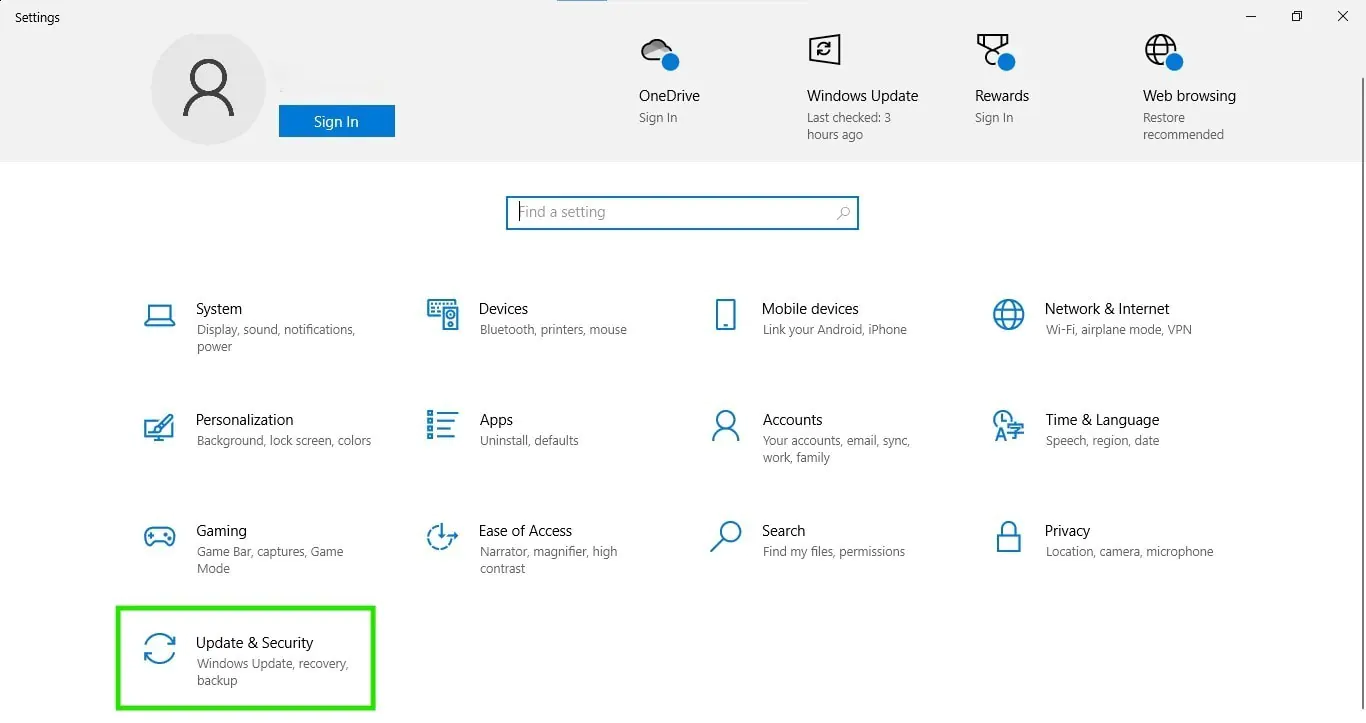
Step 2. Select “Update & Security.”
-
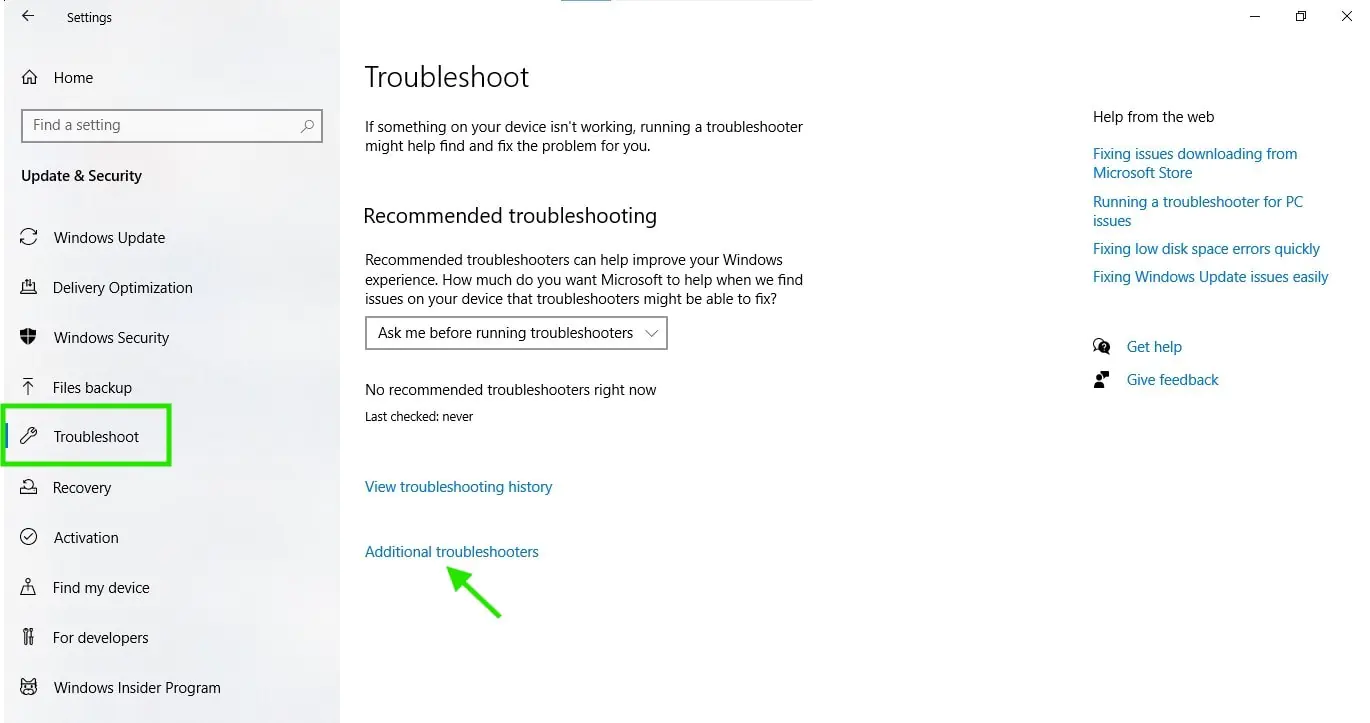
Step 3. On the left-hand menu, search for “Troubleshoot” and click it.
-
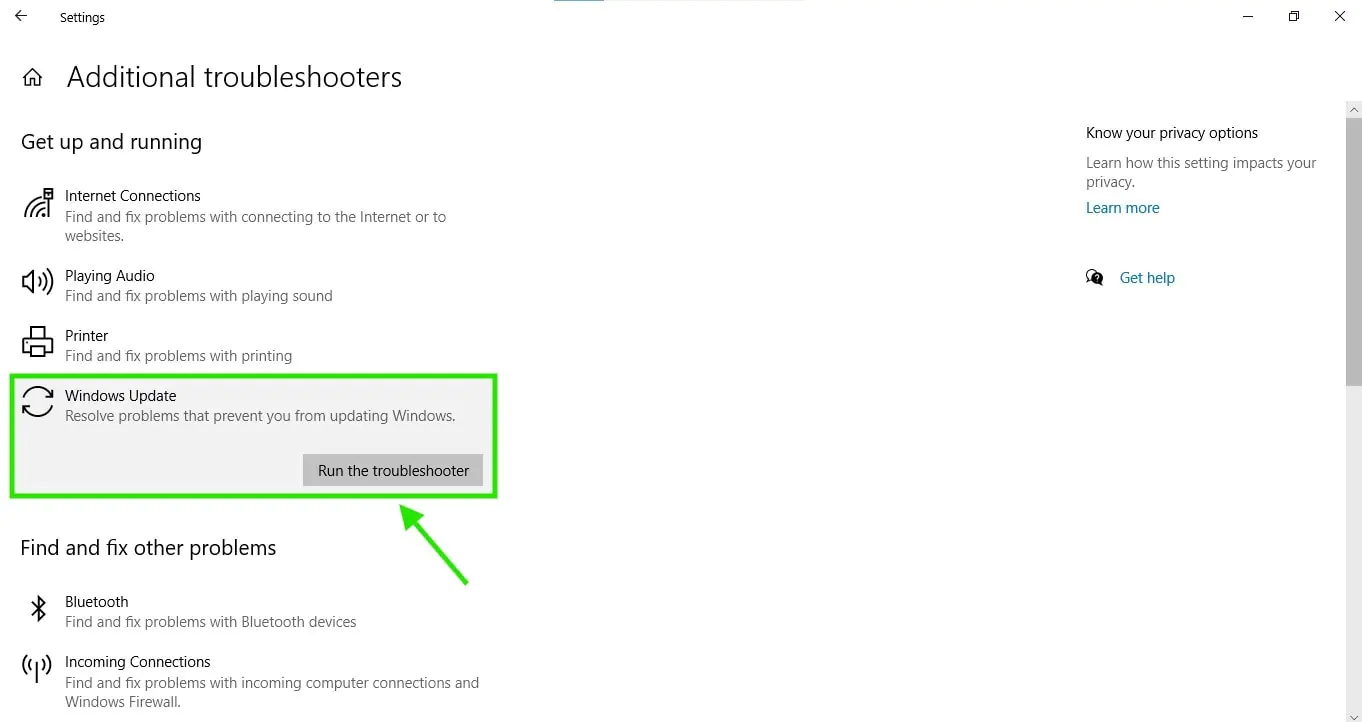
Step 4. Select “Additional troubleshooters.” Now you will see a list with options; choose “Windows Update” and then click “Run the troubleshooter.”
-
Step 5. Wait until the process is completed, and check the results to see if any particular issues have been detected and resolved.
-
Step 6. Reboot your computer and try again to update your system.
Verify Date and Time Settings
Incorrect date and time settings are another reason for Windows 10/11 update issues. That’s because Windows Update connects to Microsoft’s servers to download updates and if your system clock is significantly off, those servers will reject the connection, so the update fails or gets stuck. You can fix that by doing the following
-
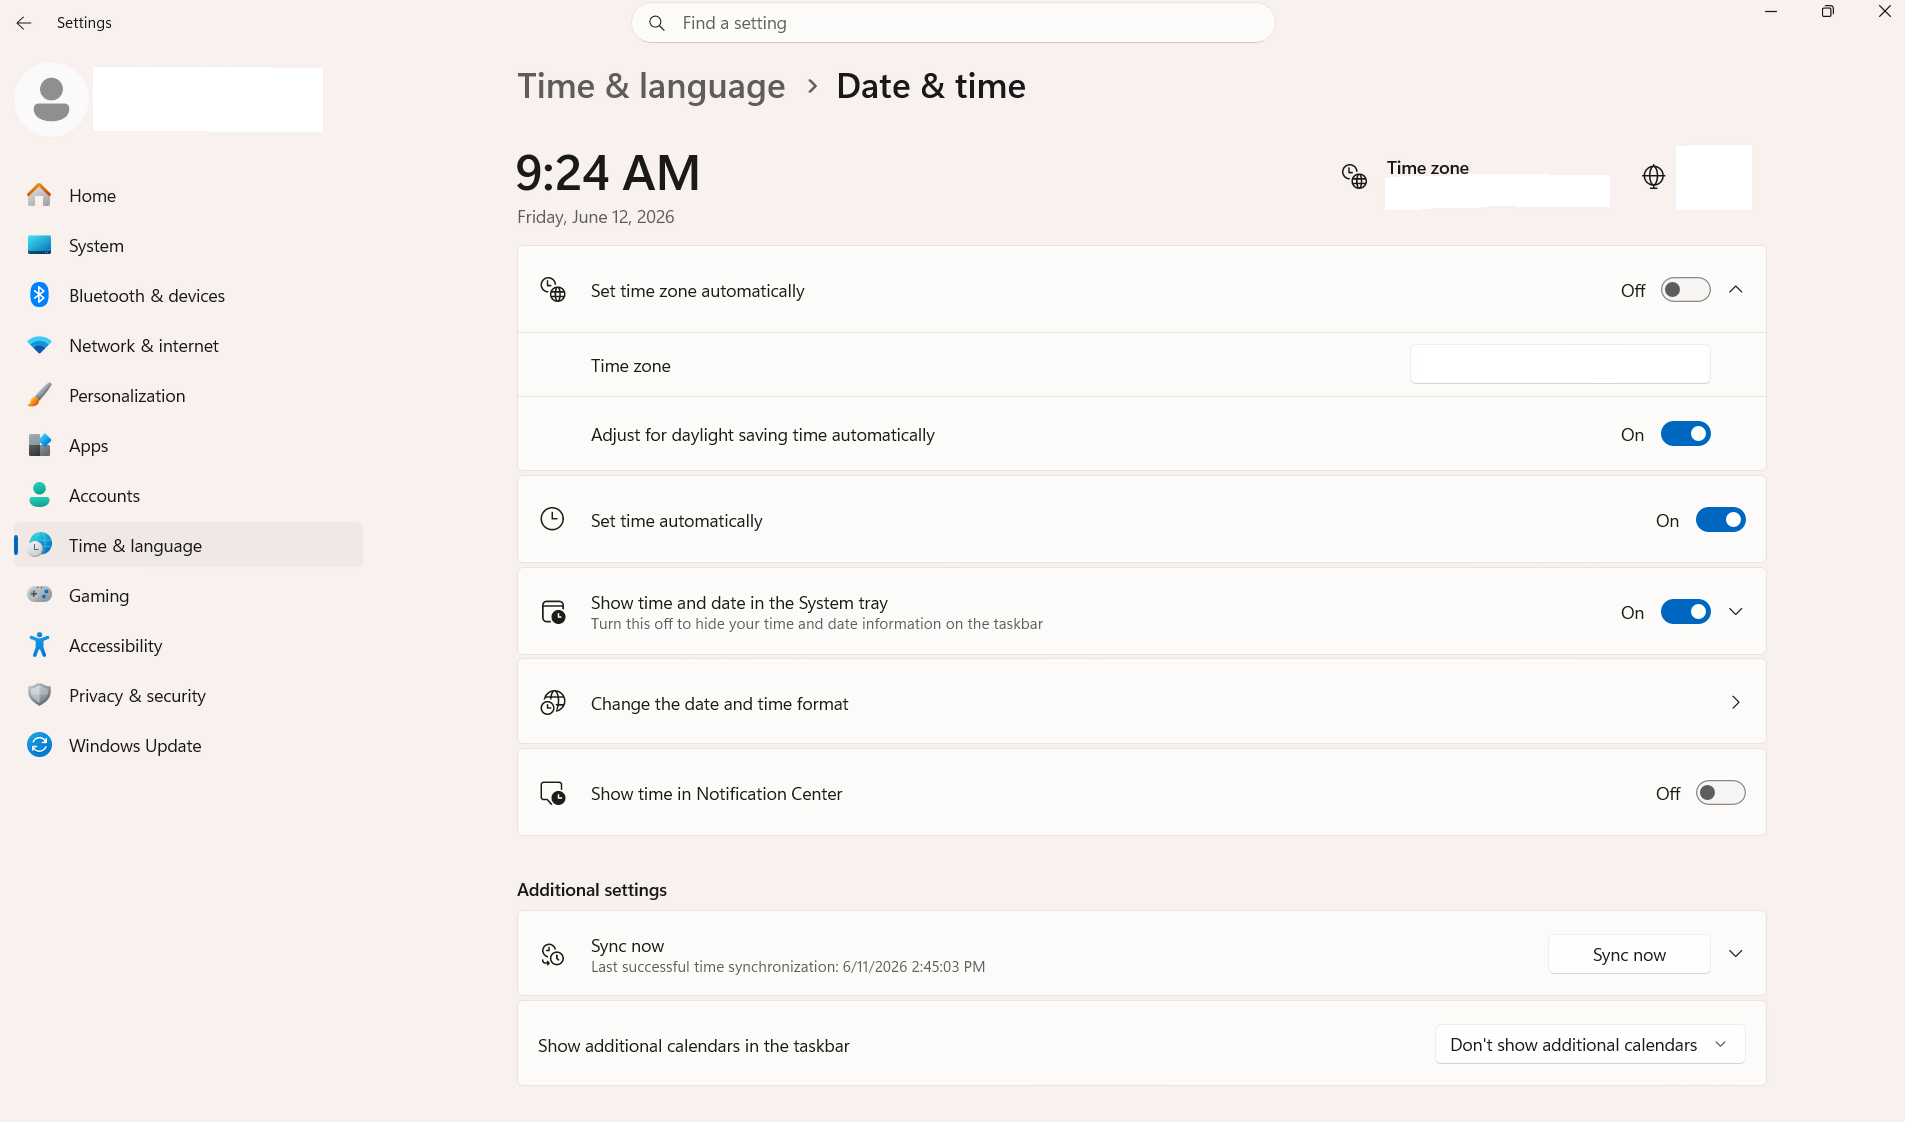
Step 1. Right-click the date and time display in the bottom right corner of your taskbar and select “Adjust date and time.” (Windows 10 users will see “Adjust date/time” instead.)
-
Step 2. Make sure the “Set time automatically” and “Set time zone automatically” toggles are both turned on.
-
Step 3. If they are already “on” but the time is still wrong, toggle them “off” and back “on” to force a refresh.
-
Step 4. Click “Sync now” to immediately synchronize your clock with Microsoft’s time servers. (On Windows 11 you will find this option under the “Additional settings”)
-
Step 5. Restart your computer and try running the update again.
Free Up Disk Space
To free up space, go through your installed programs and uninstall the ones you’re not using anymore. Next, check your Downloads folder and delete all the useless files. You’ll be amazed how many things accumulate there. Your goal is to maintain at least 10 to 20 GB of free space on your C: drive before updating your computer, because Windows updates download and unpack directly to this drive and need that space to complete the process.
An alternative method is to open the Start menu, type “Disk Cleanup,” and run it on your C: drive. It will scan for temporary files, old Windows installation leftovers, and other junk that is safe to remove. That’s another easy way to free up several gigabytes with just a few clicks.
Update Third-Party Drivers
Drivers for your graphics card, network adapter, sound card, and other hardware and firmware components need to be updated to their latest version before Windows can update successfully. Here’s an easy way to check and update them:
-
Step 1. Right-click the Start menu and select “Device Manager.”
-
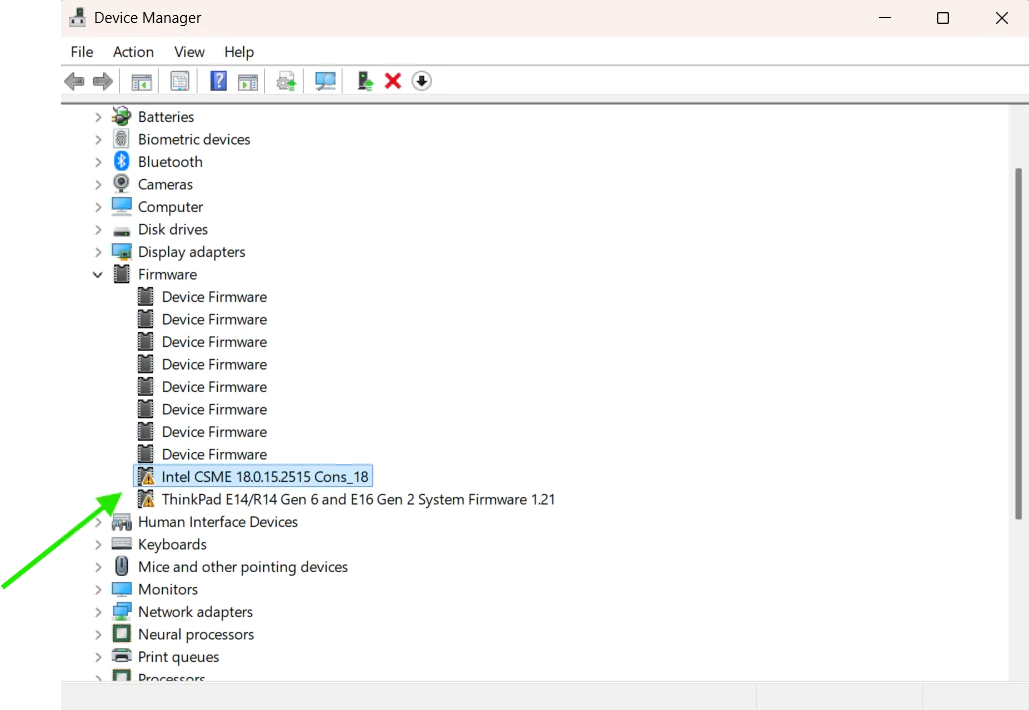
Step 2. Go through each category and look for any devices marked with a yellow exclamation mark. That symbol means the driver has a problem or is outdated.
-
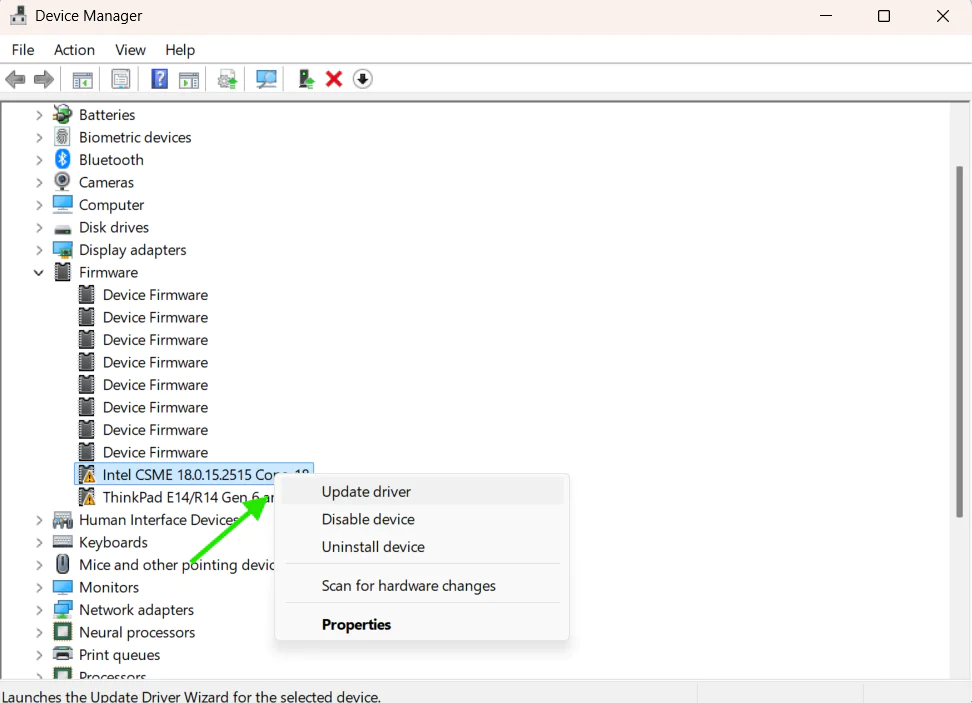
Step 3. Right-click any flagged device and select “Update driver.”
-
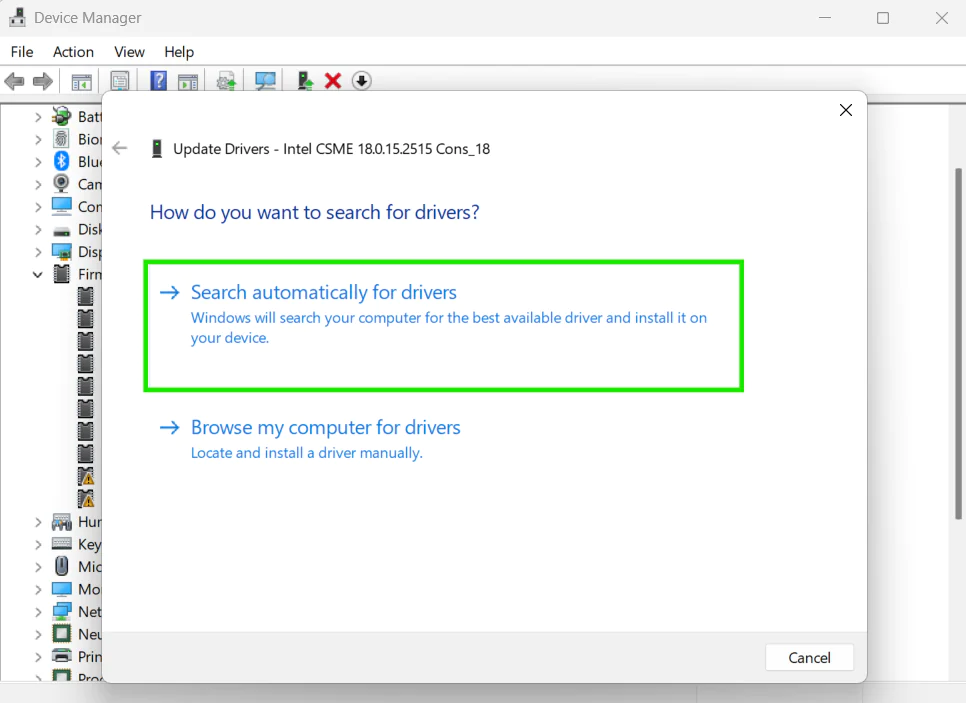
Step 4. Choose “Search automatically for drivers” and let Windows find and install the latest version available.
-
Step 5. If Windows doesn’t find an update, visit the manufacturer’s website directly, for example NVIDIA for graphics cards, Intel for processors, or Realtek for audio drivers, download the latest driver for your specific hardware model, and install it manually.
-
Step 6. Once all drivers are updated, restart your computer and try running the Windows update again.
Restart the Windows Update Service
The Windows Update service sometimes gets stuck, stops responding, or runs into an error that prevents it from updating your computer successfully. To fix that, try restarting it, because in most cases that solves the problem immediately. Here’s how to do it:
-
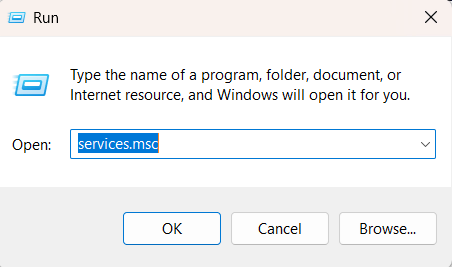
Step 1. Press the “Windows key + R” to open the Run dialog box, type “services.msc” and hit Enter.
-
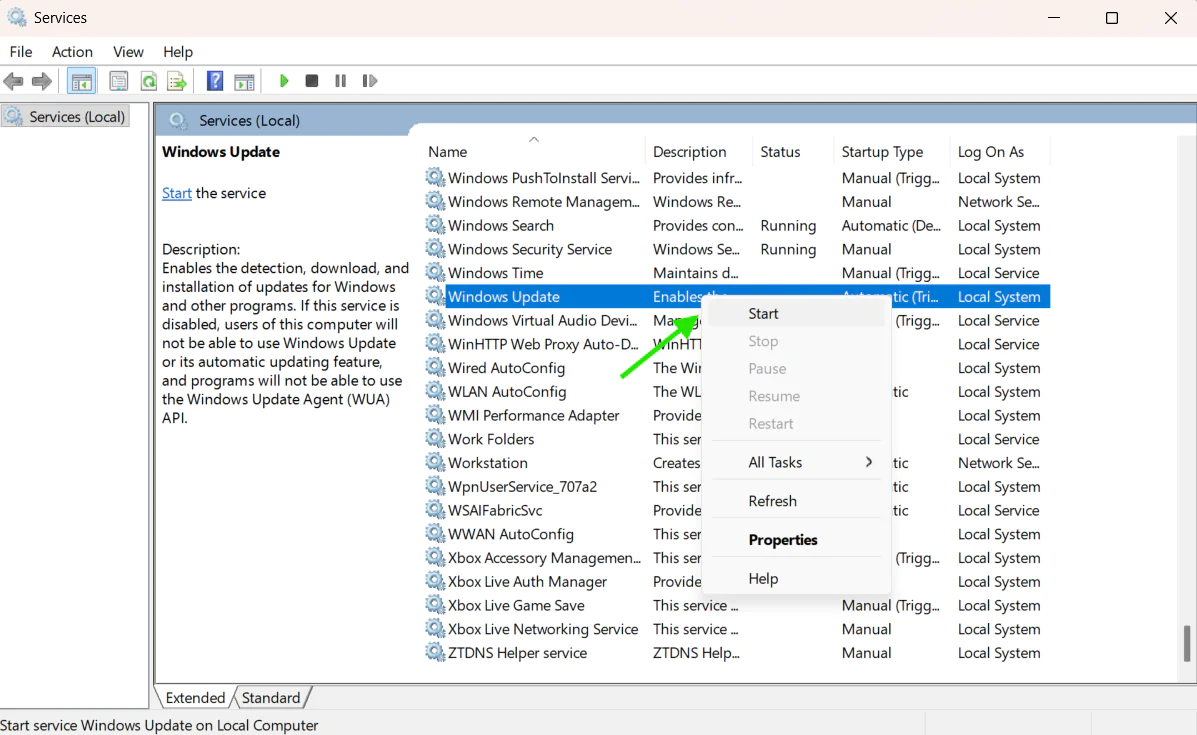
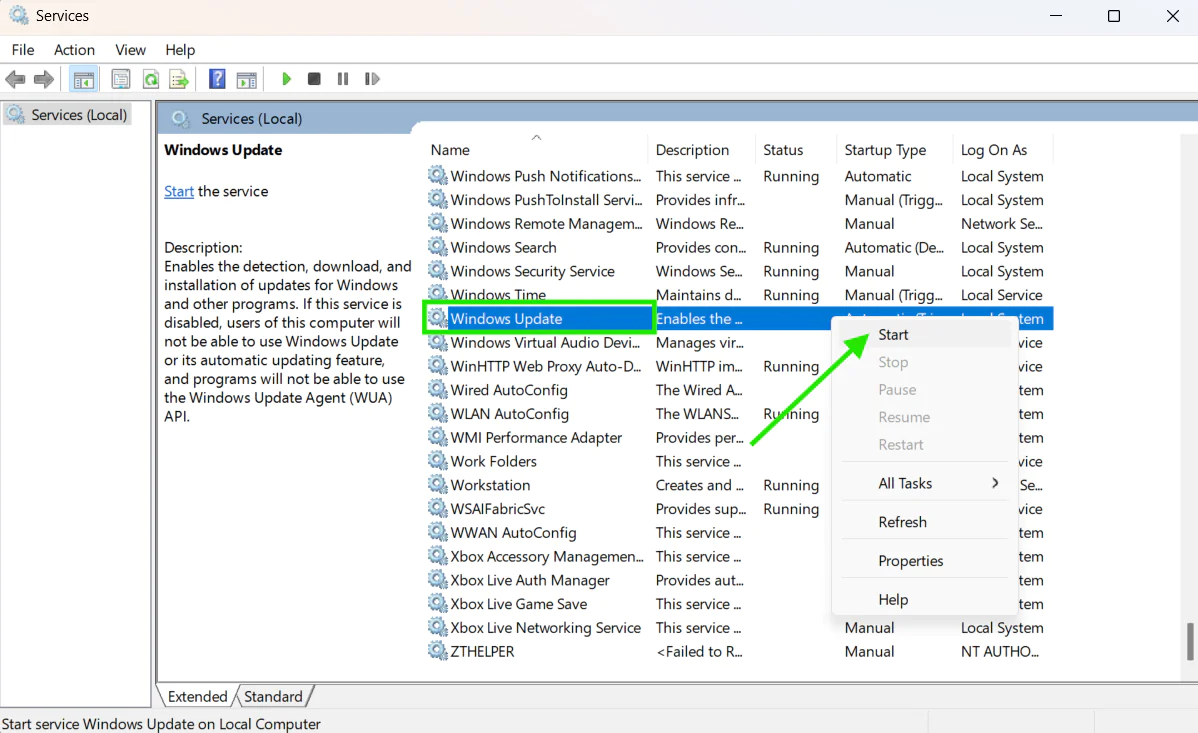
Step 2. Scroll down the list until you find “Windows Update,” then right-click it and select “Stop.”

-
Step 3. Wait for 10 to 15 seconds for the service to stop completely.
-
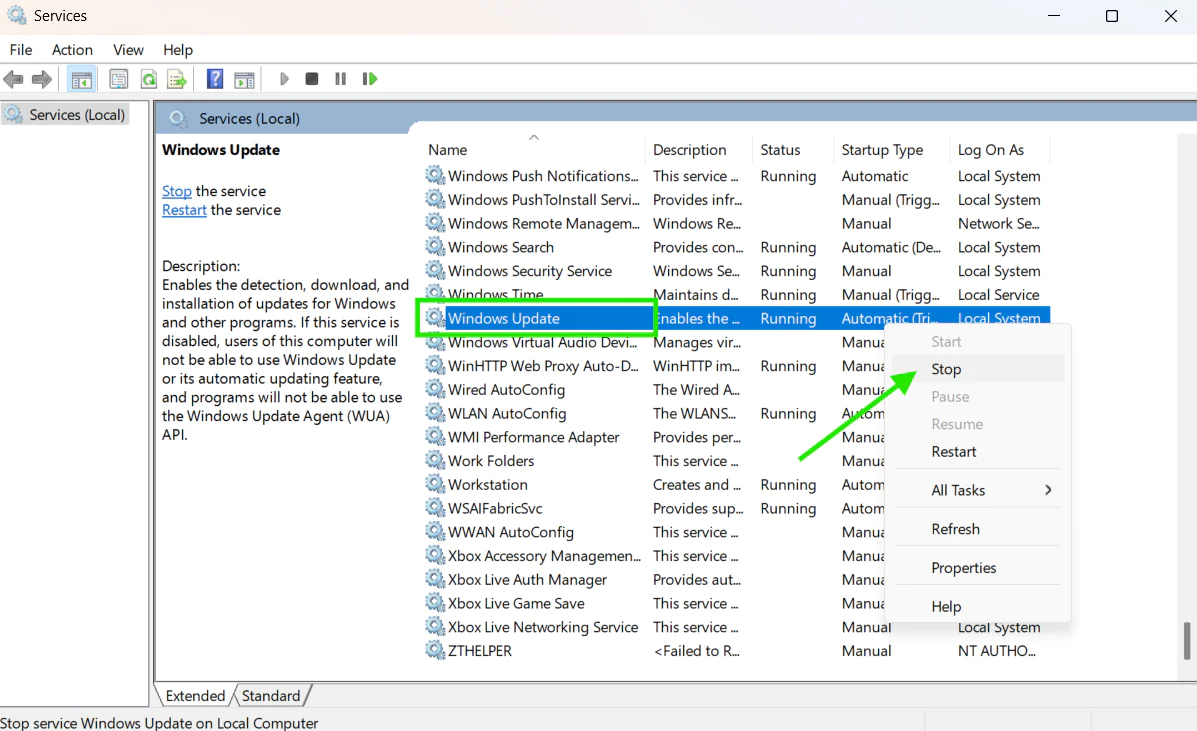
Step 4. Right-click “Windows Update” again and select “Start” to restart it.
-
Step 5. Restart your computer and try running the Windows update again.
What are the Common Causes of Windows Update Stuck at 0%?
Several things can make your Windows update stuck on 0% and they are:
Corrupted Update Files
Sometimes, downloaded update files get damaged during transfer, causing your computer to attempt installing broken pieces. This, of course, can make the update freeze and prevent a successful installation, exposing your computer to severe risks due to missing Windows 10/11 security updates.
In most cases, corruption happens when your internet connection drops midway through the download or when storage issues occur. Additionally, the Background Intelligent Transfer Service might fail to complete the download properly, leaving you with incomplete files.
Network Issues
Another common reason Windows Update gets stuck at 0% is a slow or unstable internet connection. When the connection drops or becomes unreliable, Windows may repeatedly restart the download process or freeze it entirely. These connectivity issues are more common on Wi-Fi connections than on a wired Ethernet connection.
Antivirus or Firewall Interference
Antivirus programs and firewalls sometimes block legitimate system changes by mistakenly identifying update installations as suspicious activity. In such situations, your firewall prevents your computer from connecting to Microsoft’s servers properly, causing the entire process to get stuck at 0% or entirely freeze or fail. Antivirus software is less likely to flag a Windows 11 update as potentially harmful, but this still happens from time to time, so keep that in mind.
Insufficient Disk Space
Insufficient disk space will always stop the update process immediately, since update files need free space to unpack and install correctly. If you find yourself in such a situation, you will get an error code, but in others, the update just freezes. Before updating your desktop or laptop, ensure the device has enough free space for successful update installation to avoid these unpleasant situations.
Software Conflicts
Software conflicts are another reason for a Windows update to get stuck on 0%, freeze, or fail entirely. This happens when a particular program conflicts with the Windows Update service and prevents your system from completing the process successfully. The best thing you can do is to restart these services, since this can help resolve the problem.
Outdated or Incompatible Drivers
When the drivers of your hardware are outdated or incompatible with the version of Windows you are trying to install, they’ll cause the update process to freeze at 0% or fail entirely. This happens because Windows can no longer communicate with your hardware properly. So if a driver is throwing errors or behaving unexpectedly, it can block the update installation completely. If outdated drivers are causing your update to get stuck, the Update Third-Party Drivers section above walks you through fixing it.
Windows Update Service Problems
The Windows Update service is the software that automatically downloads and installs updates on your computer. If it crashes, freezes, or gets corrupted, the update process will get stuck at 0% and won’t progress at all. This can be caused by a sudden system shutdown, a software conflict, or simply because the service has been running for too long without a proper reset.
Common Windows Update Error Codes Related to Stuck Updates
If your Windows update gets stuck or fails, your computer will usually show you a specific error code that tells you exactly what went wrong. These codes are directly pointing your attention to the problem causing the issue, which makes finding the right fix a whole lot easier. Here are the most common ones you might face:
0x800705b4
This error code (0x800705b4) tells you that the Windows Update operation timed out before it could complete. The problem is related to a slow or unstable internet connection, causing the download to stall, pause, restart, and ultimately fail entirely. To fix that, check your internet connection by running an Ookla speed test. If it’s slow or shows high ping, restart your router, toggle the Wi-Fi settings on your laptop, or disconnect and reconnect your ethernet cable. If none of that fixes the problem and the slow speed or high ping remains, you’ll have to call your internet provider for help.
0x80240034
This error code (0x80240034) says that Windows Update failed to download the update files. Again, the reason might be your internet connection, but that’s not the only possible cause. In some cases it also appears when the Windows Update cache contains corrupted files from a previous failed attempt, blocking the new download process. To fix it, simply clear the cache by following the instructions in the “Clear the Windows Update Cache” section above.
0x800f0922
Error code (0x800f0922) tells you that Windows couldn’t deploy the update successfully. That’s commonly caused by insufficient free space on your C: drive. The next possible cause is your VPN, if you’re using one, or your network configuration blocking the connection to Microsoft’s update servers. To fix it, free up disk space on your C: drive using the steps in the Free Up Disk Space section above, or disconnect your VPN before retrying the update installation.
0x8007000d
Error code (0x8007000d) means there’s a missing or corrupted update file that Windows needs to complete the installation. Almost every time, the reason is that the downloaded update package got damaged during transfer, or the Windows Update cache contains incomplete files from a previous attempt. Clearing the cache will solve that problem right away. The steps to fix this are already mentioned in the article above.
0x80070057
This error code (0x80070057) says that Windows encountered an invalid parameter during the update process, caused by corrupted system files or a damaged Windows Update component. In rare cases, it might also be caused by issues with your disk or file system. The proper fix is to reset the Windows Update components. Again, we’ve mentioned how to do that earlier in the article.
0x80070422
The following error (0x80070422) appears when the Windows Update service is either disabled or fails to start, so Windows can’t begin the update process at all. That’s an easy fix. You’ll need to start the Windows Update service, or stop it and start it again. We’ve covered that fix too in the previous section above.
0x80070020
This error code (0x80070020) shows that another process on your computer is currently using the files that Windows Update needs to complete the installation. Antivirus software and third-party security tools are the most common suspects. To fix that, temporarily disable your antivirus using the steps in the “Disable Antivirus or Firewall Temporarily” section below, then try running the update again.
What are Some Advanced Fixes for Windows Update Being Stuck at 0%?
When Windows Update gets stuck at 0% for an extended period, you can resolve the issue using several methods. These include clearing the Windows Update cache, resetting the update components through Command Prompt, temporarily disabling your antivirus or firewall, or manually downloading and installing the problematic update.
Here’s how to do it on both Windows 11 and Windows 10:
Clear the Windows Update Cache
-
Step 1. Press the Windows key + R, then type ‘services.msc’ and hit Enter.
-
Step 2. Find the “Windows Update” service, right-click it, and select “Stop.”
-
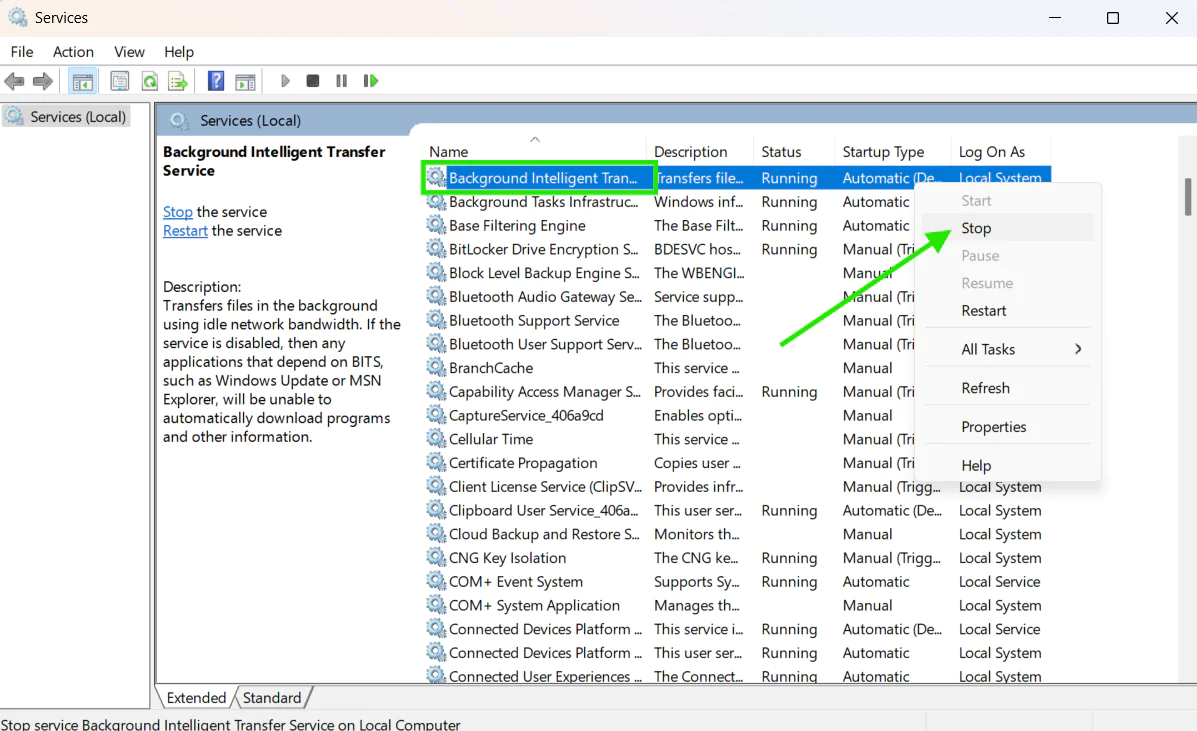
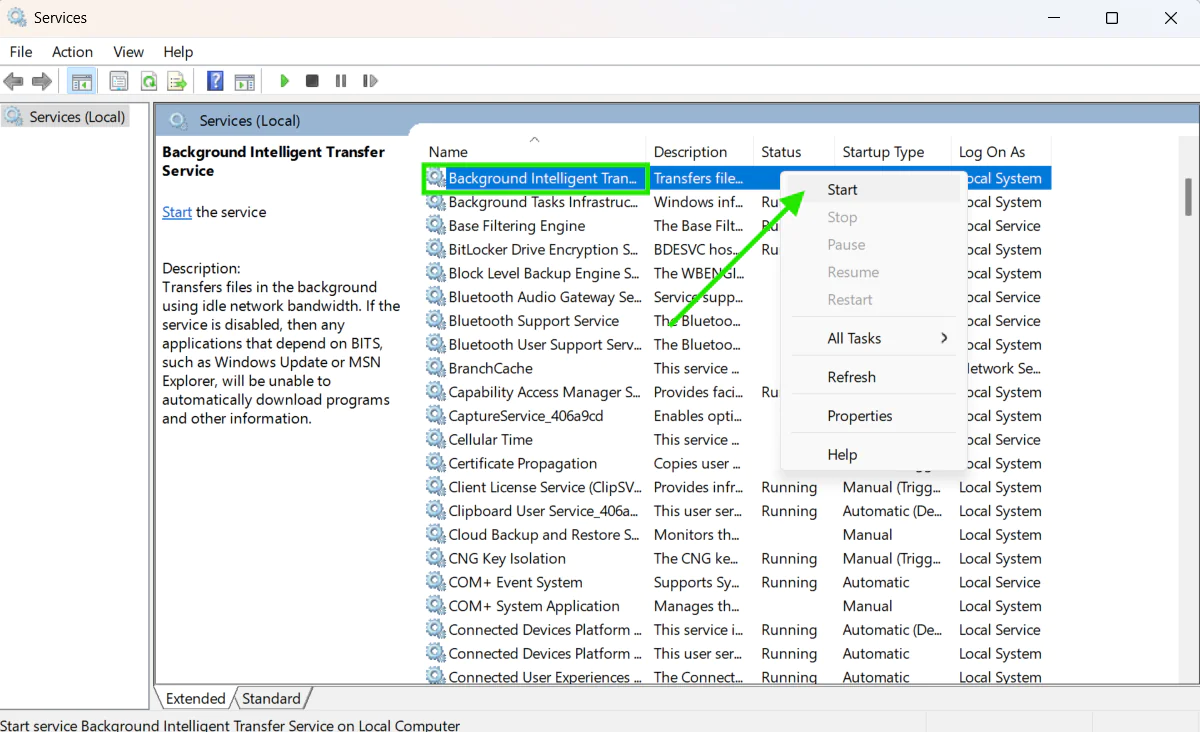
Step 3. Next, it is also mandatory to stop “Background Intelligent Transfer Service (BITS)” the same way.
-
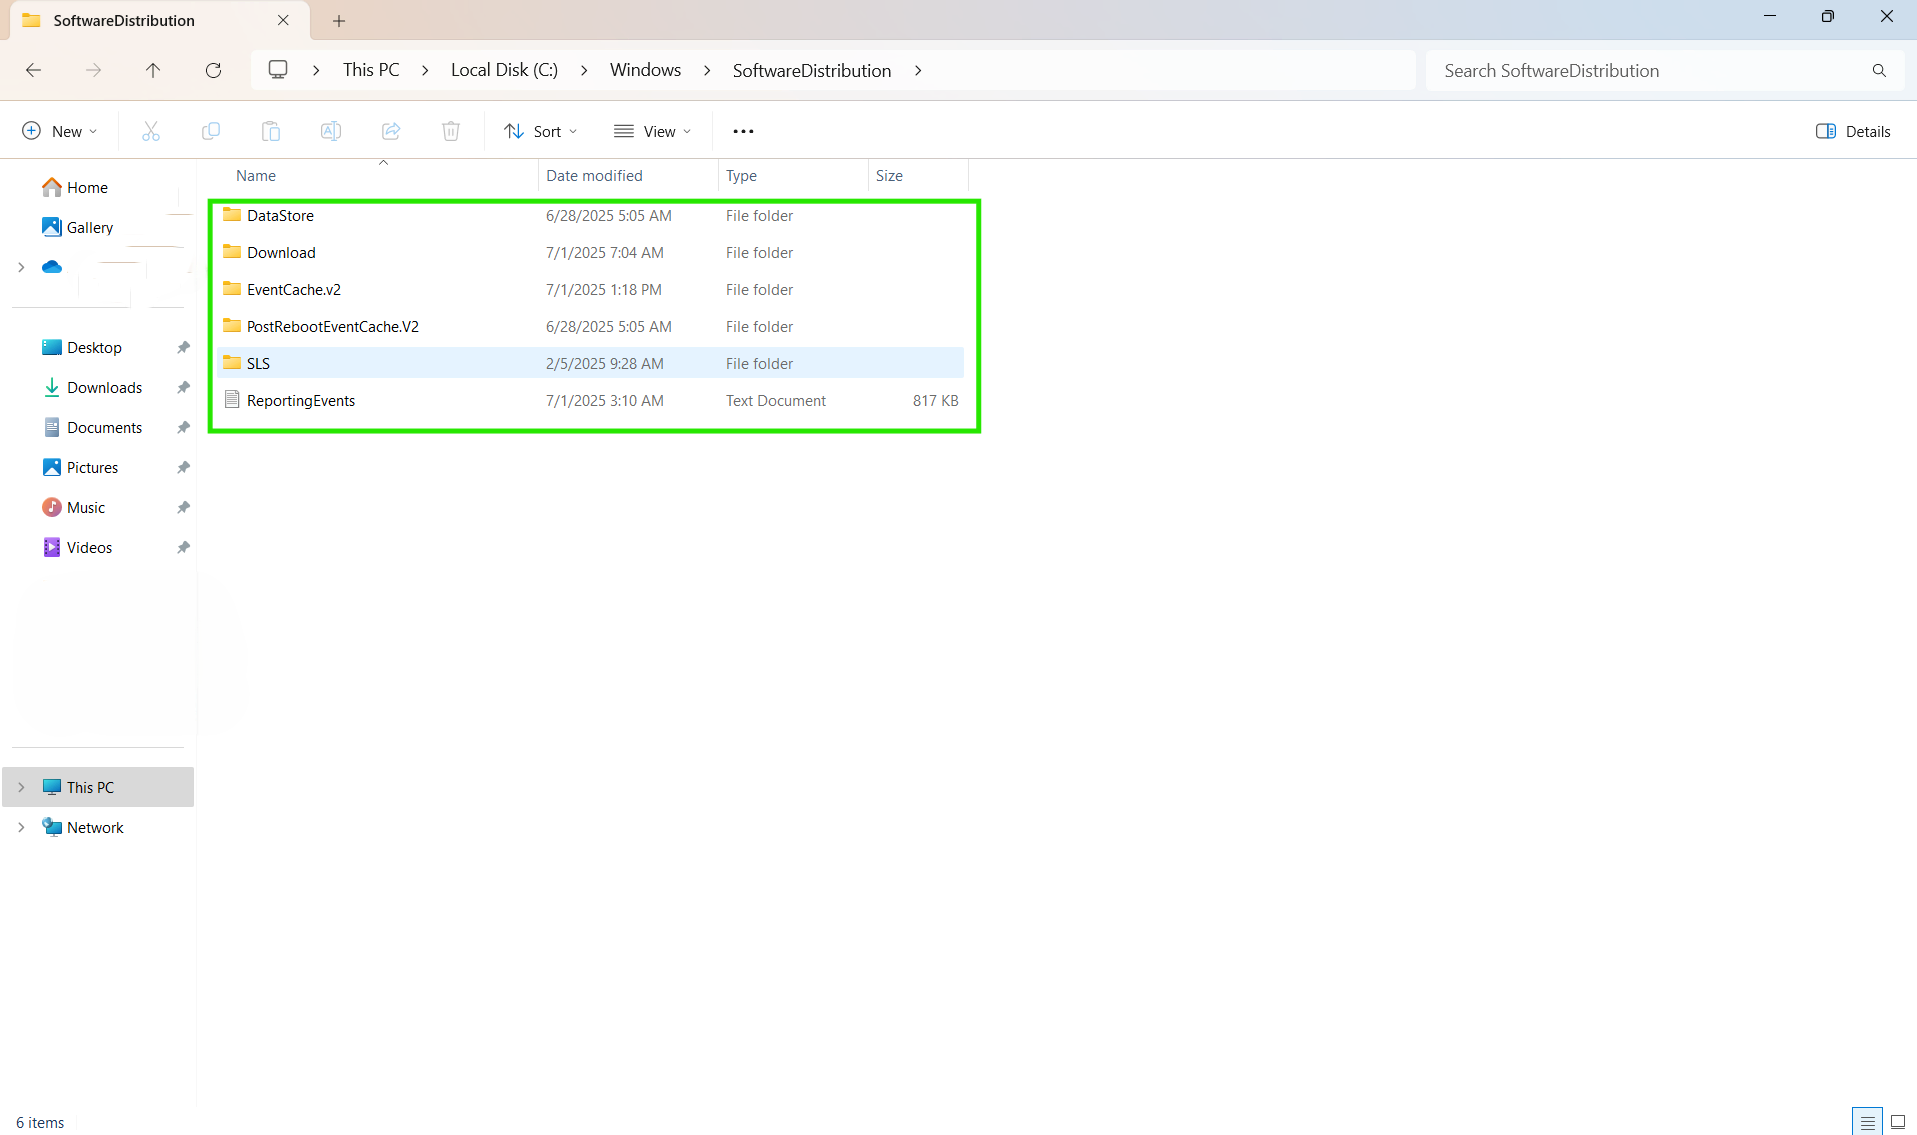
Step 4. Continue with the next step, which is to navigate to C:\Windows\SoftwareDistribution and delete all files inside the folder (but do not delete the folder itself; it is a mistake).
-
Step 5. Now, you must go back to the services window and restart “Background Intelligent Transfer Service” first, then “Windows Update.”
-
Step 6. Last, but not least, restart your computer and try again to install the update.
NOTE: This procedure forces your system to redownload all update files, which should allow you to complete the update successfully. Keep in mind that this works if the problem is caused by corrupted update files.
Important disclaimer on the Use of SFC and CHKDSK (next section!)
The use of System File Checker (SFC) and Check Disk (CHKDSK) utilities should be approached with caution, particularly on systems already exhibiting signs of instability, corruption, or hardware degradation. While these tools are designed to identify and repair issues with system files or disk integrity, their operation can introduce risk in certain scenarios.
Running SFC or CHKDSK on a compromised or unstable system may:
-
Trigger unrecoverable changes to critical system files.
-
Cause system files or disk structures to become further corrupted.
-
Lead to boot failures or data loss, especially if underlying storage hardware is failing.
-
Lock or interrupt access to important files or services during operation.
These utilities do not distinguish between recoverable system irregularities and critical conditions where intervention may worsen the situation. Therefore, running them on a degraded system can result in unintended consequences, including complete system failure or data loss.
It is strongly recommended to perform a full system backup before using either tool, and to consult a qualified technician or administrator when dealing with signs of instability such as frequent crashes, file system errors, or boot issues.
Use of these tools is at your own risk.
Rename the SoftwareDistribution and Catroot2 Folders
-
Step 1. Press the “Windows key + R” to open the Run dialog box, type “services.msc,” and hit Enter.
-
Step 2. Find “Windows Update” in the list, right-click it, and select “Stop.” Do the same for “Background Intelligent Transfer Service (BITS).”
-
Step 3. Open “This PC,” then go to Local Disk C and open the folder named Windows. Find the “SoftwareDistribution” folder, right-click it, and rename it to “SoftwareDistribution.old.”
-
Step 4. Now go back to the Windows folder, find the folder named System32, and look for the “Catroot2” folder. Right-click it and rename it to “Catroot2.old.”
-
Step 5. Go back to Services, right-click “Background Intelligent Transfer Service” and select “Start,” then do the same for “Windows Update.”
-
Step 6. Restart your computer and try running the Windows update again. Windows will automatically create new “SoftwareDistribution” and “Catroot2” folders and redownload the update files fresh.
Use Command Prompt to Reset Windows Update Components
-
Step 1. Press the “Windows key + X” and select “Command Prompt” (run it with administrative privileges).
-
Step 2. To stop all related services, execute sequentially the following commands, pressing Enter after each:
net stop wuauservnet stop
cryptSvcnet stop bitsnet stop msiserver
-
Step 3. Next, you must clear the already stored update cache by typing:ren C:\Windows\SoftwareDistribution SoftwareDistribution.oldren C:\Windows\System32\catroot2 catroot2.old
-
Step 4. Now, restart services in reverse order by executing sequentially the following commands and pressing Enter after each:
net start msiservernet start
bitsnet start cryptSvc
net start wuauserv
-
Step 5. Run the system file checker and DISM:sfc /scannowDISM /Online /Cleanup-Image /RestoreHealth
-
Step 6. Finally, reboot your computer and try to run the update again.
Note: The DISM command in Step 5 repairs the Windows image itself, which is the foundation Windows Update relies on to install updates correctly. If this command finds and fixes corruption in the Windows image, it often resolves stuck updates that nothing else could fix.
Disable Antivirus or Firewall Temporarily
-
Step 1. Right-click your antivirus icon in the system tray and select “Disable” or “Pause protection.”
-
Step 2. To turn off the Windows Firewall, you must go to Settings > Update & Security > Windows Security > Firewall & network protection.
-
Step 3. Turn off your active network profile temporarily. Disabling the firewall for a couple of hours will not harm your system.
-
Step 4. Restart your computer and try installing the update while firewall protection is disabled.
-
Step 5. Do not forget to re-enable your antivirus and firewall immediately after the update completes to keep your PC protected.
Manually Download and Install Updates
-
Step 1. Find the specific KB number of the stuck update from the Windows Update history.
-
Step 2. Visit the Microsoft Update Catalog website, which contains all Microsoft product updates, and search for your specific KB update number.
-
Step 3. Download the correct version matching your computer system (x64 for 64-bit, x86 for 32-bit).
-
Step 4. Run the downloaded file and manually install the update.
-
Step 5. Restart your computer when prompted to complete installation.
Additional Solutions for Persistent Issues
If the previous methods we discussed didn’t fix your stuck update, you need to try these additional solutions that are able to resolve deeper system problems related to stuck or failing Windows 11/10 updates.
Check for Disk Errors Using CHKDSK
Another common reason for a stuck or failed update is hard drive errors. If you are in such a situation, run a disk check to find and fix these problems through the following steps:
-
Step 1. Press the Start menu icon, then type “Command Prompt,” right-click on it, and select “Run as administrator.”
-
Step 2. Next, type chkdsk C: /f and press Enter.
You will then see a message:
“Would you like to schedule this volume to be checked the next time the system restarts?”
-
Step 3. When prompted with the message above, type “Y” and press Enter to schedule the scan for the next restart.
-
Step 4. Restart your computer to begin the scan. It will run before Windows loads.
-
Step 5. Let the scan complete, and do not interrupt it under any circumstances. (This can take 1–3 hours depending on your drive size.)
-
Step 6. After Windows starts, try installing the update again.
Create a New User Account
User profile issues rarely cause Windows Update to stick at 0%, since the update service runs system-wide. Try this only as a last resort for user-specific update features.
-
Step 1. Go to Settings > Accounts > Family & other users.
-
Step 2. Click “Add someone else to this PC.”
-
Step 3. Select “I don’t have this person’s sign-in information.”
-
Step 4. Choose “Add a user without a Microsoft account.”
-
Step 5. Create a username and password for the new account.
-
Step 6. Sign out and log into the new account, then try updating Windows.
Note: This method has limited success for Windows Update issues but may help with Microsoft Store updates.
Perform a Clean Boot
A clean boot starts your Windows with a minimal set of drivers and startup programs, literally enough to run but nothing additional. Unlike Safe Mode, it keeps Windows fully usable so you can test Windows Update under normal conditions. That lets you find the exact background application or service that is causing the Windows update to get stuck. Despite it sounding a bit complicated, it’s not. Here’s how to do it:
-
Step 1. Disable Startup Programs
-
Press Ctrl + Shift + Esc to open Task Manager.
-
Click the “Startup Apps” tab on Windows 11 or “Startup” on Windows 10.
-
Right-click each enabled program and select “Disable” until all of them are turned off.
-
Step 2. Disable Third-Party Services
-
Press the “Windows key + R” to open the Run dialog box, type “msconfig,” and press Enter.
-
Go to the “Services” tab at the top.
-
Check the “Hide all Microsoft services” box at the bottom left. This is very, very important because it prevents you from accidentally disabling essential Windows features.
-
Click “Disable all,” then click “Apply.”
Note: Don’t worry about disabling everything here. These are third-party programs, not system files, and none of them are required for Windows to start or restart successfully.
-
Step 3. Restart Your PC
-
Click “OK” in the System Configuration window.
-
Click “Restart” when prompted.
Once your computer restarts it will be running in clean boot state. Now, you can try deploying the update.
-
Step 4. Restore Normal Startup After Troubleshooting
Once you are done testing, do not leave your computer in clean boot mode permanently. Here’s how to return to normal:
-
Press the “Windows key + R,” type “msconfig,” and hit Enter.
-
Go to the “General” tab and select “Normal startup.”
-
Go to the “Services” tab, uncheck “Hide all Microsoft services,” and click “Enable all.”
-
Go to the “Startup” tab, click “Open Task Manager,” and re-enable all the startup programs you disabled in Step 1.
-
Click “OK” and restart your computer.
Your computer will now start normally with all services and programs restored.
Update Windows Using Media Creation Tool
You can update your Windows using the media creation tool; however, it is used mainly for major feature updates, not monthly cumulative ones that typically get stuck at 0%. The process is quite simple and straightforward:
-
Step 1. Visit Microsoft’s official website and download the Windows 11 (or Windows 10) Media Creation Tool.
-
Step 2. Now you must run the tool and select “Upgrade this PC now.”
-
Step 3. Strictly follow the wizard to download the latest Windows version.
-
Step 4. Remember to select the option “Keep personal files and apps” when asked; otherwise, you might lose all your data.
-
Step 5. Let the upgrade process complete without pressing any key, which takes approximately 1-2 hours.
Keep in mind that this procedure performs an in-place upgrade and may not resolve issues with specific monthly updates. For severe corruption, you might need a bootable USB drive for complete reinstallation.
Fix Windows 11 Installation Assistant Stuck at 0%
The Windows 11 installation assistant is a tool you can download from Microsoft’s website to upgrade your operating system to Windows 11. If you’re doing exactly that right now, and it gets stuck on 0% for more than 10 minutes, here’s the full checklist to get it moving:
1. The Quick Checks
-
Disconnect all external devices except your mouse and keyboard.
-
Disable any active VPN, proxy, or third-party antivirus before running the assistant.
-
Run the Windows Update Troubleshooter.
-
Make sure you have at least 64 GB of free space on your Local Disc (C:)
-
Right-click the Installation Assistant and select “Run as administrator” before launching it.
2. Restart the Update Services
Here’s how to restart it:
-
Press “Windows key + R,” type “cmd,” and press Ctrl + Shift + Enter to open it as administrator.
-
Type “net stop wuauserv” and press Enter.
-
Type “net stop bits” and press Enter.
-
Type “net stop cryptsvc” and press Enter.
-
Restart your computer and try the assistant again.
Note: You don’t need to manually restart the services. Restarting your computer starts them automatically.
3. Clear the Update Cache
Corrupted download files are one of the most common reasons the assistant freezes at 0%. See the “Clear the Windows Update Cache” section above for the full steps.
Fix Windows 10 to Windows 11 Upgrade Stuck at 0%
Before applying any of the fixes covered earlier in this article, check these two things first. They are unique to this upgrade and are the most common reasons it stalls at 0%:
-
TPM 2.0 and Secure Boot must be enabled. Windows 11 requires both to be active in your BIOS. If either is disabled, the upgrade may stall at 0% or display compatibility warnings that prevent the installation from continuing. Download and run Microsoft’s PC Health Check app to verify your PC meets Windows 11 requirements. If it flags TPM 2.0 or Secure Boot as disabled, restart your computer, enter your BIOS by pressing F2, F10, or Delete depending on your manufacturer, enable both, save your settings, and try the upgrade again.
-
You need around 64 GB of free space on your C: drive. The Windows 11 upgrade downloads and unpacks a full new OS build, which requires significantly more space than a regular monthly update. Check your C: drive before starting and free up space if needed using the steps in the Free Up Disk Space section above.
If neither of those is the problem, go through the fixes covered earlier in this article. Start with the quick fixes before moving on to the advanced ones.
When to Consider a Clean Installation
If your update keeps getting stuck installing no matter what you try, consider a clean Windows 11/10 installation. That’s the right call when your computer problems run so deep that neither the quick nor advanced fixes will solve them. Here’s when you might need to start fresh with a clean Windows 11/10 installation.
-
Multiple Update Failures: If you’ve tried every method we provided in this guide and you’re still facing the same issue with Windows Update stuck at 0%, your system most likely has serious file corruption issues. A clean installation of your OS becomes necessary and is probably the only way to solve the problem.
-
Update Components Won’t Reset: You’ve tried resetting Windows Update components multiple times, but the services keep failing or won’t start properly, making OS updates unsuccessful. When DISM and SFC commands can’t repair these problems, the corruption goes too deep for regular fixes, so reinstalling Windows 11/10 becomes the only solution to your issues.
-
Endless Update Loops: If your Windows 11/10 keeps trying to install updates that fail, restart, and download again, hitting the same problem on every attempt, you’ll need to perform a clean installation, since this will completely fix it.
-
Critical System Files Corrupted: When SFC scans reveal corrupted system files related to Windows Update that can’t be repaired, and DISM reports that the Windows image is seriously damaged beyond automatic repair, these core problems confirm the need for a clean Windows 11/10 installation.
-
Update History Shows Constant Failures: When you check Windows Update history and notice that many updates fail to install with various error codes, and none of our discussed methods help resolve the issue, you must perform a clean installation.
Read also: How to Update and Repair Windows 10/11?
How to Prevent Windows Updates from Getting Stuck Again?
You can prevent Windows updates from getting stuck in the future by following a few simple best practices, like the ones listed below:
Keep Enough Free Disk Space
Make sure you have at least 20 GB of free space for regular updates and 64 GB when upgrading from Windows 10 to Windows 11. That alone will prevent Windows updates from getting stuck, and it will also make your laptop or desktop run better.
Maintain a Stable Internet Connection
Having a stable internet connection is mandatory for preventing Windows updates from getting stuck. Starting an update with a slow connection or high ping is the easiest way to get it stuck or to fail entirely. So before starting anything, run an internet speed test using Ookla, for instance, and check that your download and upload speeds and ping are within the expected ranges. If they are, go ahead and install the update. If not, fix your connection first to minimize the chance of the update getting stuck, or at least make sure that if it does happen, it won’t be because of your internet connection.
Keep Drivers Updated
Outdated drivers are one of the most common reasons Windows updates get stuck, so checking them regularly saves you the headache later. Open Device Manager once a month and look for any devices flagged with a yellow exclamation mark. Update those right away through Device Manager or directly from the manufacturer’s website if Windows doesn’t find a newer version. Graphics cards, network adapters, and chipset drivers cause the most update conflicts, so prioritize those. A few minutes of checking now means one less reason for your next update to freeze at 0%.
Install Updates Regularly
Install important updates regularly, because delaying them for a long period increases the chances of running into trouble, like the update getting stuck or failing entirely. Set Windows to install updates as soon as they’re released, or if you’re using a third-party patch management solution, make sure it deploys them weekly. If you’re doing this manually, check for new updates at least every two weeks, in line with the Patch Tuesday schedule. Avoiding multiple updates at once also helps you steer clear of unexpected problems, like a loading bar stuck at 0%.
Use Reliable Patch Management Software
Use third-party patch management software like Action1, because it automates vulnerability detection, missing patch identification, testing, deployment, and even reporting. That means fewer headaches and less room for the kind of mistakes that cause stuck updates. These tools also offer features like P2P patch distribution, offline catchup that updates endpoints the moment they reconnect, scheduled deployment, and retry windows, all of which make your life a lot easier.
Fix Stuck Updates with Action1
Action1 helps you avoid stuck updates by taking over the entire update process, so only approved Windows updates are deployed during your configured maintenance windows, not randomly by Windows itself. On top of that, the software automates the whole process from missing patch detection to deployment. Updates get tested before they reach your devices, deployed in stages, and stopped automatically if something doesn’t work as expected. In other words, with just a few clicks, Action1 can solve your biggest Windows patching problems, the same ones that would otherwise take you hours of troubleshooting.
Automated Windows Update Management
Automate the Windows update process from end to end. Let things get done automatically instead of manually, and watch every Windows update get detected, downloaded, and installed across your endpoints without you lifting a finger. Action1 is free for up to 200 endpoints, making it a great option for administrators who want to automate patch management without spending a fortune, in fact, without spending a single dollar. The software works across on-premises and remote endpoints and comes with a remarkable set of features and flexibility, letting you shape the patch management process exactly the way you envision it.
Remote Endpoint Patching Without VPN Dependency
Equip yourself with a platform that lets you patch your remote endpoints without requiring VPNs or any other local infrastructure. This way, you can keep every system up to date while also minimizing the chances of an update getting stuck because of VPN problems, like an accidental disconnection.
Patch Visibility Across Windows 10 and Windows 11 Devices
Managing a mix of Windows 10 and Windows 11 devices gets messy fast without the right visibility. A single dashboard shows you the patch status, compliance, and update history of every device, regardless of which Windows version it’s running. You always know exactly which machines are up to date and which ones need attention, without jumping between different tools or screens.
Reduced Bandwidth Usage with P2P Update Distribution
Downloading the same update separately on every device in your network eats up bandwidth fast, especially with larger Windows 11 upgrades. Peer-to-peer update distribution solves that by downloading the update once and sharing it directly between your endpoints. That means faster deployment across your whole network and far less strain on your internet connection, no matter how many devices you’re updating.
Frequently Asked Questions
Why Does Windows Update Get Stuck at 0%?
Windows Update gets stuck at 0% when your computer is unable to download or install the update successfully. This problem is always caused by a weak or unstable internet connection, not enough free disk space, corrupted update files, or blockage from your antivirus or firewall. In such situations, restarting, clearing the update cache, or resetting the update components often gets it going again. However, if these methods don’t help, a clean Windows 11/10 installation is needed to fix deeper problems.
How Long Should I Wait if Windows Update is Stuck at 0%?
If Windows Update is stuck at 0% give it at least 30 to 60 minutes, since large updates can sit at 0% for a while during file extraction or preparation. To check if it’s actually working, open Task Manager and look at disk and CPU activity. If either is moving, leave it alone. If there’s no activity for over an hour, the update is genuinely stuck, so restart your computer and try the fixes covered above.
Will Resetting Update Components Delete My Files?
No, resetting update components will not delete your personal files, programs, or settings. This process only resets the parts of Windows that handle updates, like temporary folders and update services. You are just cleaning up the tools responsible for downloading and installing updates, so there is no chance to lose any other valuable data. However, keep in mind that it is always a good idea to back up important personal files before making any big system changes, just in case something unexpected happens.
Can I Stop a Stuck Windows Update Safely?
Yes, you can stop a stuck update safely by restarting your computer or manually stopping the update services. After your PC restarts, you can troubleshoot the issue and try again without forcing anything in a risky way.
Read the full guide on How to stop a stuck windows 11 Update below:
Read also: How to Stop Windows 11 Update?
Why is My Windows 10 to Windows 11 Upgrade Stuck at 0%?
The Windows 10 to Windows 11 upgrade getting stuck at 0% is most commonly caused by TPM 2.0 or Secure Boot being disabled in your BIOS, or not having enough free space on your C: drive. Windows 11 requires both TPM 2.0 and Secure Boot to be active and at least 64 GB of free space on your C: drive before the upgrade can complete successfully. If both of those check out, software conflicts, corrupted update files, or antivirus interference might be the cause.
What Should I Do if My Windows Update Download Is Stuck at 0%?
If the download process gets stuck at 0% during a Windows update, start with the basics. Check your internet connection, restart the Windows Update service, clear the update cache, disable any VPN or proxy, and turn off your antivirus and firewall temporarily. If none of those fix the issue, you’ll have to reset the Windows Update components through Command Prompt.
What Should I Do When My Windows Update Is Stuck at 0% During Installation?
When a Windows update gets stuck at 0% during installation, it is most likely caused by corrupted system files, not enough disk space for the update to unpack, or a software conflict blocking the process. To fix that, run the Windows Update Troubleshooter, clear the cache, and run SFC and DISM to repair corrupted system files. If none of that works, install updates manually by downloading them directly from the Microsoft Update Catalog.
Can Low Disk Space Make Windows Update Stuck at 0%?
Yes, low disk space is a major reason for Windows updates getting stuck at 0%. It happens because you might have enough space for the update to download, say 5 GB, but when installing, that file gets unpacked and roughly doubles in size. If your drive doesn’t have that extra space available, the update gets stuck. Before updating your system, make sure you have at least 20 GB of free space for regular updates and 64 GB when upgrading from Windows 10 to Windows 11.
Can Action1 Help Prevent Stuck Windows Updates?
Action1 is an autonomous endpoint management solution that successfully automates the process of identifying existing software vulnerabilities across your devices, prioritizes them based on their severity, and tests and deploys updates through intelligent automation.
Nowadays, having an efficient and reliable update management tool is of utmost importance to remediate software vulnerabilities and minimize the chances of experiencing the devastating effects of cyberattacks.
Equipping your company with Action1’s software streamlines each step of the update management process, minimizes the time gap between identified and remediated vulnerabilities, and eliminates the manual burden related to the vicious cycle of constantly patching your systems with the latest updates. On top of that, it enables a single administrator to keep thousands, if not hundreds of thousands, of endpoints updated with just a few clicks.
With the software, you can leave manual update processes in the past while ensuring that only tested and reliable updates reach your endpoints. No unexpected downtime, no blind spots with unaddressed vulnerabilities, and no concerns about whether your devices are up-to-date, compliant, and protected.
In fact, Action1 helps you overcome stuck and failed updates, since the platform uses a privately maintained software repository where each update is delivered only after being tested for reliability and safety. Windows 11/10 updates will no longer make you nervous before each deployment, wondering if the update will get stuck or fail. Using Action1 gives you peace of mind that once you schedule the update installation, it will simply work, of course when having enough space for the update.
Furthermore, with the P2P update distribution, there will be no more bandwidth constraints, regardless of the number of devices you are managing. The software pulls updates only once and then shares them between all of your endpoints, significantly reducing the time needed for update deployment.
With the flexible testing and scheduling options, you can ensure that each update will be installed at a convenient time without interrupting your PC or the entire network of devices used in your organization.
Action1 not only reduces the attack surface across your endpoints, strengthens the overall security posture, eliminates the manual workload, and ensures regulatory compliance, but also makes the update management process as easy as playing your favorite game.
Since March 2025, you can take advantage of the platform on up to 200 endpoints without spending a single dollar, with no feature limitations or expiration periods. Get started with Action1 and identify and remediate vulnerabilities in a matter of minutes, not days or weeks.


