
Removing single or multiple programs from remote computers is a common administrative task. There are many solutions and software tools available for installing and uninstalling software on remote computers. This article explains how to uninstall software on remote machines using built-in Windows tools by using Windows Management Instrumentation (WMI), as well as how to remove several apps from multiple remote computers in bulk using Action1.
What is Windows Management Instrumentation Command?
WMI is Windows Management Instrumentation. From the name, it is clear why this technology was created and applied. It is worth adding that it has long stepped over the scope of managing only the Windows operating system and allows controlling many other compatible applications.
WMI is an enhanced and adapted Microsoft implementation of the WBEM standard (Web-Based Enterprise Management by DMTF Inc.). At the core of WBEM is the idea of creating a multi-functional monitoring and control interface to different systems and components of a distributed enterprise information environment using an object-oriented ideology and widespread web-based information presentation technologies: XML and HTTP protocols. The WBEM standard is the successor to the DMI standard (Desktop Management Interface).
The basis of the data representation structure in the WBEM standard is CIM (Common Information Model—a general type of information model) that implements an object-oriented approach to representing system components as classes with their own set of properties and methods, as well as inheritance principles.
What Are the WMI Prerequisites for Remote Software Uninstallation?
Remote software uninstallation in Windows environments requires specific system configurations and preparation when you need to uninstall programs remotely using WMI.
This enterprise-grade interface enables IT administrators or service providers to efficiently manage software deployments across distributed infrastructures. Bear in mind that understating and implementing these prerequisites guarantees and enables secure and efficient management operations across your infrastructure.
To begin with, you must configure local administrator privileges and explicit root\CIMV2 WMI namespace permissions on target systems when planning to uninstall remotely particular software. This fundamental requirement ensures proper authorization for executing any software management tasks.
Next, your environment must have DCOM authentication configured at the ‘Packet Privacy’ level and appropriate ‘Launch and Activation’ permissions set through Component Services.
On top of that, network accessibility requires TCP port 135 for the RPC endpoint mapper and dynamic RPC ports (49152-65535) to be open and properly configured. Furthermore, don’t forget that Windows Firewall must allow WMI (DCOM-In) and Remote Administration (RPC) traffic. And last, but not least, core services including WMI, Remote Procedure Call (RPCs), DCOM Server Process Launcher, and Remote Registry must be running on your target systems to successfully uninstall software remotely.
These prerequisites will help you establish a strong foundation for secure remote software management operations. Keep in mind that regular validation of these requirements ensures operational integrity and prevents deployment issues.
How to Start Windows Management Instrumentation?
WMI is launched from the command line. You can open the command line from the “Start Menu” ⇨ in the search bar; type “Command Prompt”, then right-click on the icon and choose “Run as administrator,” or just press the “WIN + R” keys. The “Run” window will open in which, in the “Open” box, type “cmd” and click OK.
In the command window that opens, type “wmic” and press “Enter.”
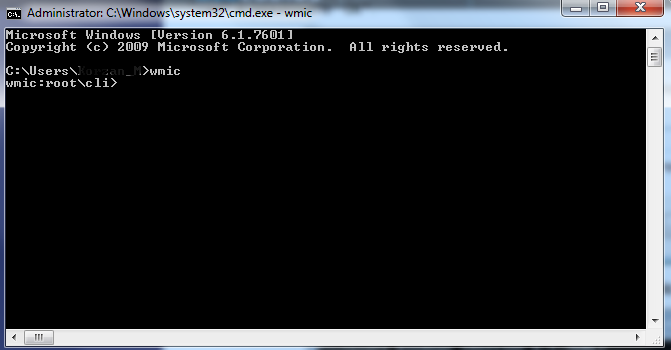
Thus, we launched a console utility for interacting with the WMI structure on a local or remote computer. Now using the WMI Query Language (WQL), you can execute various WMI commands.
For example, we get the entire list of installed software on a remote computer. To do this, run the following command:
/node: {computer name} product get name
Where instead of {computer name}, we substitute the name of the remote and local machines with which you want to get an installed programs list. The computer name is better for quoting. Click “Enter,” wait for some time to collect information, and get the following picture:

How to Uninstall Software Using WMI
You can remove a specific program using the following query:
/node: {computer name} product where name = {program name} call uninstall
Where instead of {computer name} we insert the name of the computer from which the program will be deleted, and instead of {program name} the name of the deleted program as in the received software list.
For example, we need to remove “Microsoft Office Professional Plus 2024.” Then the query will look something like this:
/node: {home2} product where name = “Microsoft Office Professional Plus 2024” call uninstall
Press “Enter” and respond to the request for offers to remove the program Y:
UNLOCK THE FULL SCRIPT
When you attempt to delete the program using the uninstall command, a message detailing the results will appear. In case of successful deletion, the message will look like this:
Method execution successful.
Out Parameters:
instance of __PARAMETERS
{
ReturnValue = 0;
};
How to Troubleshoot WMI Issues
Sometimes things don’t work as planned, and you may encounter specific technical issues when uninstalling programs remotely using WMI. Now we will have a closer look at the most common errors you may encounter and provide information on how to resolve them.
Error 0x80070005 (Access Denied)
To resolve this security error, you must first ensure your service account has appropriate access to both program files directories and registry locations containing uninstall strings. Without these permissions, WMI cannot access the necessary uninstallation parameters. Follow these configuration steps:
-
WMI Security Configuration:
Step 1: Launch Windows Management Instrumentation Console by pressing Windows key + R to open the Run dialog, then type wmimgmt.msc and press Enter.
Step 2. Left-click WMI Control (Local) → More Actions → Properties.
Step 3. Open the Security tab.
Step 4. Navigate to Root → CIMV2.
Step 5. Click on Security.
Step 6. Add your service account or group.
Step 7. Grant the following permissions:
-
Enable Account
-
Remote Enable
-
Execute Methods
-
-
DCOM Configuration:
Step 1. Open Component Services by pressing Windows key + R to launch Run dialog, then type “dcomcnfg” and press Enter.
Step 2. Navigate to Component Services → Computers → My Computer.
Step 3.Right-click My Computer → Properties.
Step 4. Select COM Security tab.
Step 5. Under Launch and Activation Permissions click Edit Default.
Step 6. Add your service account and allow:
-
Local Launch
-
Remote Launch
-
Local Activation
-
Remote Activation
Step 7. Now navigate to the “Default Properties” tab.
-
Set Default Authentication Level to “Packet Privacy.”
-
Set Default Impersonation Level to “Impersonate.”
-
Error 0x800706BA (RPC Server Unavailable)
This error is likely caused by the RPC ports being blocked between the servers used in the communication or server process you are trying to complete.
The resolution to this error needs a few actions from your side. Make sure to adjust your firewall policies to unblock RPC. Many firewalls (WatchGuard) will automatically block RPC and SMB/NetBios even when you have established “any-any” rules in place.
When the problem comes from WatchGuard, you will have to create a policy to explicitly allow and unblock the RPC ports. When NetScreen causes the error, the rule has a checkbox to allow NetBIOS.
Error 0x80041010 (Invalid Class)
This error indicates structural issues within the Windows Management Instrumentation framework. Begin your diagnostics by verifying WMI’s operational status through Command Prompt → WMIMGMT.MSC →Right-click “WMI Control (Local)” and select Properties; if you receive an “Invalid Class” error, this confirms WMI infrastructure problems that require systematic resolution.
Resolution Path:
-
MOF Registration Resolution: Launch Command Prompt with administrative privileges (Right-click -> (Run as Administrator) and execute the following commands:
-
CD C:\Windows\System32\WBEM
-
dir /b .mof .mfl | findstr /v /i uninstall > moflist.txt & for /F %s in (moflist.txt) do mofcomp %s
This command recompiles all Management Object Format (MOF) files, rebuilding the WMI class structure.
-
Repository Verification and Repair: If MOF recompilation doesn’t resolve the issue, execute these commands sequentially in an elevated Command Prompt:
First, verify the current state of the repository:
-
winmgmt /verifyrepository
Only if the verification reports problems, proceed with repository salvage:
-
winmgmt /salvagerepository
-
Infrastructure Validation: Open Component Services by pressing Windows key + R to launch Run dialog, then type “services.msc” and press Enter. After repository repair, verify these essential services are running and configured for Automatic startup:
-
Windows Management Instrumentation
-
DCOM Server Process Launcher
-
Remote Procedure Call
-
How to Uninstall Software Using Action1?
Struggling with remote software management? Looking to automate endpoint management while enhancing security? Action1’s enterprise-grade, cloud-native platform transforms the traditionally complex and time-consuming task of software installation/uninstallation into a seamless, automated process across your entire infrastructure.
Action1’s intuitive interface lets you effortlessly manage software uninstallation, whether you need to remotely remove programs from all or a particular group of endpoints in your network. Schedule removals at convenient times, track progress in real-time, and maintain detailed audit logs for compliance. Best of all, both organizations and home users can secure up to 200 endpoints completely free, forever, with no feature limits.
For your convenience, we have created a step-by-step guide to follow, making the process as easy as possible:
Step 1. Log in to your Action1 dashboard
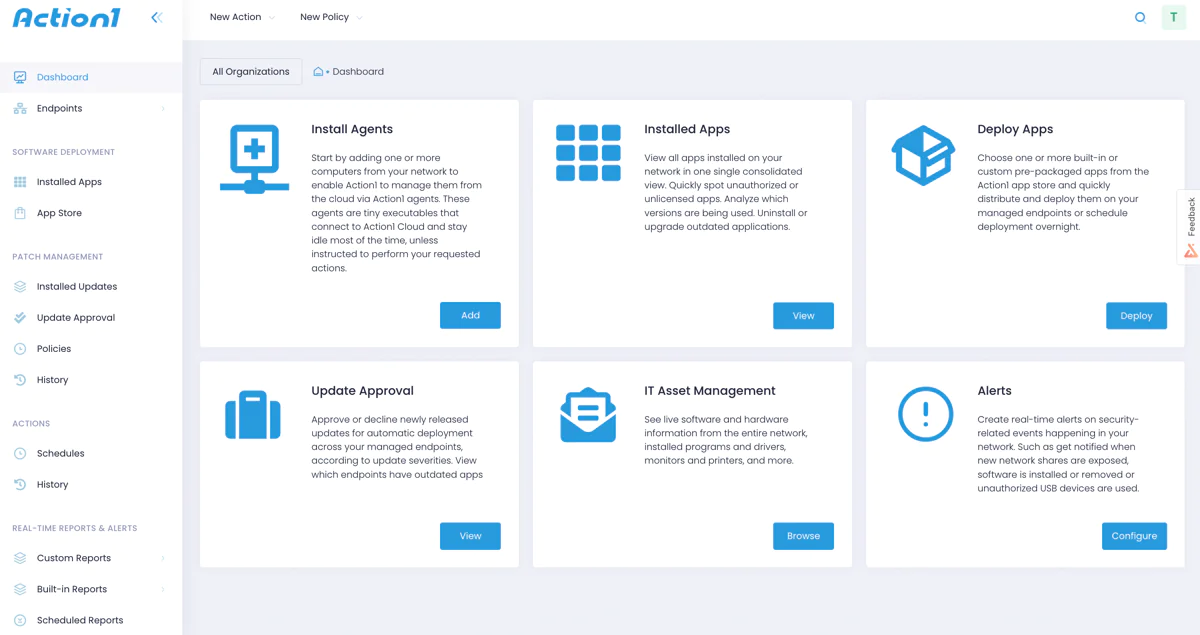
Step 2. Enter AD Domain in Discovery Settings

Step 3. See All Managed Computers
Action1 will automatically find all domain computers and show them in the list of managed endpoints.
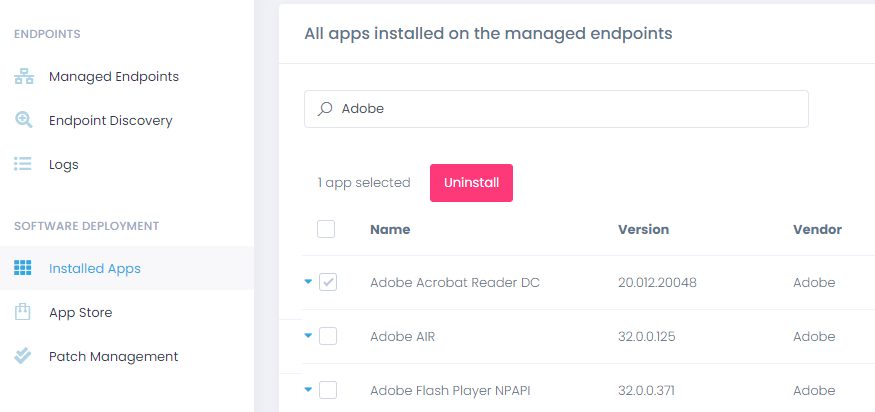
Step 4. Select Programs to Uninstall
Navigate to Installed Apps to see the entire list of programs installed on all computers on your entire network, filter the list by program name, and then select the apps you want to uninstall:
Step 5. Confirm Programs to Uninstall
Review the list and click “Next Step.”
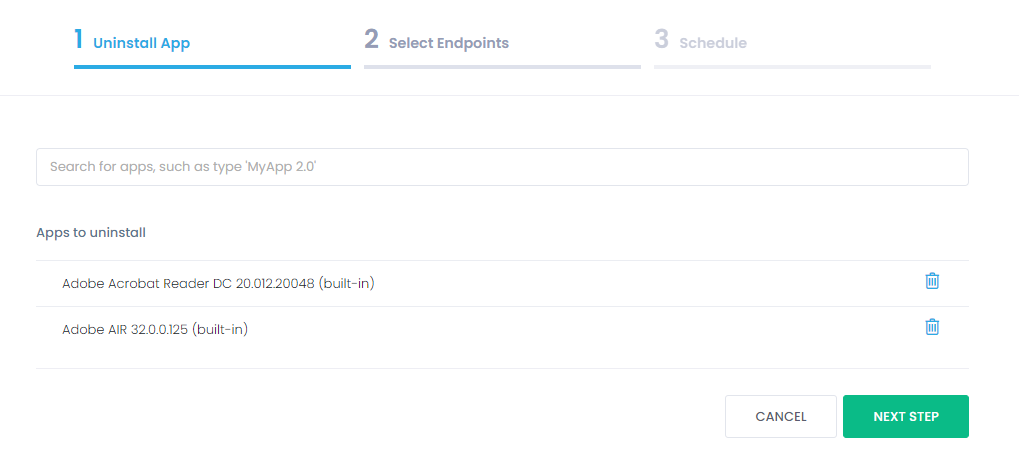
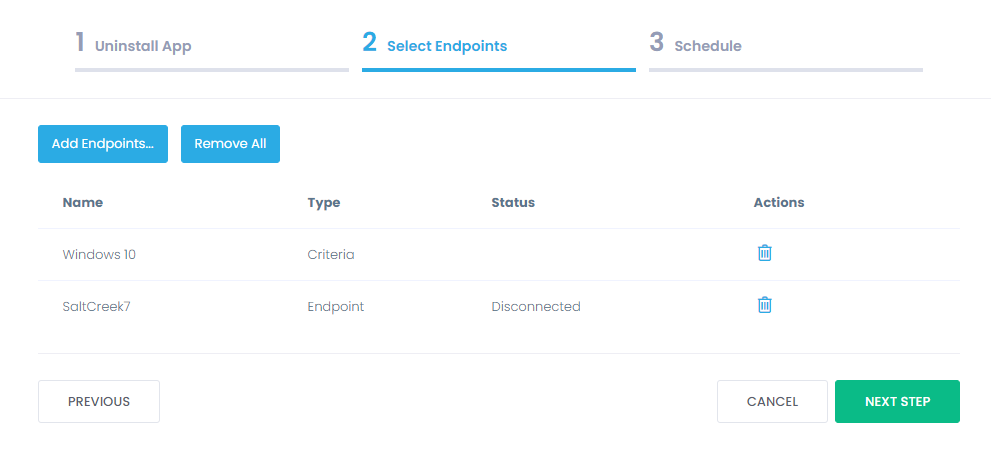
Step 6. Select Computers
Select the individual computers or groups of computers from which you want to remove the apps and click Next Step.
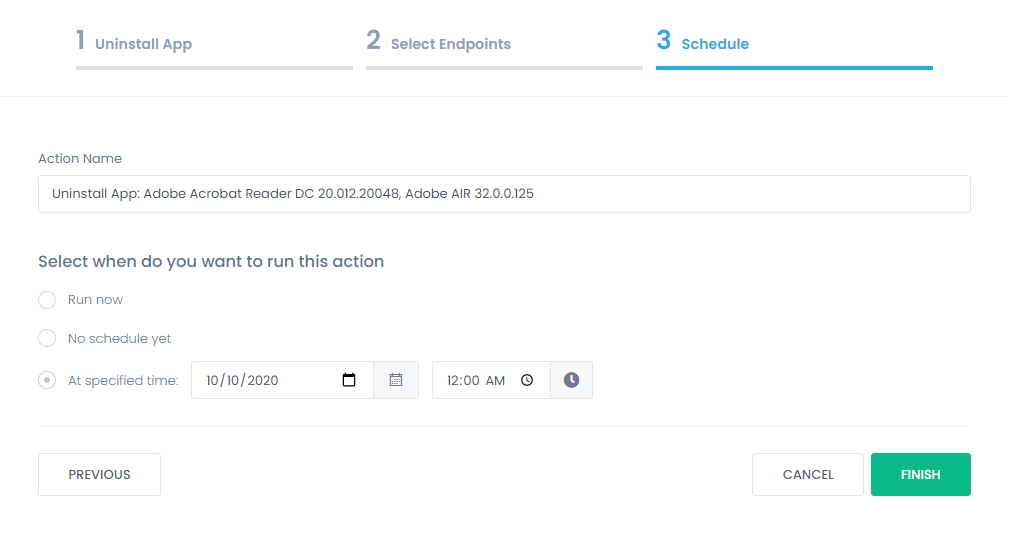
Step 7. Run “Now” or “Schedule”
You can then start the uninstallation immediately or set it to run later, such as overnight, to avoid any disruption to your users. Click Finish after choosing the appropriate uninstallation time:
Consider Using Action1 to Uninstall Software Remotely if:
-
You need to perform an action on multiple computers simultaneously.
-
You have remote employees with computers not connected to your corporate network.
Action1 is a cloud-based platform for patch management automation, software distribution tools, remote desktop, software asset inventory, endpoint management.


