All users who are set up with a network home or portable home directory must have proper permissions to the shared directory in which the home directories are created. Initially, you can provide access to the shared directory through the Windows built-in security group, Authenticated Users. Later on, you can fine-tune permissions for this group based on your company’s file-sharing needs. For example, if an administrator pre-creates home directories for each user before they log in, users only need Read access to the shared directory in order to access their home directories. This article helps you to set share permissions.
Firstly, Select the Directory to Share
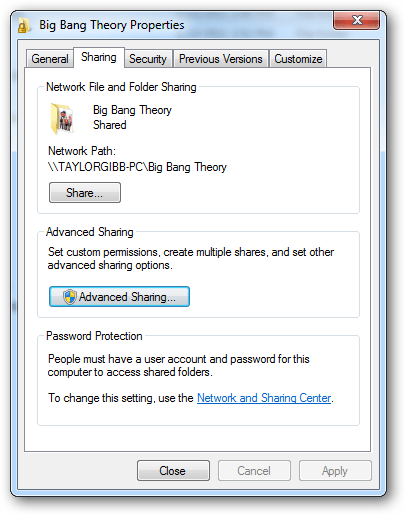
On the network share computer, select the directory to share (for example, MacUsers). Right-click, click Properties and click the Sharing tab; then click Advanced Sharing.
Click Permissions to Add Required Options
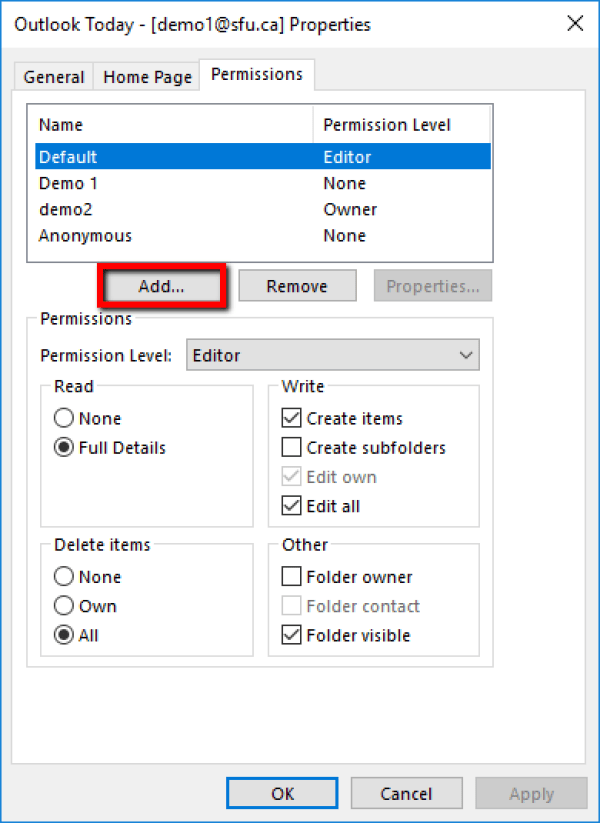
Make certain that Share this folder is selected. Click Permissions, then click Add
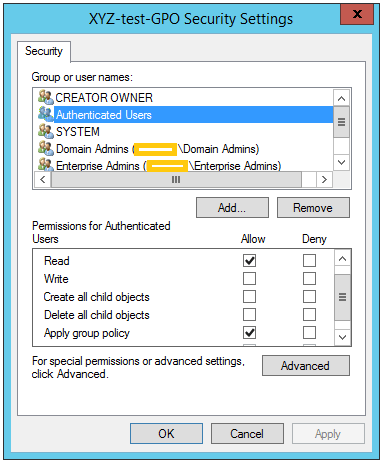
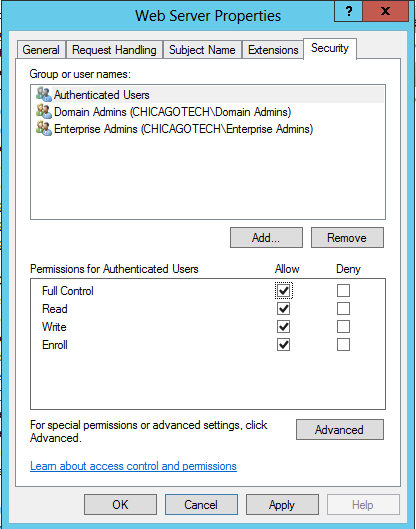
Set Permissions for Authenticated Users
Type auth and click OK to return the Authenticated Users group. Select Authenticated Users, then click Allow for Full Control. Click OK to set permissions for authenticated users, then OK again to close the properties page.
Verify That Users Are Authenticated
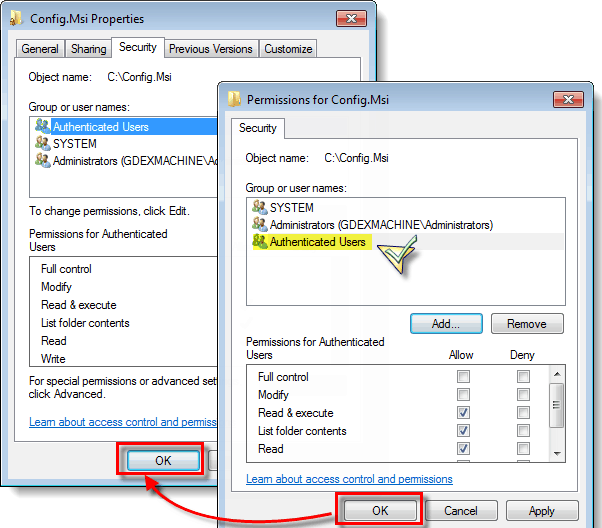
Verify that Authenticated Users have proper permissions on the Security tab as well as on Share Permissions.
Ordinarily, this is automatic because the Active Directory Users group, which includes authenticated users, inherits Full Control to the shared folder, but if permissions were altered on the Security tab, and are not sufficient, users may not be able to log in.
Click the Security tab and select Authenticated Users (or click Add to add it if it is not already in the Group or user names box).
Select Full Control and Click Ok
Select Full control and click OK to save and close the Properties page. Assigning permissions to Authenticated Users on the network home share directory means that each home folder will inherit the proper permissions to allow logged-in users to access their home directories. It also means that every user will have access to every other user’s home directory. To change this, you can set permissions on the individual home directories.
Limiting Users Access to Other Users’ Home Folders
The previous section showed how to assign permissions to a network-home shared folder, which are consequently inherited by the home folders created in the shared folder. Because permissions are inherited, each user has equal access to every other user’s home folder. This section shows how to fine-tune permissions to limit user’s access to their own home folder.
Select the Network Share
Select the network share you assigned permissions to in the previous section.
Select One of the User Home Directories
Select one of the user home directories in the network share.
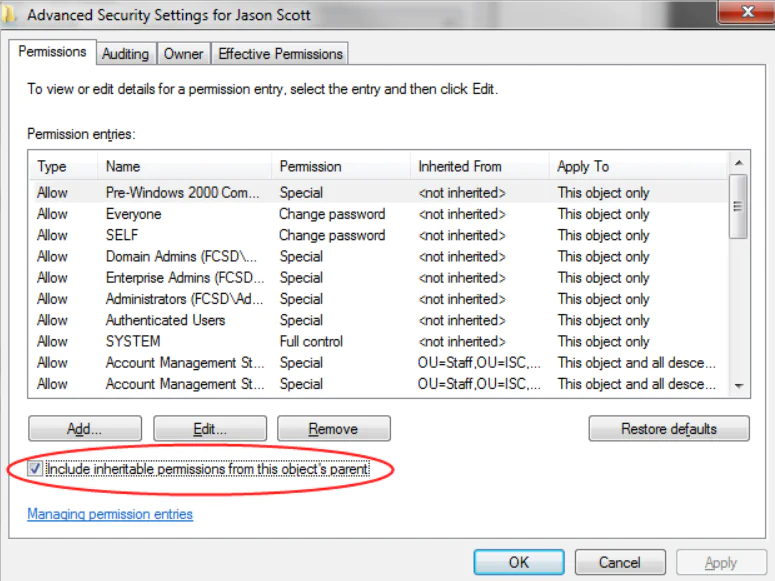
Deselect Include Inheritable Permissions
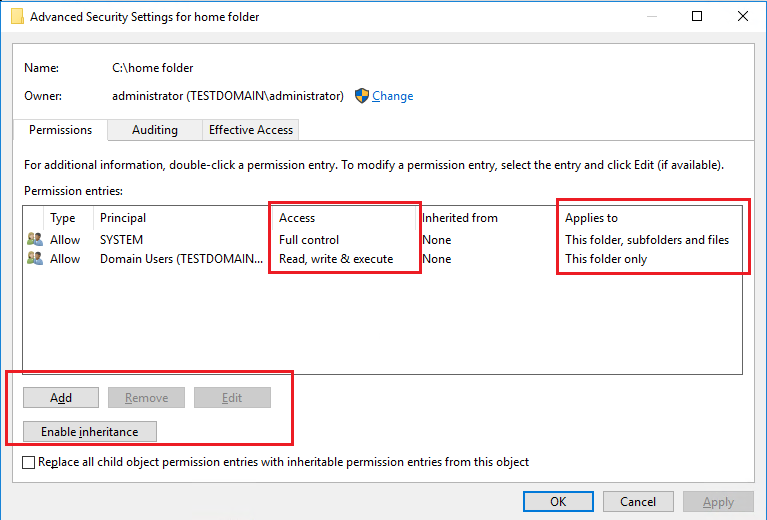
Click the Security tab. Then click Advanced and Change Permissions. Deselect Include inheritable permissions from the object’s parent and click Remove when prompted.
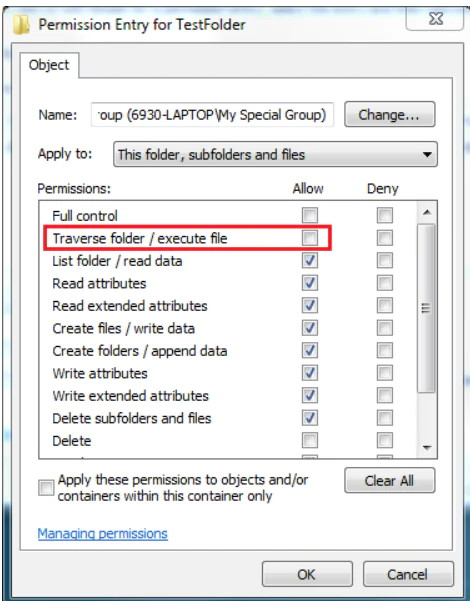
Select the Following Permissions
Click Add and type users and click Return. Select the following permissions for Users:
- Traverse folder / execute file
- Read Attributes
- Read Extended Attributes
- Create files / Write Data
- Create Folder / Append Data
Finally, Click OK Button
Click OK, and OK again until you have saved all the open dialogs and closed the Properties page.
Consider Using Action1 to Set Share Permissions if:
- You need to perform an action on multiple computers simultaneously.
- You have remote employees with computers not connected to your corporate network.
Action1 is an endpoint management solution. It encompasses tools such as patch management, software deployment, remote access, software/hardware inventory, and endpoint configuration.
