Mapping network drives and other locations is the right way of keeping remote data at hand within your local area network. However, at some point, you might also want to delete some of these mappings to keep only those of them that you use daily. In this article, we’ll show you how to remove a mapped drive.
NOTE: All the ways of deleting network mappings work identically on Windows 7, Windows 8.1, and Windows 10. To keep our instructions clear, we use screenshots taken mainly from Windows 10. We also include screenshots from Windows 7 or Windows 8.1 when needed.
Here are four methods for deleting mapped drives and network locations.
Method 1: Use File Explorer to Delete a Mapped Network Drive from Windows
Step 1: To delete a previously created drive mapping, start with opening File Explorer in Windows 10 or Windows 8.1 (or Windows Explorer in Windows 7).
Step 2: Select This PC from the left pane in Windows 10 or Windows 8.1 (or Computer in Windows 7).
Regardless of the operating system, all the mapped drives are listed in the Network Locations group, under your SSD, HDDrives, and other similar devices such as CD/DVD or USB memory cards.

Step 3: To delete a particular mapped network drive, right-click on it and select Disconnect from the contextual menu.

Method 2: Run Net Use Command to Remove Mapped Drive
Running the Command Prompt, you can successfully delete all the required mapped drives in all modern Windows versions.
Open the Command Prompt, and in the box, type net use [Mapped Drive Letter] /delete. Replace the Mapped Drive Letter parameter with a specific drive letter. Then, press Enter. For instance, there’s a mapped drive to which we assigned the letter Z; thus, we type net use Z: /delete.

Once the mapped drive “was deleted successfully,” the respective network drive immediately disappears from File Explorer (Windows Explorer).
NOTE: This method comes in handy when your plan is to remove a mapped drive having an assigned letter. Plus, the command above does not work for network location mappings such as FTP servers or web servers.
Method 3: Use File Explorer to Remove a Network Location Mapping from Your PC by Erasing Its Shortcut
A network location mapping is a shortcut stored as a file on your Windows PC. If you can’t delete it with the instruction Method 1, see how to use File Explorer to delete a shortcut differently.
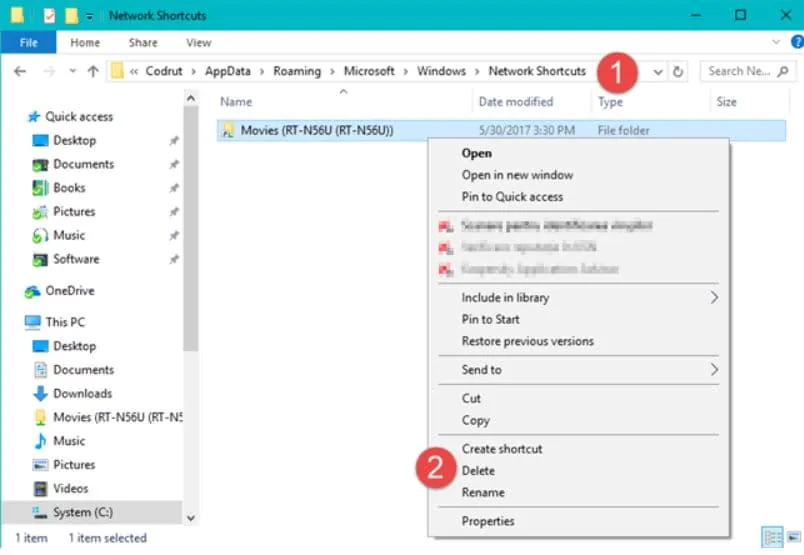
Step 1: Open File Explorer and navigate to “C:\Users\Your_User_Name\AppData\Roaming\Microsoft\Windows\Network Shortcuts” where Your_User_Name is the name of your Windows user account.
Step 2: In the Network Shortcuts folder, there are all the network location mappings. Select those you no longer need and remove them by right-clicking and going for the Delete option (by pressing Delete on your keyboard). As for Windows 10 and Windows 8.1, the selected shortcuts will be deleted instantly with no confirmation required.

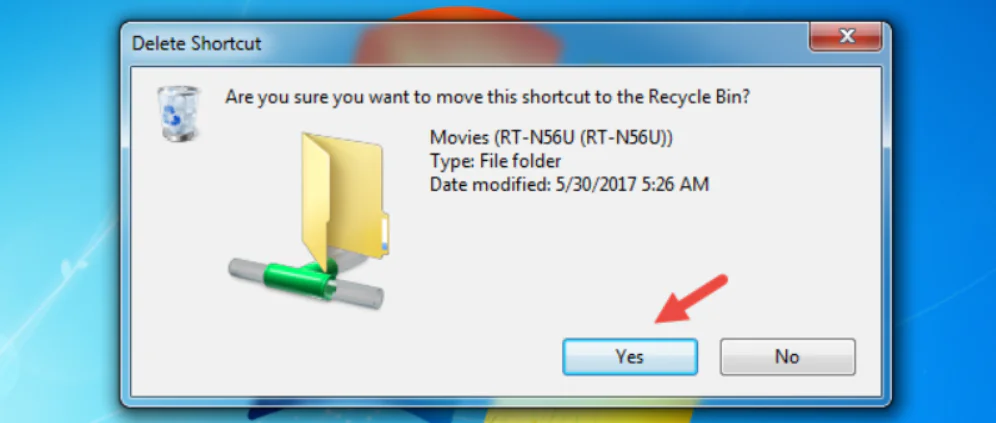
Step 3: Confirm your action if you use Windows 7.

Method 4: Use Command Prompt to Remove Network Location Mapping from Your PC by Erasing Its Shortcut
You can also use cmd.exe to browse your PC and remove a network mapping.
Step 1: Open the Command Prompt window and use the cd (Change Directory) command to navigate the location mentioned in the previous section — cd “C:\Users\Your_User_Name\AppData\Roaming\Microsoft\Windows\Network Shortcuts” where Your_User_Name is the name of your Windows user account.

Step 2: Use the Del (Delete) command to remove the shortcut for the network mapping you no longer need. For instance, if you delete the Music network mapping, you should run the command del Music.
Step 3: Confirm the action: type Y that stands for Yes. Once you’ve done that, the network mapping immediately disappears from your Windows computer or device.

How to Remove a Mapped Drive Effortlessly with Action1
Action1’s intuitive dashboard helps optimize routine tasks, significantly scaling up IT productivity.
Step 1: After logging into the Action1 dashboard, in the Navigation pane (the left column), select Managed Endpoints and mark the endpoint, for which you are about to delete a mapped drive.
Step 2: Then click on the More Actions menu and select Run Command.
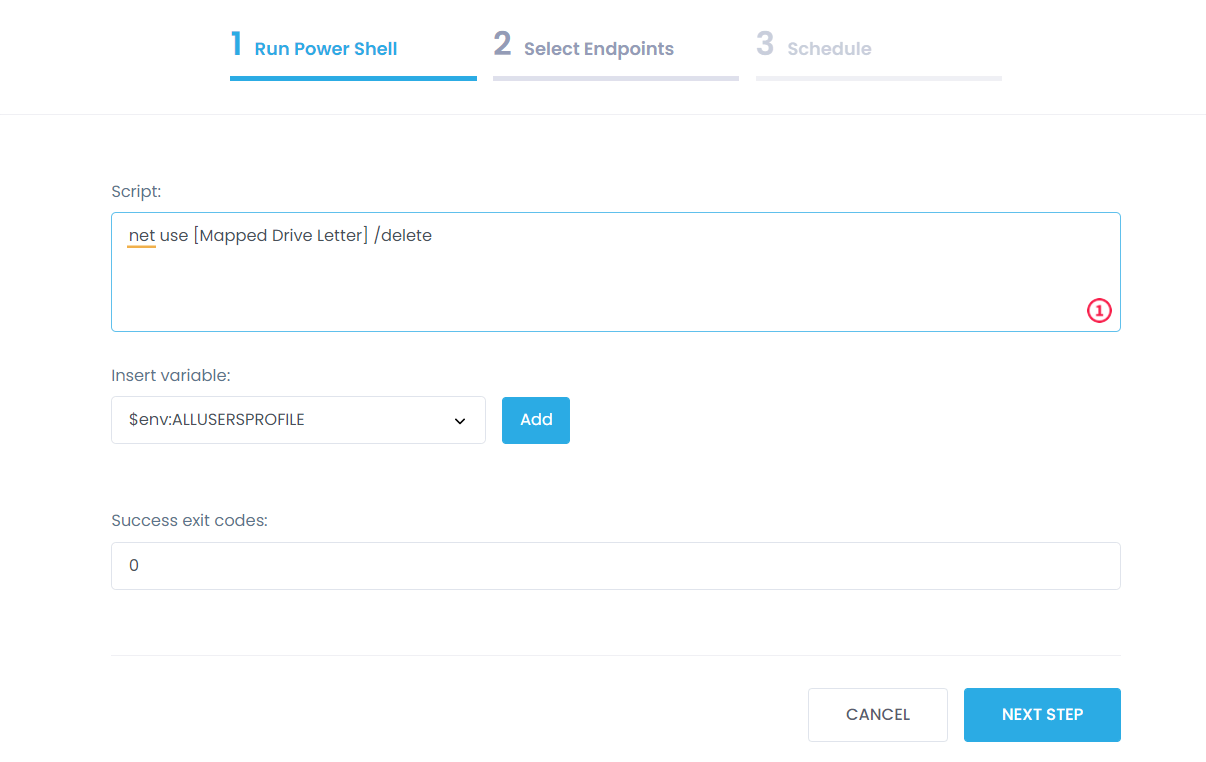
Step 3: In the box, enter the command net use [Mapped Drive Letter] /delete.

Step 4: In the Select Managed Endpoints window, you mark those endpoints for which you are going to remove mapped drives. You can add all the available endpoints or mark them one by one.
Step 5: Schedule the action (Run now/ No schedule yet/ At specific time/ Repeat) and Finish.
Consider Using Action1’s RMM Solution
Staying competitive in the market is always a challenge, and loud words don’t do wonders for optimizing administrative tasks and scaling up IT productivity. But actions do! With Action1’s cloud-based RMM solution, your IT department will timely deliver patches and updates, manage IT assets, maintain remote assistance, and run many other complex tasks.
Read the of our product or be the judge — get your free trial.


