How to find out which processor is on the computer many users asked themselves this question, faced with the need to make changes to the hardware of the computer to perform the upgrade. It is useful to know information about the processor in any case, since the overall performance of the computer largely depends on this device.
Get the necessary information about the central processor will help software running on the Windows operating system. This method will allow the user to make the right decision, because otherwise it will be very difficult, for example, to find out which processor is on the laptop. You can find out the most general information by system tools, and to obtain more detailed information you will need to use third-party software.
In this article, we will look at instructions on how to use PowerShell to get CPU information in Windows.
1. How to Get Processor Information in Windows PowerShell
Using this method, you can find out system information in Windows PowerShell.
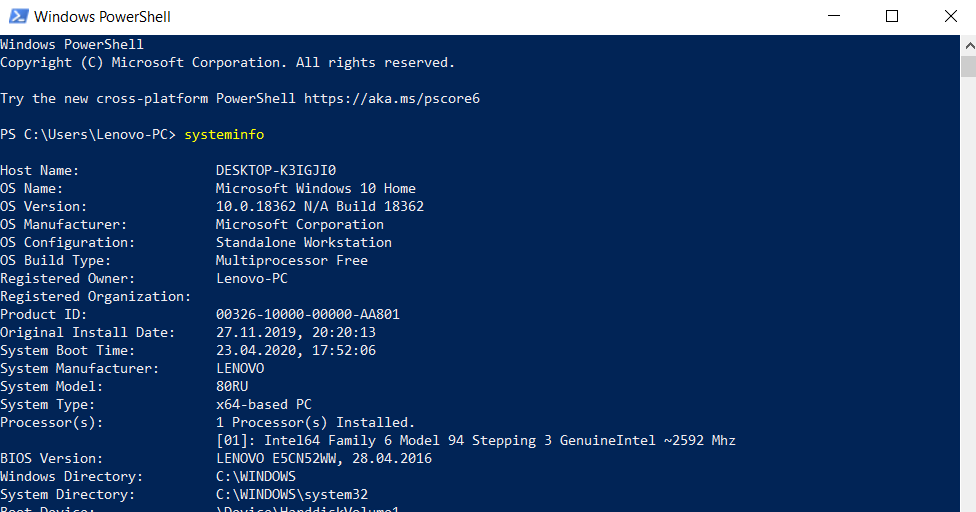
Launch Windows PowerShell as an administrator, enter the command:
“systeminfo”
(without quotes), and then press the Enter key.
The Windows PowerShell window displays some information about the processor on this computer.
2. Find out the Number of Processor Cores on the Command Line or in PowerShell
Open Command Prompt or PowerShell ⇨ type the command:
WMIC CPU Get DeviceID, NumberOfCores, NumberOfLogicalProcessors
And press Enter.
3. Get Cpu Information on a Remote Computer Using Windows PowerShell
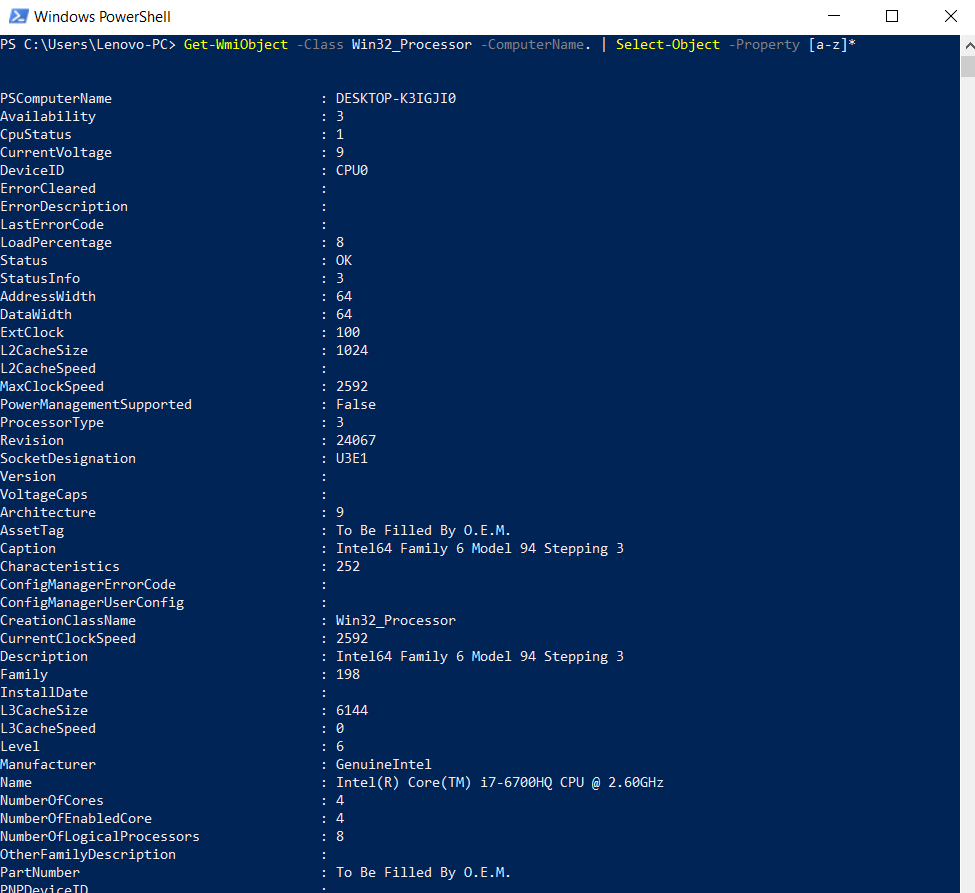
To get information about the remote computer, the Get-WmiObject cmdlet is suitable. You just need to specify the name or IP address of the computer.
General information about the processor can be obtained using the Win32_Processor class of the WMI service, however, the user will probably need to filter the received data.
Get-WmiObject -Class Win32_Processor -ComputerName. | Select-Object -Property [a-z]*
To get the general description string of the processor family, just return the Win32_ComputerSystem SystemType property:
Get-WmiObject -Class Win32_ComputerSystem -ComputerName. | Select-Object -Property SystemType
4. How to Find out Which Processor Is on Your Computer Using Task Manager in Windows 10
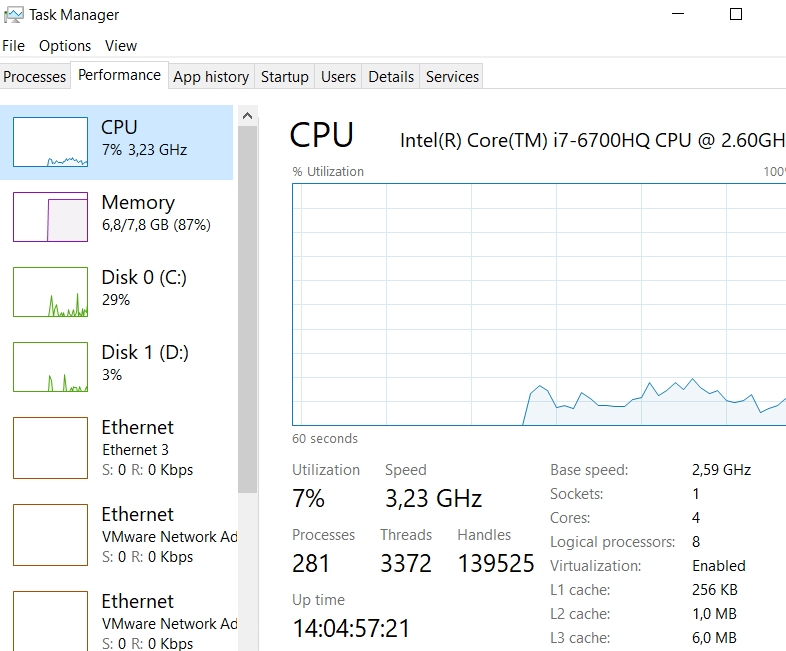
Using the Task Manager in the Windows 10 operating system, you can find out the main characteristics of the central processor.
Enter one of the convenient ways to the Task Manager.
Open the tab “Performance”, click on “CPU”.
The Task Manager window displays basic information about the central processor and the number of resources used.
5. How to Get Processor Information in the Dxdiag Diagnostic Tool
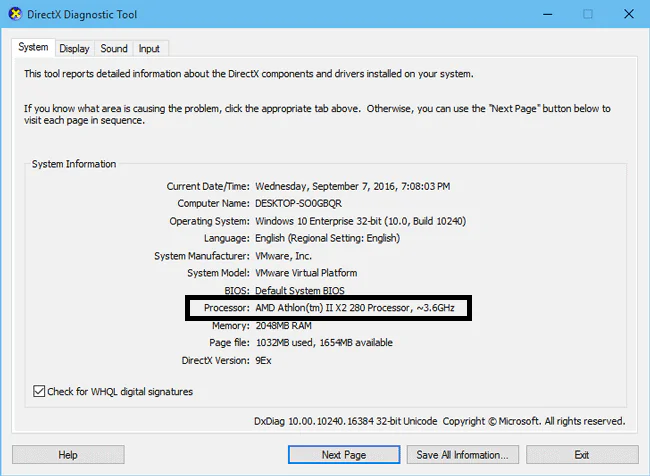
The DxDiag system tool provides general information about the central processor.
Press on the keyboard the keys “Win” + “R”.
In the Run window, type: dxdiag (without quotation marks).
In the “DirectX Diagnostic Tool” window, in the “System” tab, general information about the computer processor will be displayed.
Consider Using Action1 to Obtain Processor Information if:
- You need to perform an action on multiple computers simultaneously.
- You have remote employees with computers not connected to your corporate network.
Action1 is a cloud-based platform for patch management, software deployment, remote desktop, software/hardware inventory, endpoint management and endpoint configuration reporting.


