1. Identifying Your Hardware Configuration with Action1
When you need to inventory multiple computers at once, or manage a large fleet of remote employees with endpoints not connected to your corporate network, traditional methods can be challenging to execute. In these situations, Action1’s capabilities may be the ideal solution for the task. Follow these steps to use Action1 for hardware inventory:
1. Log in to the Action1 Platform.
Sign up with Action1 for your first 200 endpoints – absolutely free!
2. Open the “Real-time Reports & Alerts” menu, then navigate to “Built-in Reports” > “IT Asset Management” > “Hardware Inventory“
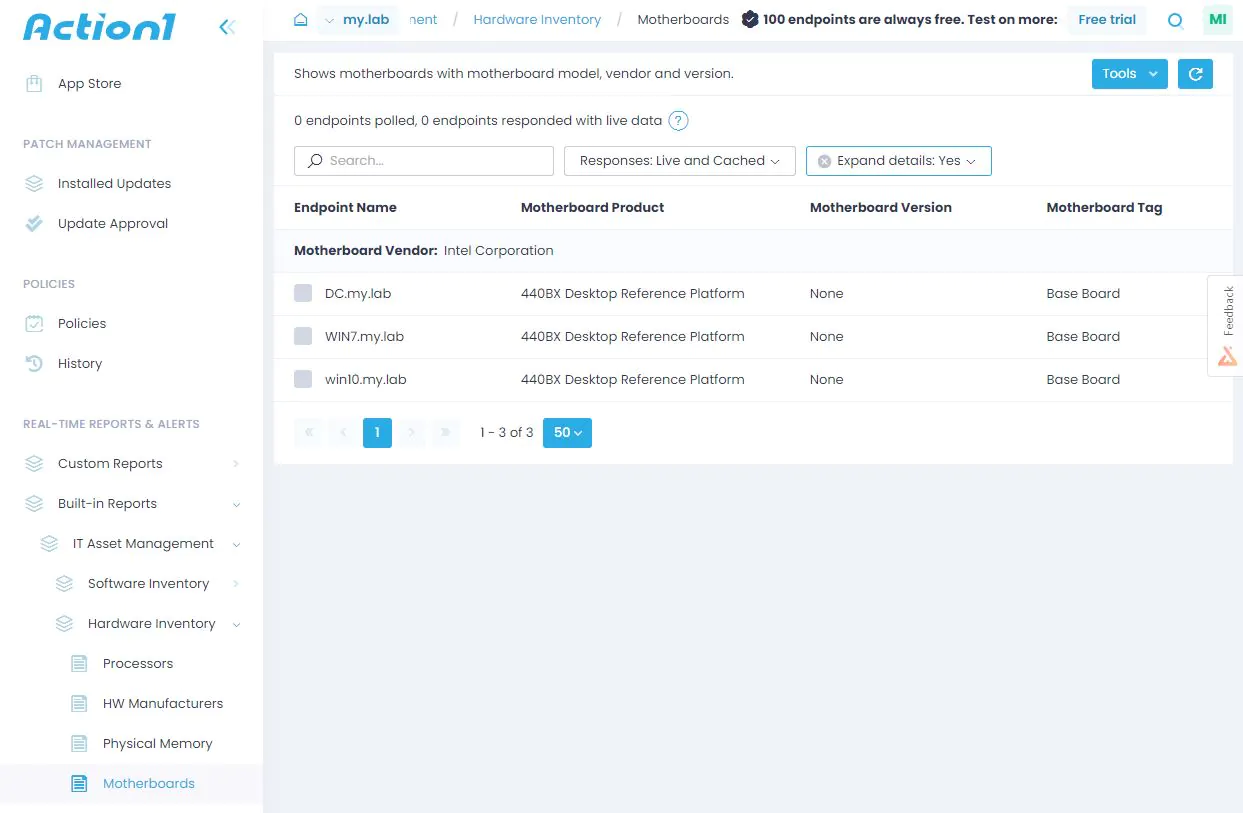
3. Click Motherboards and review your report:
For a more customized report on your hardware, in the previous screen:
- Click “Tools” > “New.”
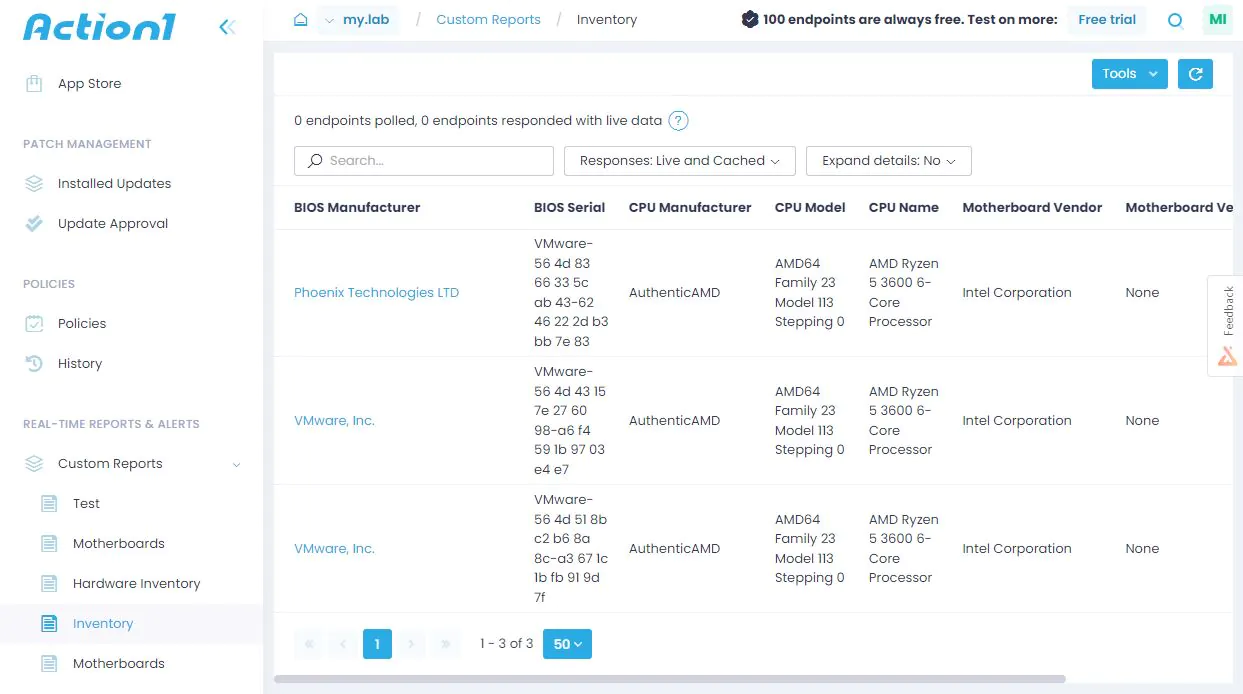
- Choose “Hardware Summary” in the “Data Source” field, enter a name for your report, and click “Next.”
- Select “Summary Report” and pick “Add Columns” in the “Summary columns” and “Drilldown columns” sections.
- Click “Next Step.”
- Click “Add Filter” and set filters to target specific endpoints for data collection.
- Click “End Task.” Wait for the data to be collected, then review your report.
2. Visual Definition of the Model and Manufacturer of the Motherboard
How to know the model of the motherboard visually? Very simple, for this we need a screwdriver and good lighting. We unscrew the bolts from the side cover of the system unit and remove it.
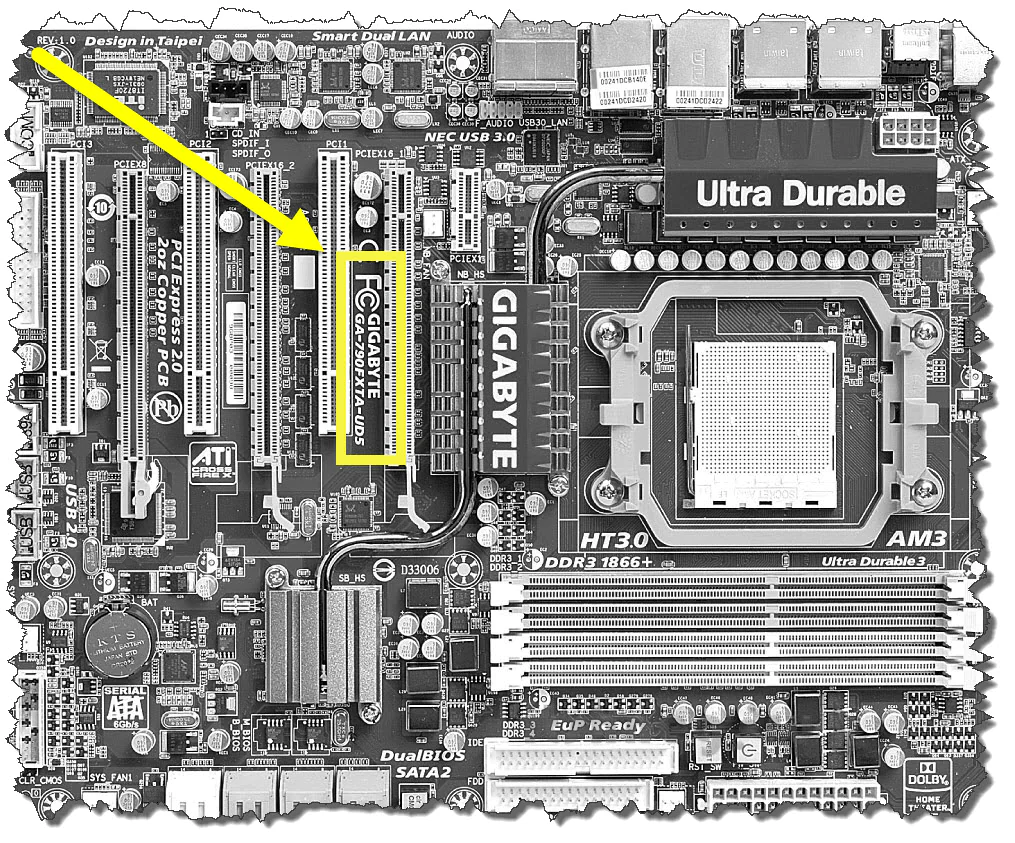
Now the most important thing is to carefully examine the motherboard. Unfortunately, some manufacturers manage to write the name so that it can not be found. Typically, markings are applied over the PCI-E slot or next to the processor. For example, in the photo below, the motherboard model number is GA-790FXTA-UD5. It is this name that we will drive into Google to determine the characteristics of the equipment or download drivers.
3. How to Identify Motherboard Using System Information
One of the three simplest methods to find out the necessary information without using third-party software is the “System Information” utility integrated into Windows. It is in the 7th, 10th version.
How to check what motherboard I have:
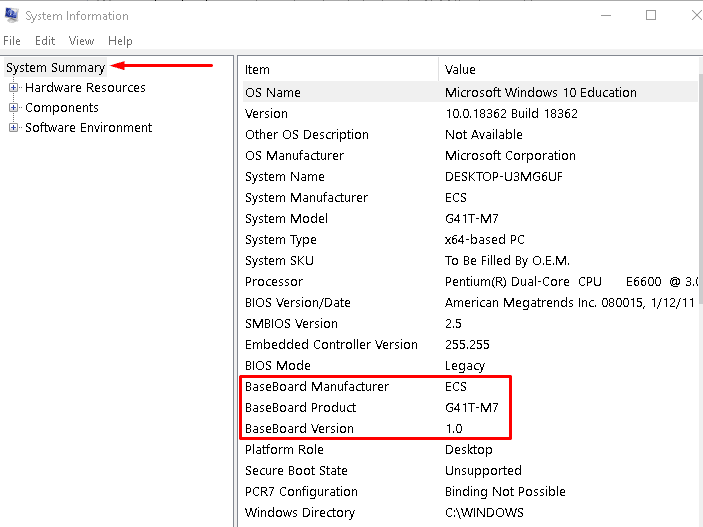
- In the Windows search bar, enter the name of the standard application. You can also use the Win + R combination and enter
msinfo32. - In the window that opens, the items BaseBoard Manufacturer (motherboard manufacturer) and BaseBoard Product provide the necessary data.
4. How to Find My Motherboard Model with Command Prompt
In my opinion, the easiest way to find out which motherboard is installed on your computer is to query the command line. Just open the Run menu. In the window that appears, type CMD. The command line will open, which means that it remains only to enter the commands:
wmic baseboard get Manufacturerto determine the manufacturer of the motherboardwmic baseboard get productto determine the model of the motherboard
In the picture below, everything is clearly shown how it looks.
5. How to Find out What Motherboard I Have Windows 10 with Powershell
By executing the command presented above, you will receive basic information about the motherboard installed on the computer, including serial number, system model number, manufacturer. This information should be sufficient to search for motherboard drivers or the official page of the device on the Internet.
Get-WmiObject Win32_BaseBoard | Format-Table -Auto Manufacturer,Product,SerialNumber,Version

6. How to Identify Motherboard Model Using Third-Party Software
If you prefer using third-party software to find out your motherboard information, there are several options available. Some popular ones are CPU-Z, Speccy, and AIDA64. These programs can provide detailed information about your hardware components, including the motherboard model and manufacturer.
While third-party software like CPU-Z, Speccy, or AIDA64 can provide detailed information about your hardware components, including the motherboard model and manufacturer, there are several reasons why using them might be less convenient compared to other methods:
- Additional installation: Third-party software requires you to download and install the program on your computer, which can take time and may introduce additional security risks if the software is not obtained from a trusted source.
- Resource consumption: Running third-party software can consume system resources, potentially slowing down your computer, especially if it’s an older machine with limited hardware capabilities.
- Learning curve: Each third-party software has its own interface and features, which may require you to spend additional time learning how to navigate and use the program effectively.
- Potential compatibility issues: Some third-party software might not be compatible with your specific operating system version or hardware, causing the software to provide incorrect or incomplete information.
- Privacy concerns: Using third-party software may require you to grant the program access to sensitive system information. There’s a risk of data being collected and shared with external parties without your consent, depending on the software’s privacy policy.
- Cost: Some third-party software may require you to purchase a license or subscription to unlock advanced features or remove limitations, adding an extra expense.
Given these drawbacks, it might be more convenient to use built-in Windows utilities like System Information, Command Prompt, or PowerShell for identifying your motherboard model and manufacturer, as they don’t require additional installations, consume fewer resources, and pose fewer privacy risks. However, if you need more detailed information about your hardware components or prefer a graphical interface, third-party software can still be a useful option.
6. Identifying Your Hardware Configuration with Action1
When you need to inventory multiple computers at once, or manage a large fleet of remote employees with endpoints not connected to your corporate network, traditional methods can be challenging to execute. In these situations, Action1’s capabilities may be the ideal solution for the task. Follow these steps to use Action1 for hardware inventory:
- Log in to the Action1 system.
- Open the “Real-time Reports & Alerts” menu, then navigate to “Built-in Reports” > “IT Asset Management” > “Hardware Inventory“
- Click Motherboards and review your report:
Action1 Endpoint Management: Streamlined, Secure, and User-Friendly:
Аction1 is a cloud-based platform that will help you efficiently manage your enterprise without the hassle of meticulous remote scripting. Action1 will help you streamline your patch management, simplify software distribution, provide unattended access capabilities, and save previous time on software/hardware inventory and endpoint management. The platform features:
- Cloud-based updates, deployment, monitoring, and remote access
- Sleek, contemporary, and efficient design without unnecessary features
- Numerous pre-configured apps, scripts, reports, and notifications
Sign up with Action1 for your first 200 endpoints – absolutely free!
