By connecting a USB drive to your computer, any user can infect it with malware or copy important information from it. In today’s article we will look at how to disable USB drives in Windows 10.This method works in Windows 10 Pro, Enterprise or Education.
1. Disable Usb Drives in Registry Editor
This method works in all editions of running Windows 10, and it disconnects only USB drives, without affecting the mouse, keyboard, and printer connected via USB. Before editing the registry, it is recommended to create a system restore point.
Open Windows registry editor: in the search bar or in the menu to execute (run with the Win + R keys) enter the regedit command and press the Enter key.
Go to HKEY_LOCAL_MACHINE \ SYSTEM \ CurrentControlSet \ Services \ USBSTOR. In the USBSTOR section, open the Start ⇨ parameter in the “Value” field, set 4 and click “OK”.
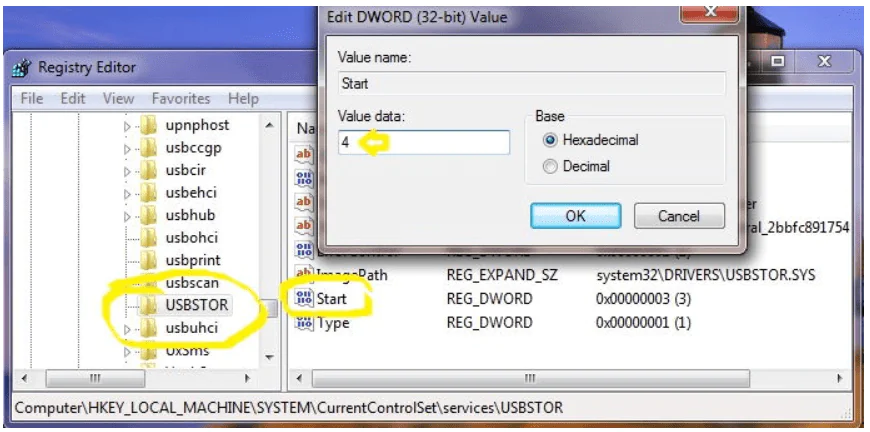
Now, if you connect a USB flash drive to a computer, it will not be displayed anywhere, and in Device Manager you will see an error installing the driver for this device. If you want to re-enable USB drives in the future — change the value of the “Start” parameter to 3 and click “OK”.
2. Disable Usb Drives in Group Policies
First, you need to open local group policy editor.
In the search bar or in the menu to execute (execute is called with the Win + R keys), enter:
gpedit.msc
and press the Enter key.
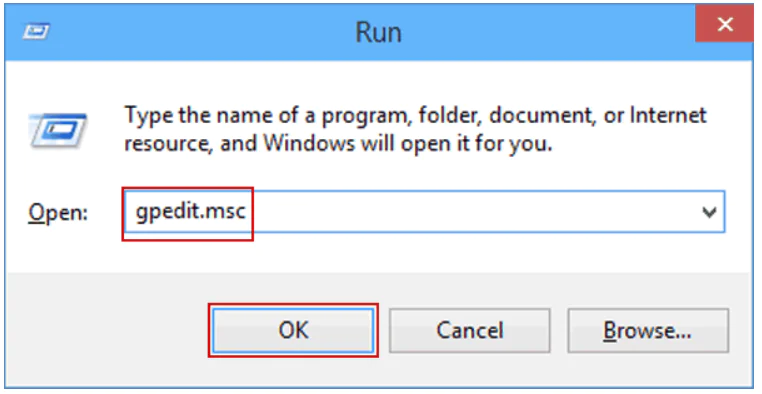
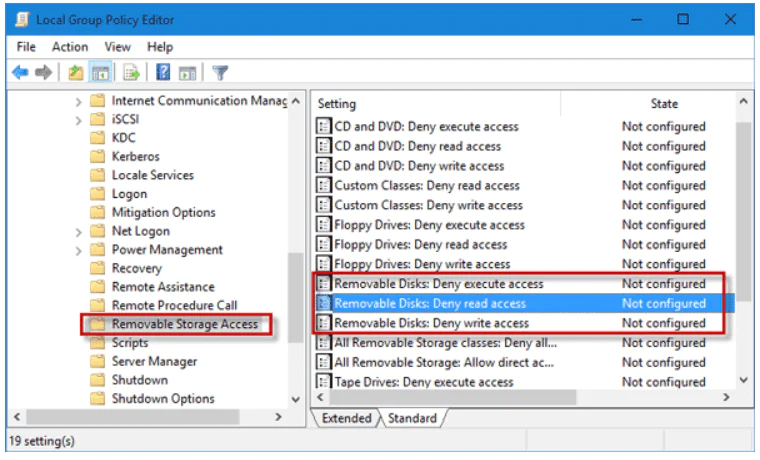
Then you need to open Removable Disks: Deny Execute Access
To do this open “Computer Configuration” ⇨ “Administrative Templates” ⇨ “System” ⇨ “Removable Storage Access” ⇨ in the right pane, open “Removable Disks: Deny Execute Access”.
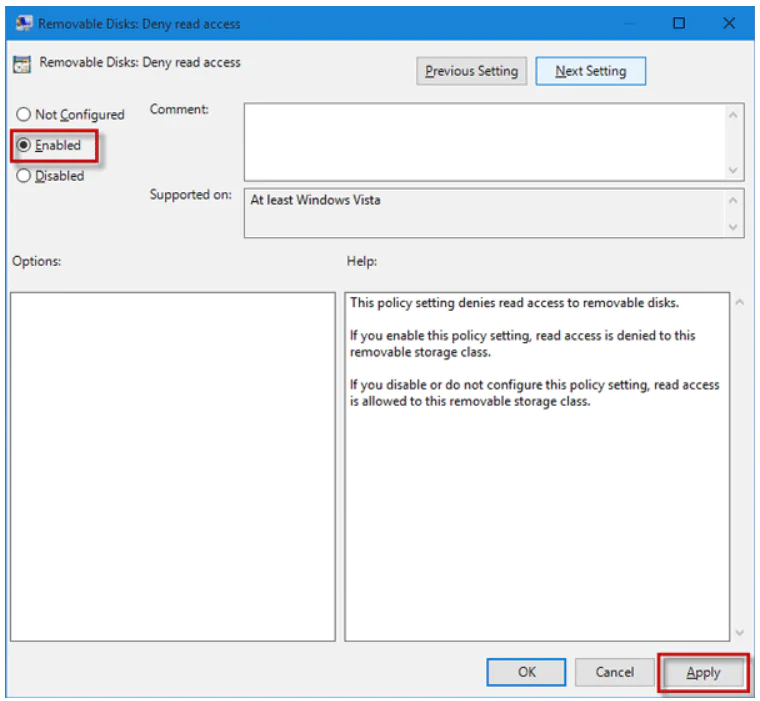
After that choose “Enabled” and click “OK”. Also put is included in “Removable disks: Deny Read Access” and in “Removable disks: Deny Write Access”, they are also found in “Computer configuration” ⇨ “Administrative templates” ⇨ “System” ⇨ “Removable Storage Access”.
3. Enable or Disable Usb Ports Through Device Manager
IMPORTANT: We recommend creating a system restore point before disconnecting the USB ports so you can easily turn them on again whenever you want.
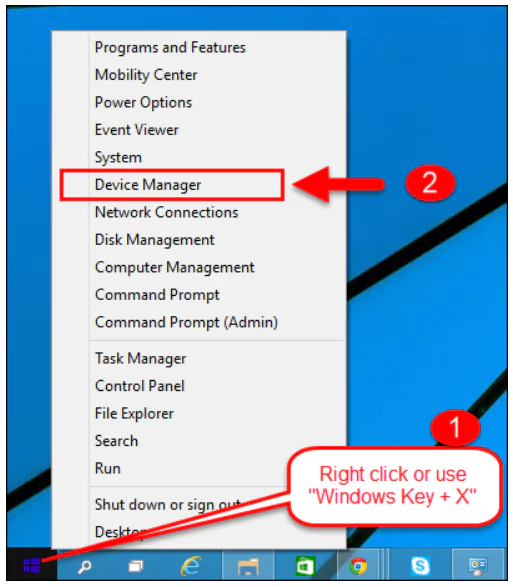
Right-click on the “Start” button on the taskbar and select “Device Manager”.
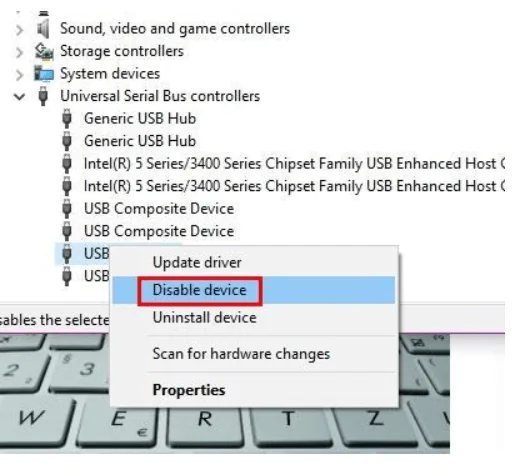
Expand USB Controllers. Right-click on all entries, one after another, and click “Disable Device”. Click “Yes” when you see a confirmation dialog.
4. Disable or Enable Usb Ports in BIOS
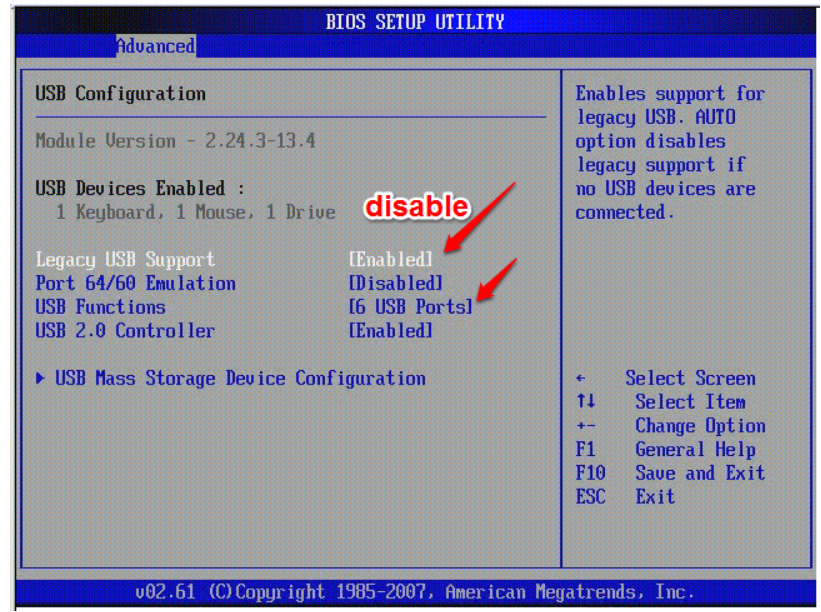
Some manufacturers offer an option in BIOS / UEFI to disable or enable USB ports. Download the BIOS / UEFI and check if there is an option to disable or enable USB ports. Check your PC user manual to find out if the option to enable or disable USB ports is present in the BIOS / UEFI.
Consider Using Action1 to Block USB Ports Remotely if:
- You need to perform an action on multiple computers simultaneously.
- You have remote employees with computers not connected to your corporate network.
Action1 is an autonomous endpoint management solution for patch management, software deployment, remote desktop, IT asset inventory and reporting.


