One of the greatest advantages of having an Active Directory Domain is the possibility to deploy software via GPO (Group Policy Object). Software deployment is crucial in business environments to save time and money. Therefore, Microsoft not only gives us a simple way to execute msi file, but also provides a quick solution to uninstall it when we don’t need it anymore. So, this manual shows you one of the ways to install software remotely.
1. Create a New GPO
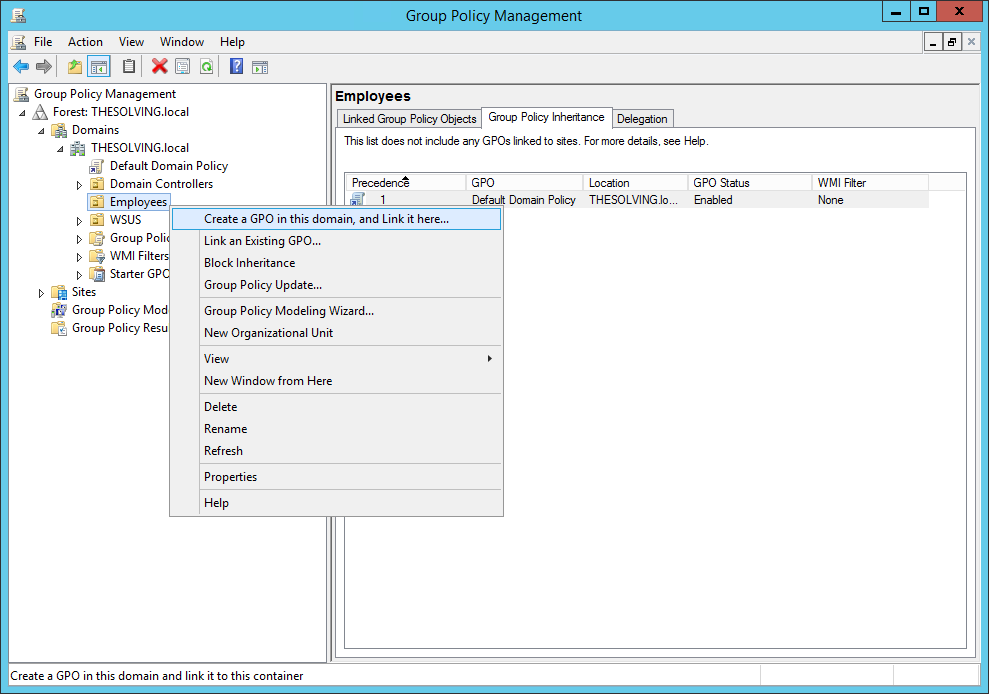
To deploy software GPO in Group Policy Management, expand the node of the desired forest, and then expand the Domains node in it. Right-click the Employees node. As a result, a context menu will open, in which select the Create a GPO in this domain command, and Link it here
2. Name the Object To Be Created
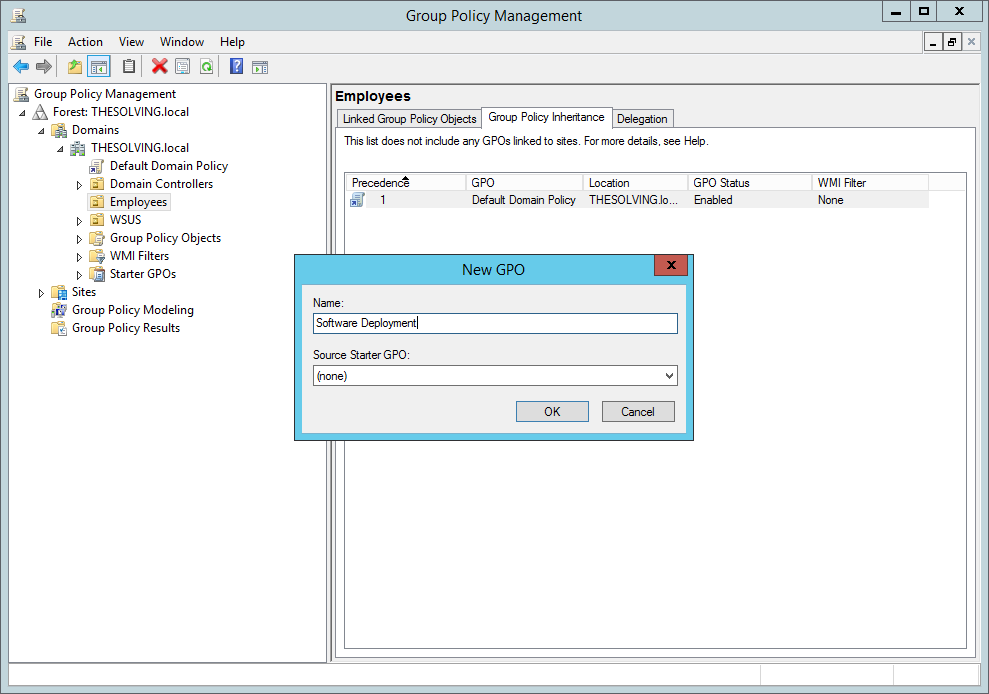
In the New GPO dialog box, enter a friendly name for the new GPO, for example, Software Deployment. If you want to use the starting GPO as a source of parameters, select it in the Source Starter GPO list. When you click OK, a new GPO is added to the Group Policy Objects container.
3. Choose Command Edit to Change Our Policy
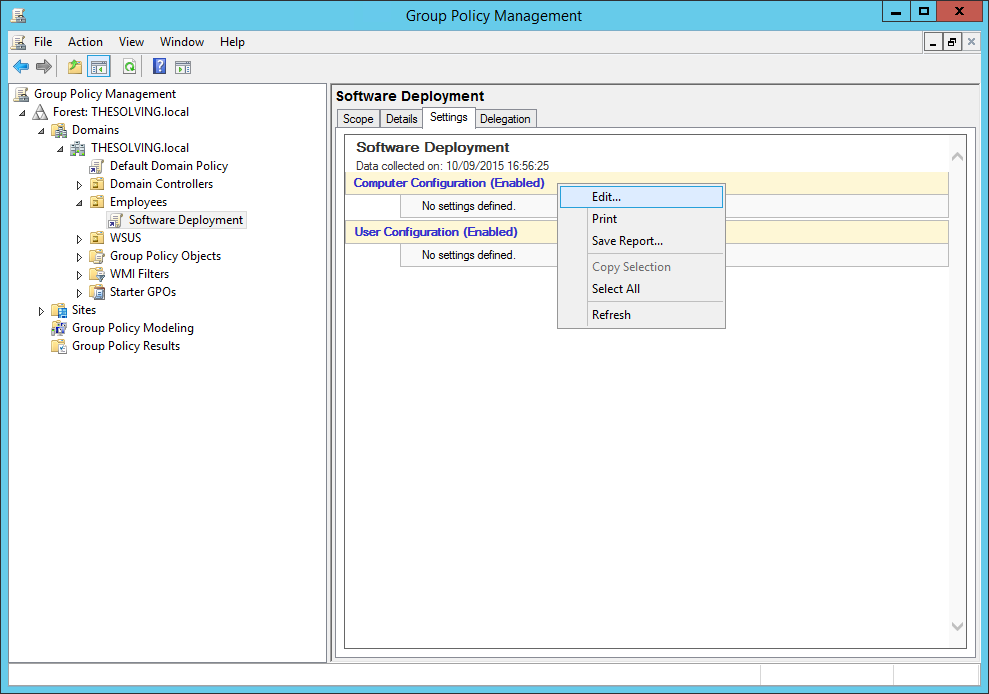
Right-click the new GPO and select Edit. Configure the required settings in the policy editor and close the editor.
4. Choose New Package in Software Installation Node
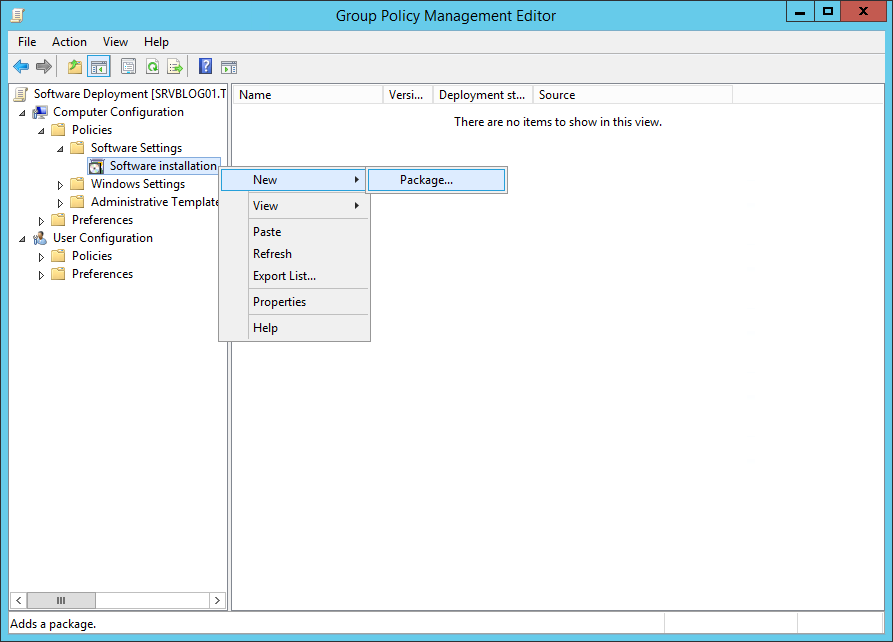
In the Group Policy Management Editor snap-in, go to “Computer Configuration > Policies > Software Settings > Software installation”. Right click on the item “Software installation”, select “New > Packages”
5. Specify a Network Path to the Software Package
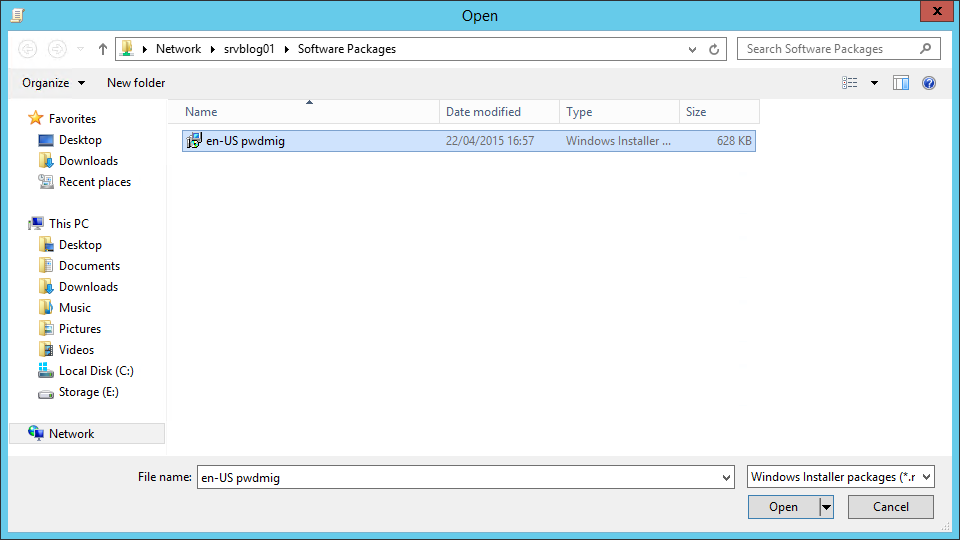
- In the window that appears, go to the previously prepared software distribution point and select the Windows Installer file, using which, the software will be installed. At this stage, pay attention to two features. First, the shared access to this folder should be open.
- The second, more important point: when choosing a folder, you need to specify not a local drive letter on your domain controller (in the event that the installation package is located on the domain controller), but the network path, since this location is published for client computers.
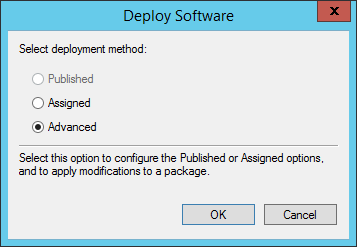
6. Select Deployment Method
We are setting up a Computer Configuration policy, so we can only assign the application and not publish it. Assigned applications will be installed at the first reboot or policy update while published applications will be available for the users to be installed or removed. For this reason, you can only publish application to users. The Advanced option simply make us able to edit the application deployment Properties.
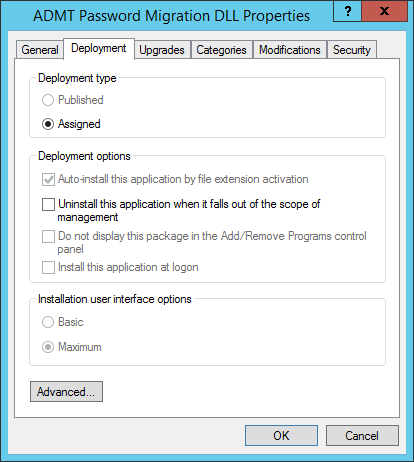
7. Use Default Settings for Deployment Method
In the properties dialog of the installation package, which pops up a few seconds after specifying the deployment method, you can specify additional parameters. After you have made all the necessary changes, click “OK.”
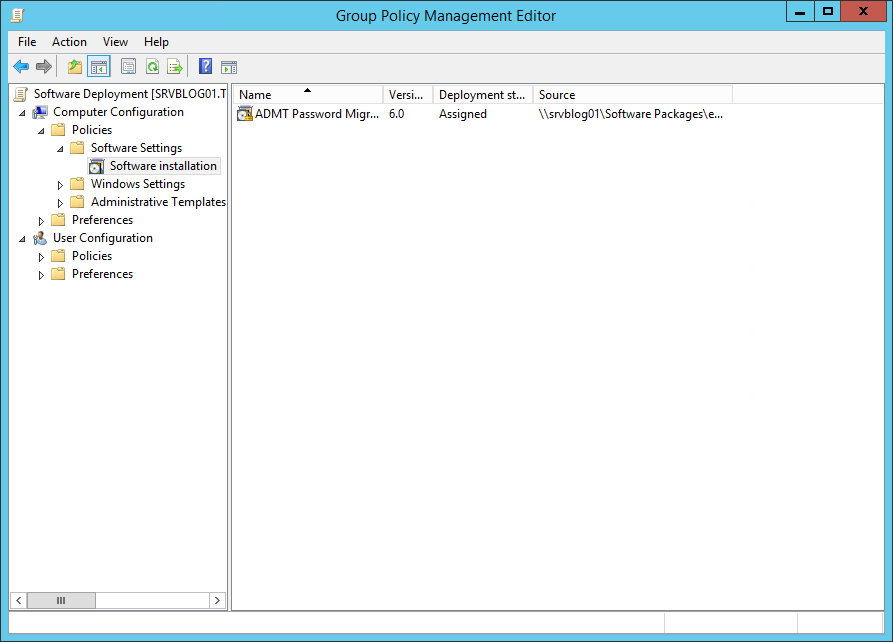
8. Deployment Set up Window
The policy editing window should look like this (screenshot).
- Close the Group Policy Management window and open the Windows command prompt.
- At the command prompt, enter the command “gpupdate / force”.
- The server will report that it will not be able to apply the installation policy without rebooting and will offer to reboot.
- Type in the command line “y” (in the English layout) and press the “Enter” key.
- The system will restart 1 minute after entering the command. Or just restart the server through the Start menu.
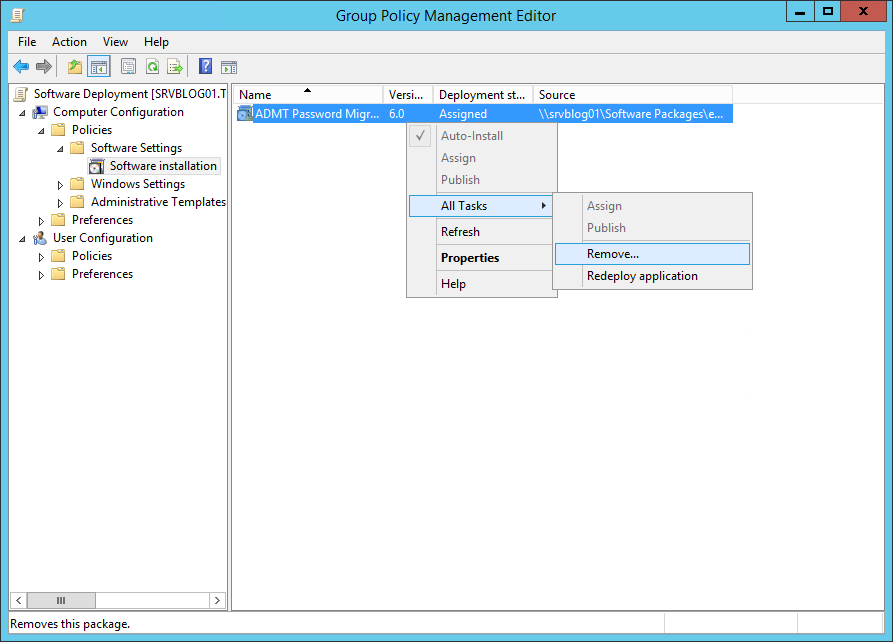
9. If You No Longer Need to Deploy Software GPO You Can Remove Programs
To remove software using GPO, in the Group Policy Management Editor snap-in, expand User Configuration \ Policies \ Software Configuration, go to the Software Installation node and click on this node with the left mouse button. Your installed program appears in the window. Click on it with the right mouse button and select “All tasks” ⇨ “Delete” from the pop-up menu.
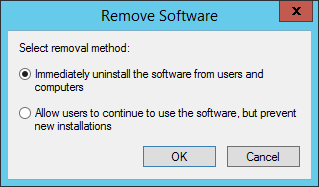
10. Select Removal Method
After that, the “Remove Applications” window pops up. Select in this window the option “Immediately remove this application from the computers of all users.” Close the window of the Group Policy Management Editor, in cmd enter and execute the gpupdate /force command, and then restart the server.
Consider Using Action1 to Deploy Software Remotely if:
- You need to perform an action on multiple computers simultaneously.
- You have remote employees with computers not connected to your corporate network.
Action1 is a cloud-based platform for patch management, software deployment, remote desktop, software/hardware inventory, endpoint management and endpoint configuration reporting.
