Remotely connecting to another computer’s Windows Registry isn’t something you’ll do regularly, if ever, but Registry Editor does let you do it, assuming a number of things are in order. The steps outlined below will work to deploy registry changes remotely in all commonly used versions of Windows, including Windows 10, Windows 8, Windows 7, Windows Vista, and Windows XP.
How to Connect to a Remote Registry
1. Open Registry Editor by executing regedit from any command-line interface in Windows.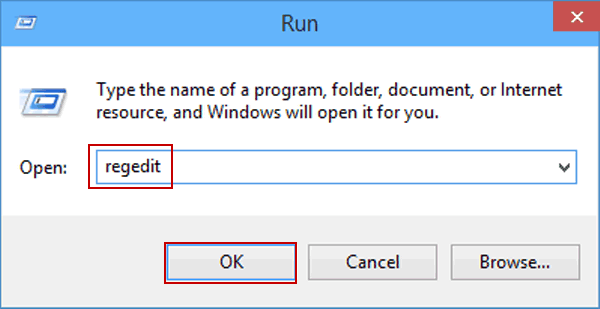
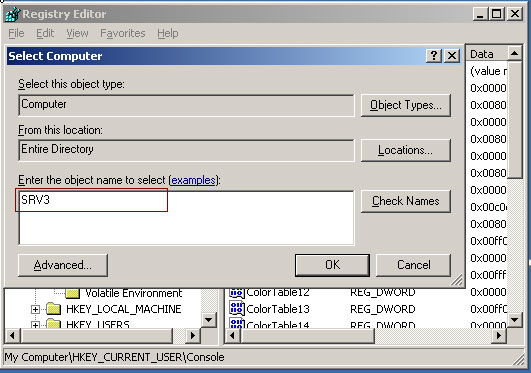
2. Tap or click File from the menu at the top of the Registry Editor window and then choose Connect Network Registry….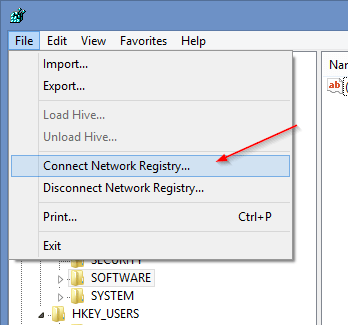
3. In the Enter the object name to select text area on this Select Computer window that you should now see, enter the name of the computer you want to remotely access the registry for.
4. Tap or click the Check Names button after you enter the remote computer’s name. After several seconds or more, depending on the speed and size of your network and computer, you’ll see the remote computer’s full path, shown as LOCATION\NAME.
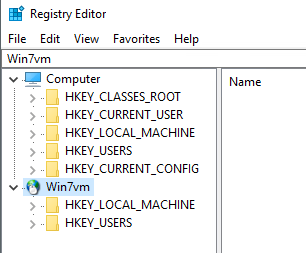
5. Tap or click the OK button. In what will probably only take second or less, Registry Editor will connect to the remote computer’s registry. You’ll see Computer (your computer), as well as the other computer you’re viewing the registry for, under [hostname].
6. Now that you’re connected, you can view whatever you like, and make whatever registry edits you need to make.
As you’re working in whatever remote registry you’re connected to, you may notice two things: significantly fewer registry hives than on your computer, and a number of “Access is denied” messages when navigating around. More on both issues below:
While your computer probably has at least five individual registry hives, you’ll notice immediately that the registry you’re connected to remotely only shows HKEY_LOCAL_MACHINE and HKEY_USERS.
The three remaining keys, HKEY_CLASSESS_ROOT, HKEY_CURRENT_USER, and HKEY_CURRENT_CONFIG, while not appearing like you may be used to, are all included in various subkeys within the two hives you do see. The “Access is denied” messages that you’re probably getting on HKEY_LOCAL_MACHINE and various keys under the HKEY_USERS hive are probably due to the fact that you don’t have administrator privileges on the remote computer. Give your account administrator access on the remote computer and then try again.
How to Enable the Remote Registry Service in Windows
The RemoteRegistry Windows Service must be enabled on the remote computer you wish to view or edit the registry on.
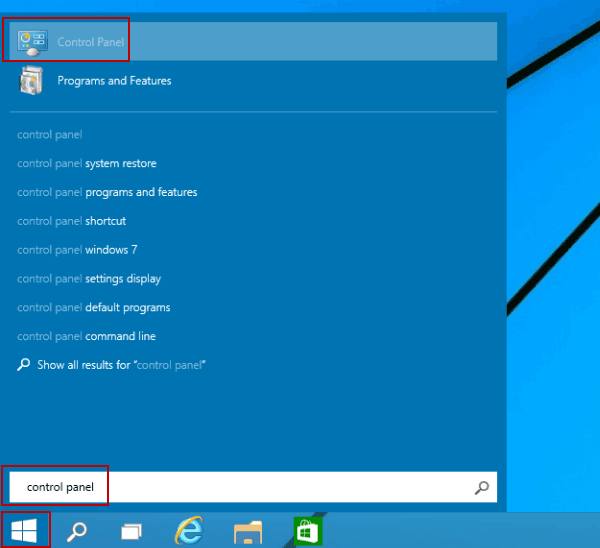
1. Open Control Panel on the computer you want to connect to.
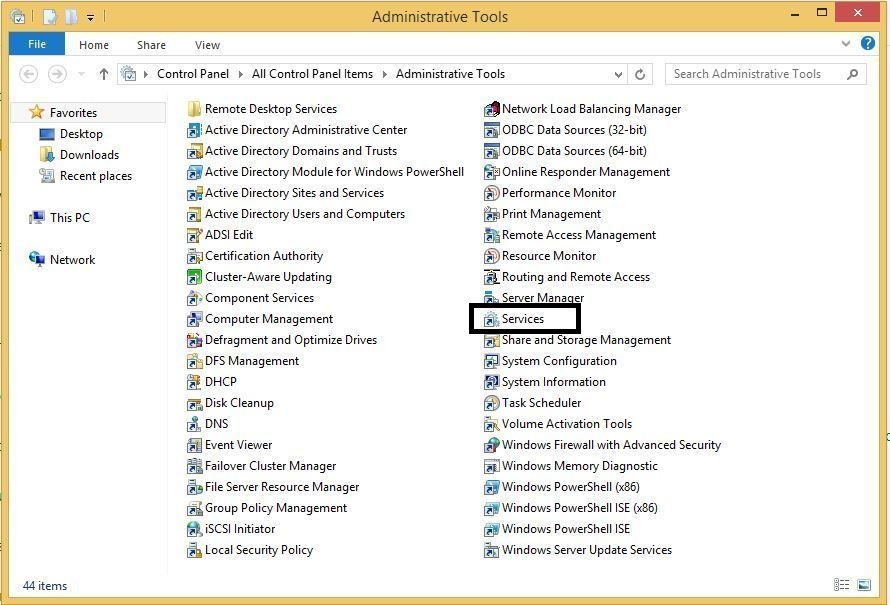
2. Once Control Panel is open, choose Administrative Tools, and then Services.
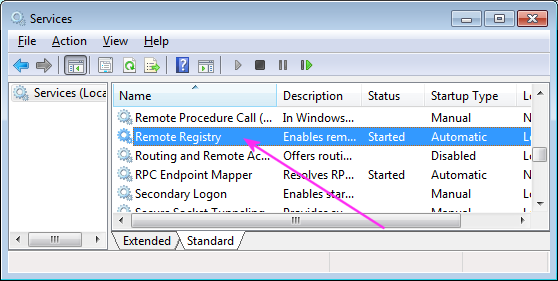
3. Find Remote Registry from the list of service names in the Services program that’s now open and then double-click or double-tap on it.
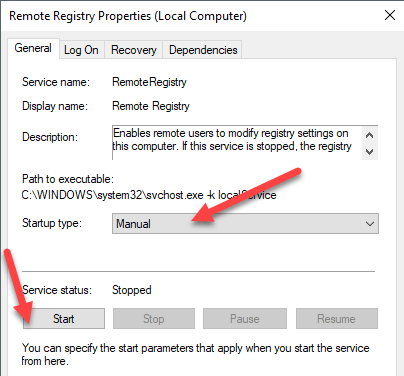
4. From the Startup type drop-down box, choose Manual.
5. Tap or click the Apply button.
6. Tap or click the Start button, followed by the OK button once the service is done starting.
7. Close the Services window, and any Control Panel windows you might still have open.
Consider using Action1 to Deploy Registry Changes if:
- You need to perform an action on multiple computers simultaneously.
- You have remote employees with computers not connected to your corporate network.
Action1 is a cloud-based platform for patch management, software deployment, remote desktop, software/hardware inventory, endpoint management and endpoint configuration reporting.
