SSO Authentication with Okta
To provide easy and secure access to Action1 console, Action1 enables users to log in using single sign-on (SSO) instead of maintaining Action1-specific user credentials. This explains how to configure SSO with Okta as an identity provider.
Configure Okta
Create App Integration
- Sign in to Okta console as administrator.
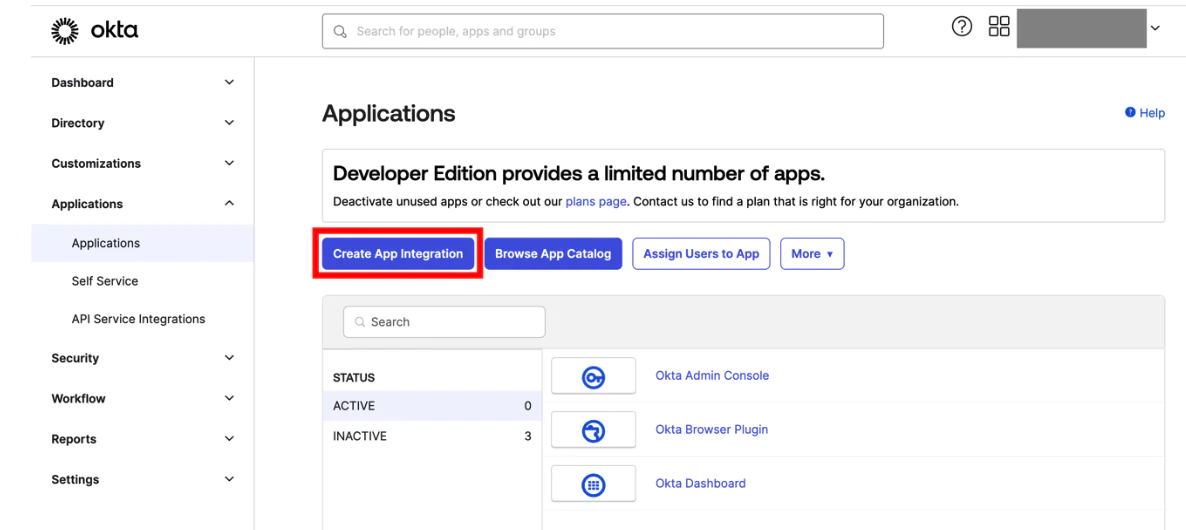
- Navigate to Applications and select Create App Integration.
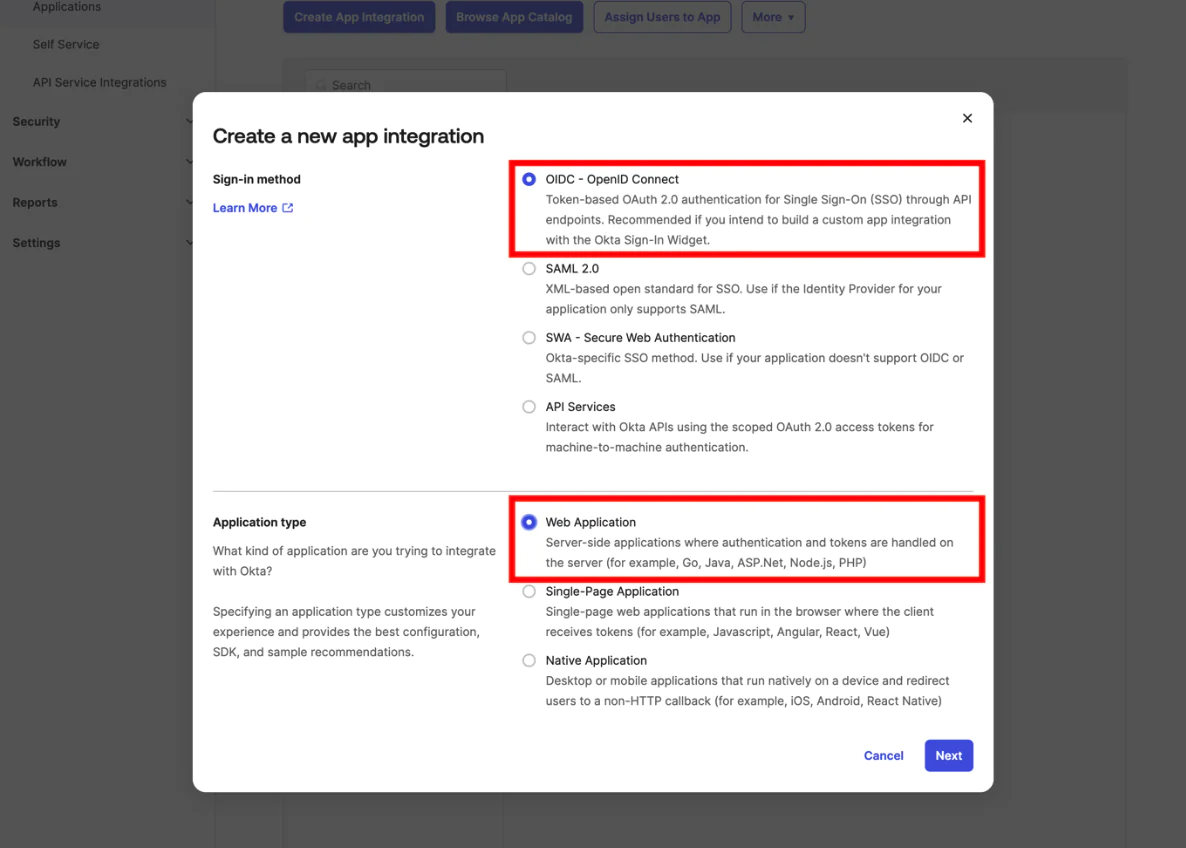
- Set the sign-in method to OIDC – Open ID Connect and the application type to Web Application.
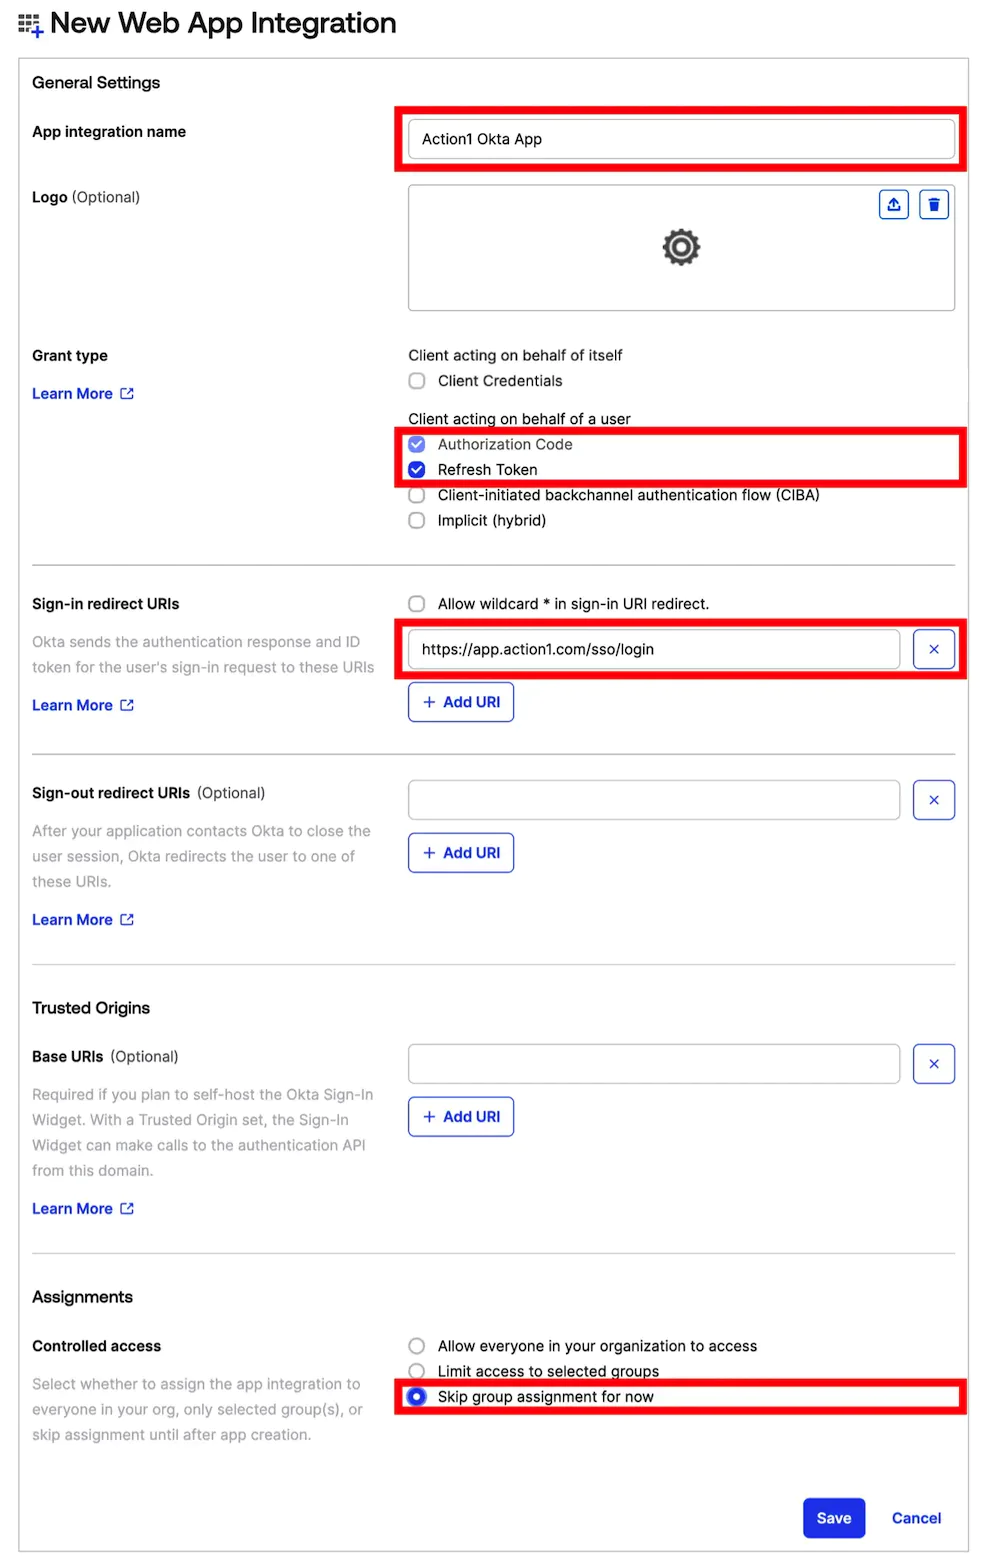
- Proceed to the app’s General settings and complete the following fields:
- Provide a name in the App integration name
- As a grant type, select Refresh Token. Authorization code is enabled by default.
- Depending on your region, set the Sign-in redirect URIs:
- North America: https://app.action1.com/sso/login
- Europe: https://app.eu.action1.com/sso/login
- Australia: https://app.au.action1.com/sso/login
- In Assignments, set Controlled access to Skip group assignment for now, and Save.
Configure App Integration
- Navigate to the app you created.
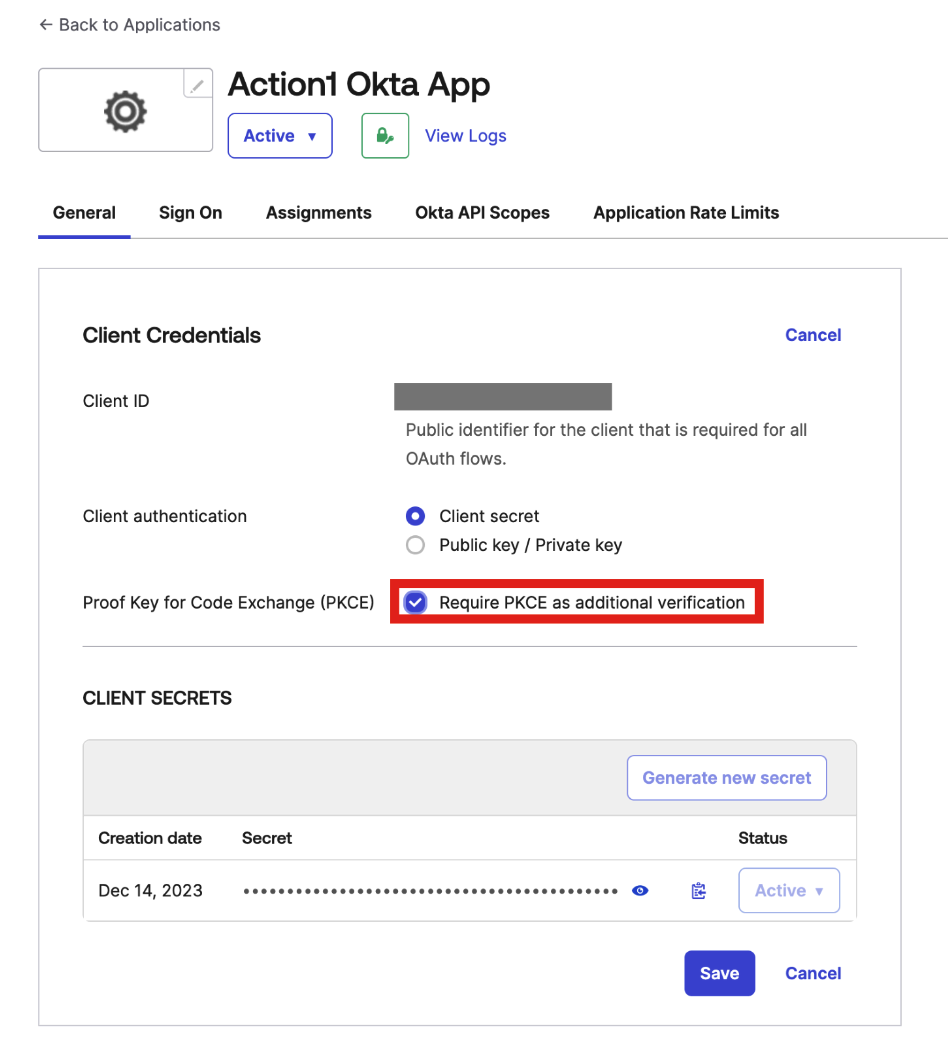
- On the General tab, select Require PKCE as additional verification.
- Copy Client ID and Secret to use later in Action1 settings.
- On the Assignments tab, specify users who can log in to Action1 using Okta integration. Note that users must be already created in Okta.
- Navigate to Security | API and copy Issuer URI to use later in Action1 settings. By default, the Issuer URI includes your Okta organization name (“https://${yourOktaOrg}”).
Enabling SSO with Okta
When you sign up for Action1, you have to create the initial Action1 credentials (without SSO) and then invite the existing accounts from your organization’s Okta. After creating the initial Action1 credentials while signing up, follow the below steps to enable Okta SSO:
- Log in to Action1 using your initial Action1 credentials (do not click Okta during login).
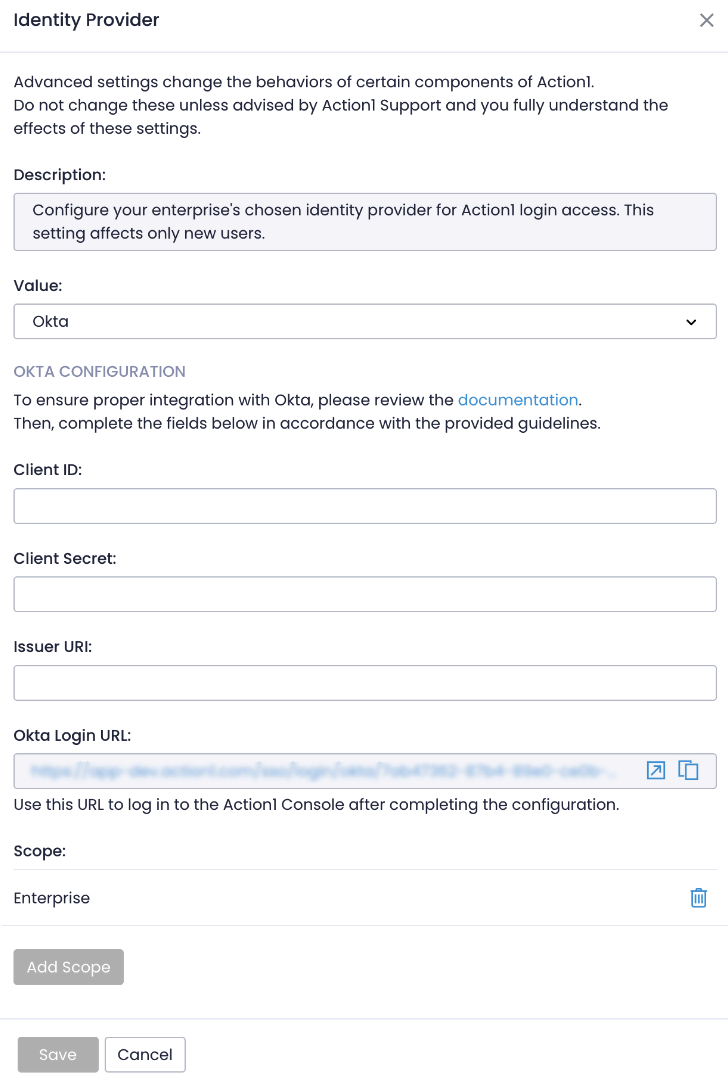
- Navigate to Advanced page and select Identity Provider.
- Specify Okta as the identity provider. Keep the scope set to Enterprise. With this setting changed, all new users will use Okta.
- Enter Client ID, Client Secret, and Issuer URI of your Okta application (see the previous steps).
NOTE: We recommend keeping the initial non-SSO Action1 credentials for emergency recovery purposes, in case you lose access to Okta. Store these credentials securely, as they have Enterprise Admin access by default.
Inviting Users to SSO with Okta
Note: Make sure these users already exist in Okta. If not, proceed to Okta to create users.
- Navigate to the Users page.
- Invite users – they will receive a login link to their email.
Migrating Existing Users to Okta SSO
Note: Make sure these users already exist in Okta. If not, proceed to Okta to create users.
Important: For the next steps, do not remove your last enterprise admin account, create a secondary enterprise admin or elevate another user to the enterprise admin role. Failure to do so could lead to admin account access being lost. Next steps will delete user accounts in order to switch to Okta, users will be unable to access Action1 until their user account migration is complete.
- Navigate to the Users page.
- Find the user account you want to switch to Okta and select Delete. Alternatively, set the user’s email to non-existant such as “[email protected]”. You might be unable to remove users that have roles assigned, make sure to revoke roles first.
- Invite the user again into Action1 by sending an invite again.
