Patch Management in Minutes with Action1
Action1 reinvents patch management with an infinitely scalable and highly secure platform configurable in 5 minutes that just works. With integrated real-time vulnerability discovery and automated remediation for both third-party software and OS, peer-to-peer patch distribution, and IT ecosystem integrations, it ensures continuous patch compliance and reduces security and ransomware risks – all while lowering costs. Action1 is certified for SOC 2/ISO 27001 and is trusted by thousands of enterprises managing millions of endpoints globally.
This quick-start guide shows how to enable patch management for third-party apps and OS in under 5 minutes.
Step 1: Add Endpoints
Step 2: Manually Review and Deploy Patches
Step 3: Automate Deployment of Critical Updates
Step 4: Generate Patch Compliance Reports
Step 1. Add Endpoints
Before you can start patching, you need to install the Action1 agent on your target endpoints. It is a lightweight application with a minimal system footprint, which remains idle unless an endpoint needs patching or a status refresh.
To deploy the Action1 agent:
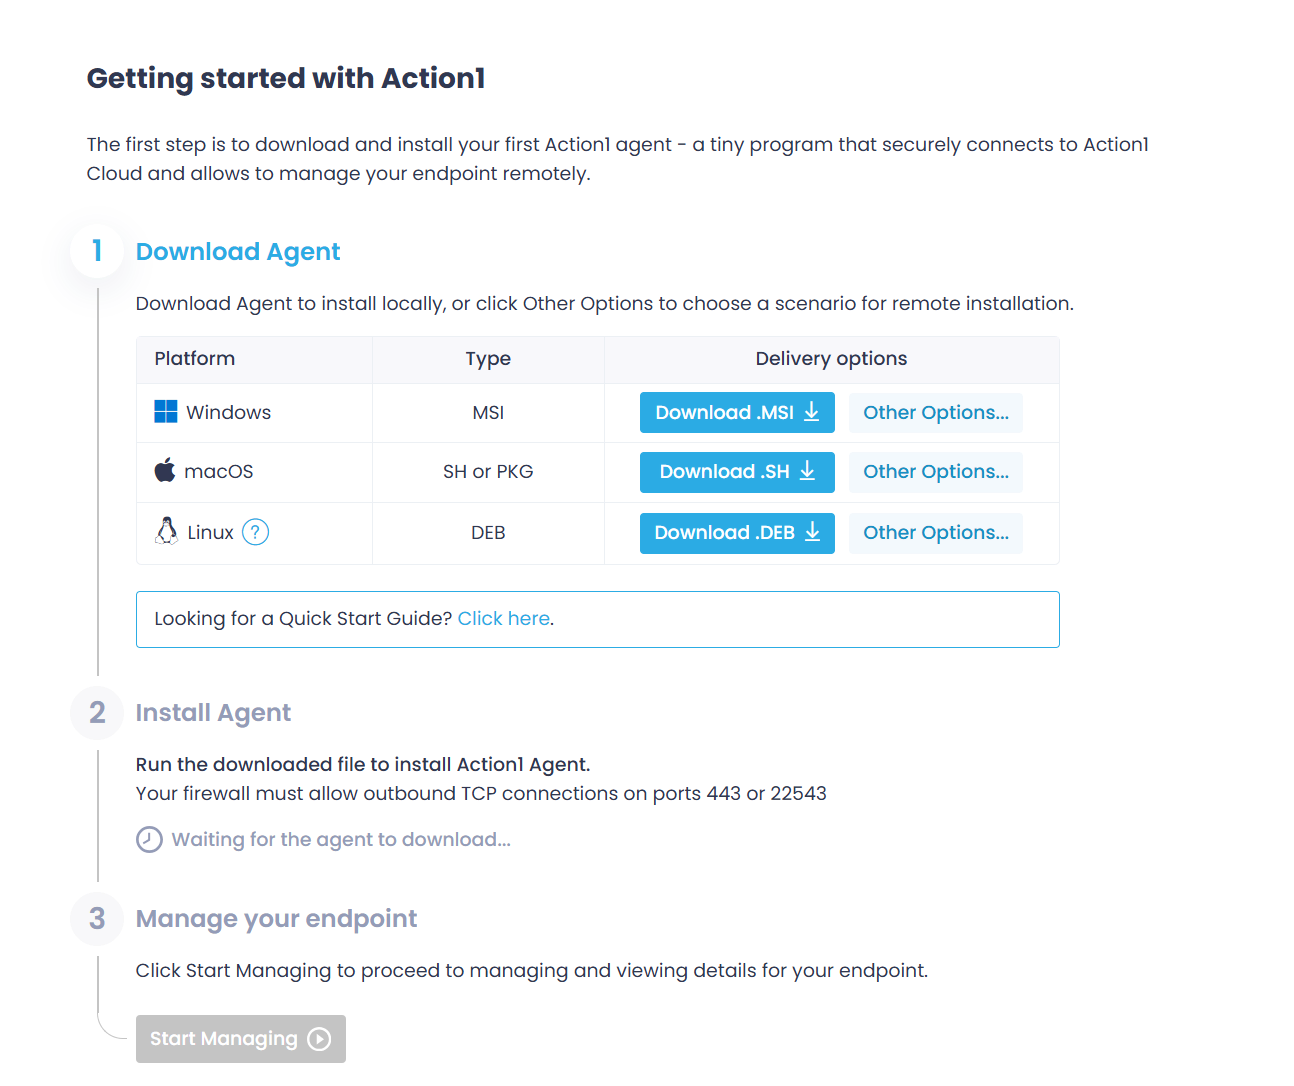
- In the Action1 console, navigate to Endpoints and click Install Agent.
- In the Download Agent step, use the Download button to get the setup package for your target platform. It will be preconfigured with connection parameters specific to your organization.
- Install the agent.
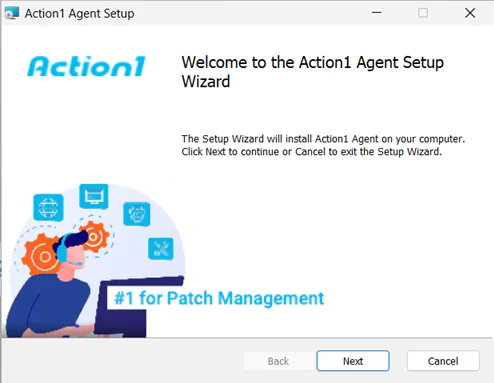
- For Windows endpoint: follow the steps of the installation wizard. In the final step, the setup may prompt you to elevate privileges to complete the installation. The agent is installed under the LOCAL SYSTEM account into %WinDir%\Action1 folder as a service called Action1 Agent. See also: Agent Installation on Windows Endpoints.
-
- For macOS endpoint: locate the downloaded script named action1_agent_YourOrganizationName.sh and copy the script name with the extension. Then launch the Terminal app and run the following command, providing the script name:
bash {script_name}
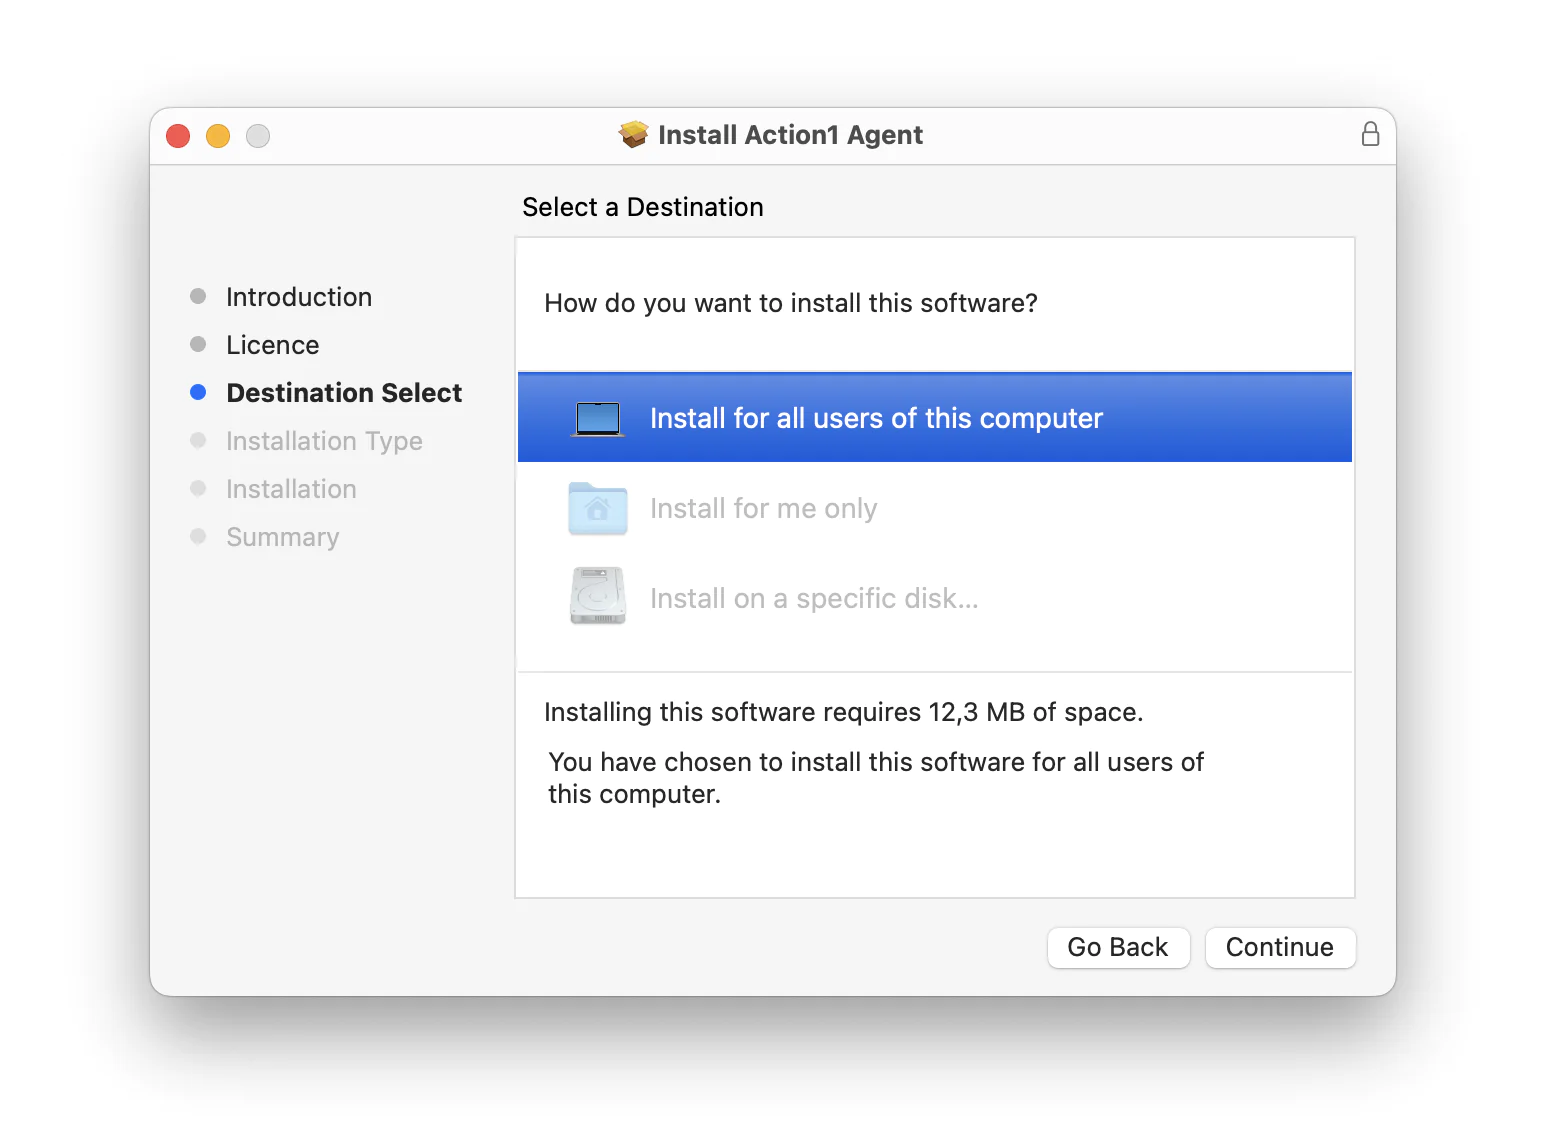
This will automatically download and start the Action1 agent setup. Follow the steps of the Agent setup wizard. The agent is installed under the administrative account in the /usr/local/action1 directory and operates as a daemon. See also: Agent Installation on macOS Endpoints.
- For macOS endpoint: locate the downloaded script named action1_agent_YourOrganizationName.sh and copy the script name with the extension. Then launch the Terminal app and run the following command, providing the script name:
-
- For Linux endpoint: Locate the downloaded package and copy its full name, including the path, to the /tmp directory. Run the package manager, providing the package name and path:
cp "action1_agent(<your_org_name>).deb" /tmpcd /tmpsudo apt install "./action1_agent(<your_org_name>).deb"
This will automatically download and start the Action1 agent setup. Follow the steps of the Agent setup wizard. The agent is installed under the administrative account in the /usr/local/action1 directory and operates as a daemon. See also: Agent Installation on Linux Endpoints.
- For Linux endpoint: Locate the downloaded package and copy its full name, including the path, to the /tmp directory. Run the package manager, providing the package name and path:
- Check Connection Status. Return to the Action1 console and wait for the Action1 cloud connection check to complete.
- Navigate to the Endpoints page to verify that the target endpoint is shown there. This page will display all system information for the endpoint, such as missing updates, installed software, and hardware details.
Try later: For bulk deployment on multiple endpoints, use Microsoft Intune, Group Policy, or another supported deployment method. See also: Action1 Agent Installation.
Step 2. Manually Review and Deploy Patches
All endpoint information, including missing patches, installed software, and OS details, is refreshed in real time. You don’t need to schedule a periodic assessment to determine if any updates are missing.
To review and deploy patches manually:
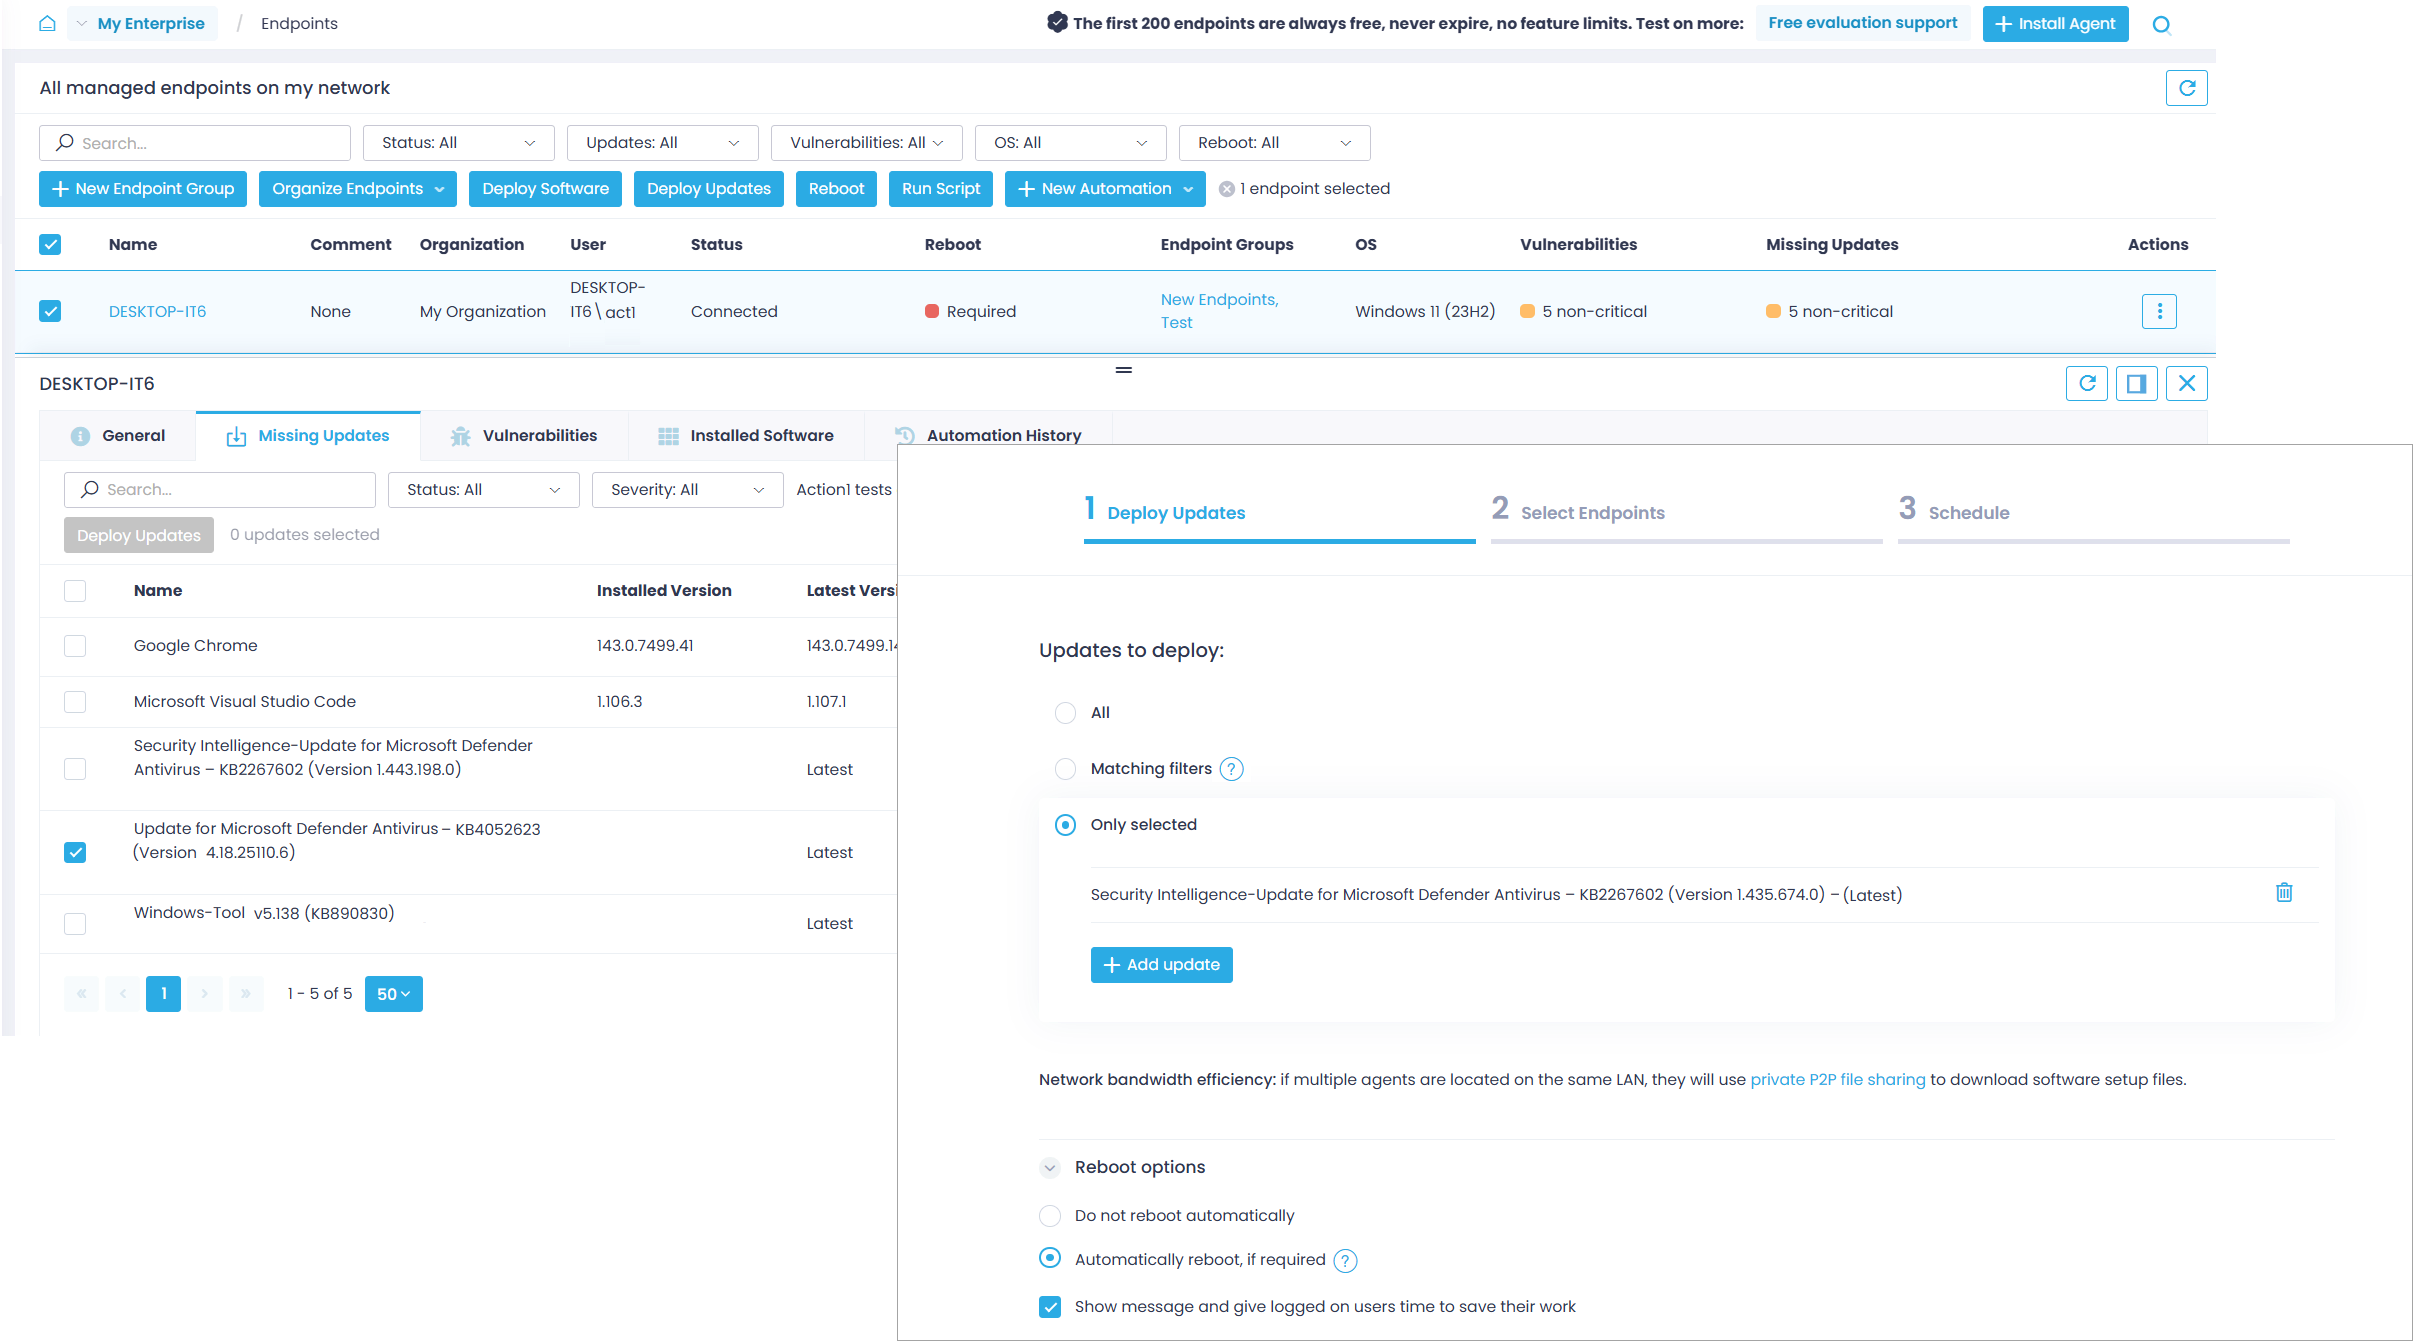
- In the Action1 console, navigate to the Endpoints view and click on the endpoint name.
- Go to the Missing Updates tab and select the updates you want to deploy. All applicable updates — both for OS and third-party applications — are shown in a single view, including the update type and security severity.
- Click Deploy Update to start the update wizard. It will prepopulate the list of selected updates.
- Adjust the Reboot Options as needed (currently applies to Windows endpoints; for other platforms, see Restart Endpoints Remotely). By default, the users will have up to 60 minutes to save their work if any of the updates require a reboot.
- Click Next Step twice to proceed to the scheduling options. For testing purposes, leave the default Run Now option selected and click Finish.
- Action1 will begin deploying the selected updates and will report progress and results in real-time.
Try later: Check out the Vulnerabilities view to remediate vulnerabilities.
Step 3. Automate Deployment of Critical Updates
Automate patch and vulnerability management routines to ensure continuous compliance across your endpoints.
To automate the deployment of critical security patches for OS and apps 3 days after they are released:
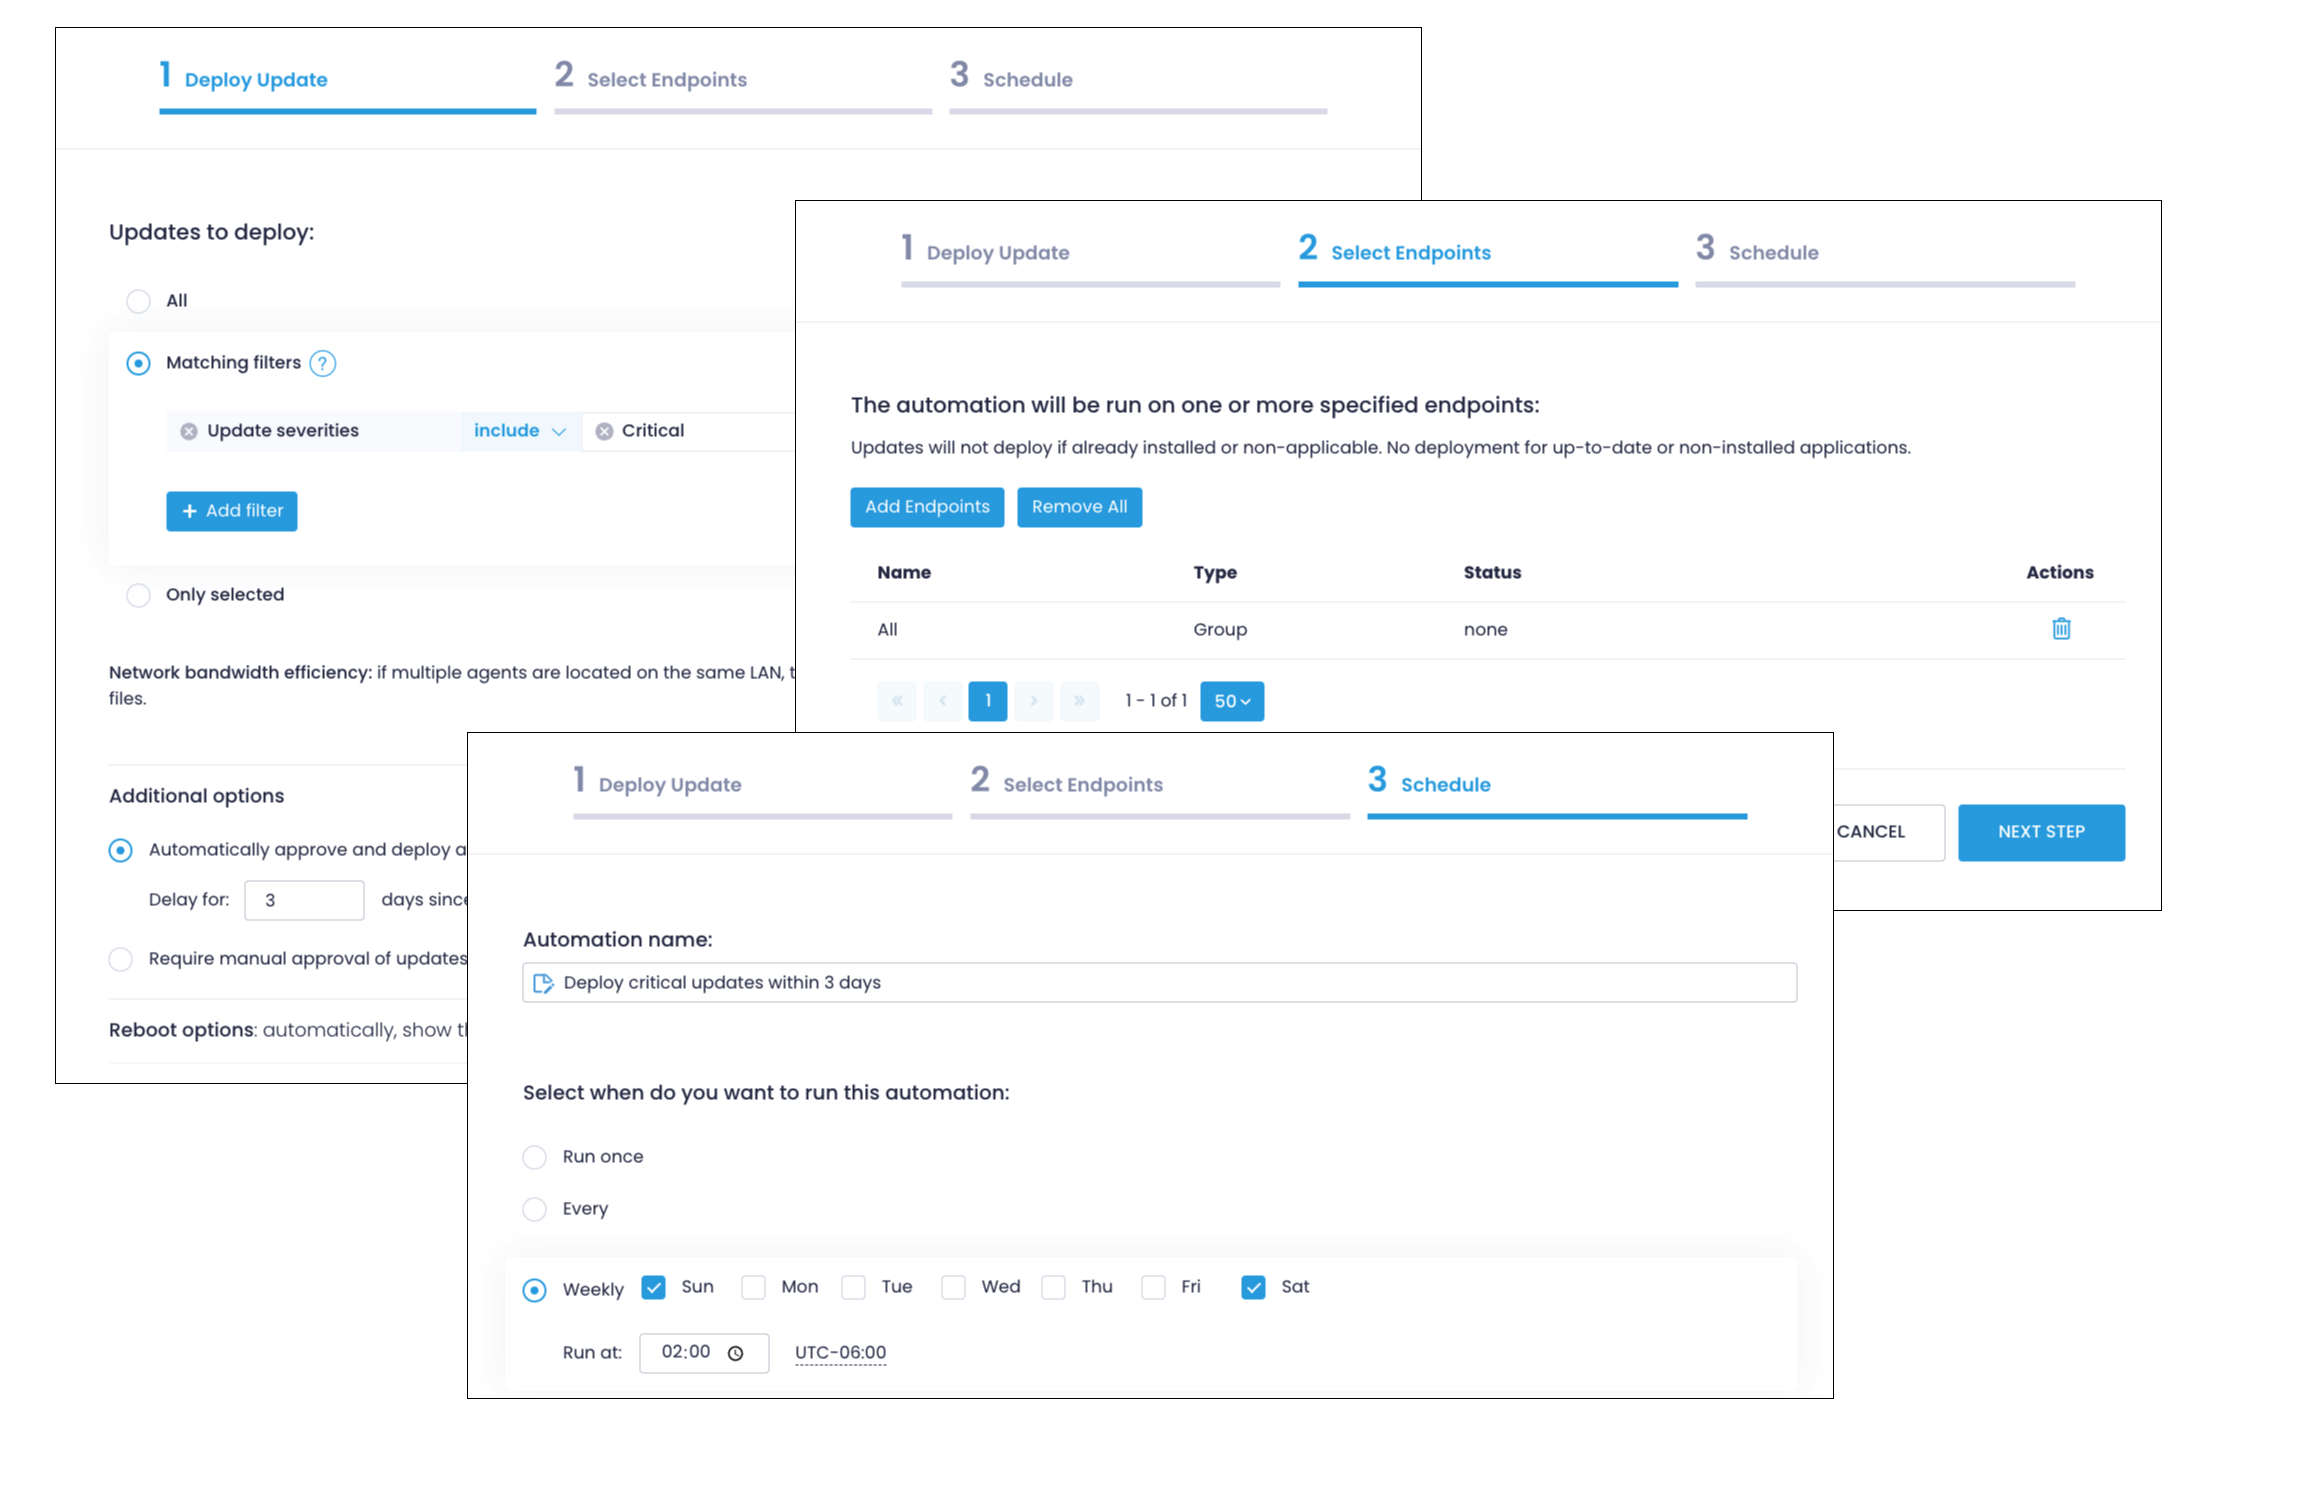
- Navigate to Automations, select New Automation, and click Deploy Update.
- On the Deploy Update step, select Matching Filters.
- Click Add filter, select Update severities, and select Critical.
- Below the filters, click Additional options, select Automatically approve and deploy all matching updates, and enter 3 days as the delay parameter.
- Adjust the Reboot Options as needed.
- Click Add Endpoints to select the endpoints or groups to include in this automation.
- On the Schedule step, specify when the automation should run — for example, weekly on Sundays and Saturdays at 2 AM.
See also: Automation with Action1
Try later: Create another automation that requires manual approval of updates and use the Update Approval section to selectively approve or decline updates. Another option is to create a broader automation to include updates beyond critical severity.
Step 4. Generate Patch Compliance Reports
Action1 comes with a real-time patch compliance dashboard and live reports to facilitate periodic reviews of your security posture and assist with compliance audits.
To generate and subscribe to reports:
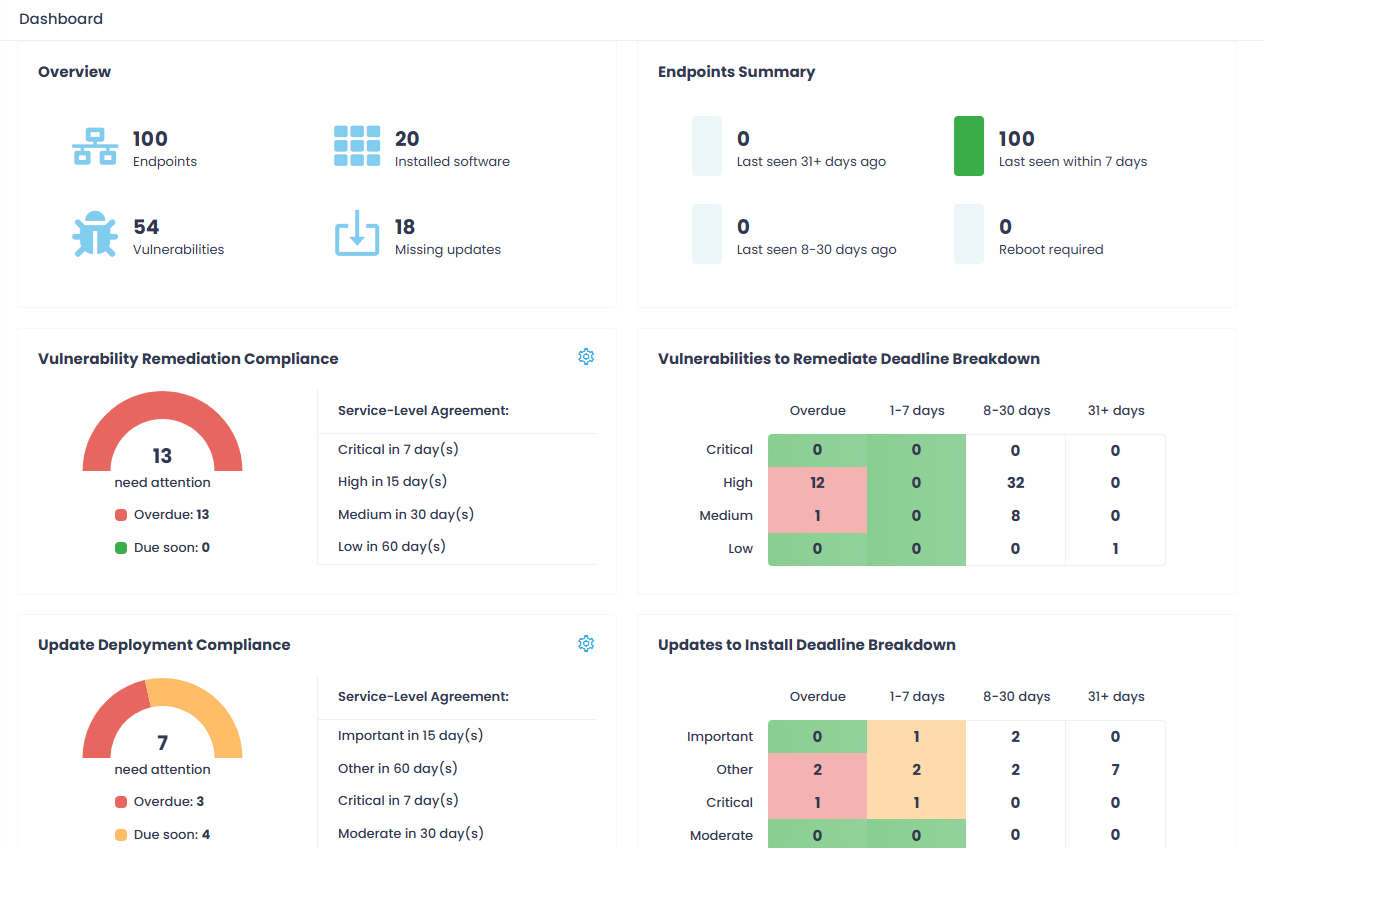
- Navigate to Dashboard for a birds-eye view of your endpoints’ health, including vulnerability remediation compliance, pending deployments, required reboots, etc.
- Go to Built-in Reports | Patch Management to access detailed reports on daily and weekly patch statistics, missing updates, required reboots, and other patching metrics.
- Click Tools | Subscribe within any report to schedule email delivery (e.g., every Monday). See also: Scheduling Reports Delivery
Next Steps
Action1 offers a broad range of capabilities to further streamline your patch management workflows. Once you are familiar with the basics, consider exploring the following features:
Leverage app-based multi-factor authentication
Multi-factor authentication (MFA) provides enhanced protection for user accounts by adding an extra layer of verification. While email-based MFA is enabled by default, Action1 strongly recommends using app-based MFA for increased security. You can use, for example, Google Authenticator, Twilio Authy, Duo Mobile, or Microsoft Authenticator. For details, see Multi-factor Authentication.
Create endpoint groups
Segment endpoints by server role, OS version, location, department, or other criteria to apply customized automation rules. Navigate to Endpoints and click Create Group. For details, see Endpoint Groups.
View installed software
Go to the Installed Software section to a list of applications installed on your endpoints, along with their version details and update availability. For details, see View Installed Software.
Deploy applications
Remotely install and configure applications using the pre-configured packages available in the Software Repository. Navigate to Software Repository, select one or more applications, and click Deploy to Endpoints. To deploy custom applications, click +Add to Repository. For instructions on installing Linux packages, see Deploy Software.
Uninstall applications
Remove outdated or unnecessary applications manually, or automate the process. Select one or more endpoints and click Uninstall Software, or create an Uninstall Software automation to streamline automatic uninstalls. For details, see Uninstall Software.
Run scripts
Use the Script Library to perform remote management tasks, such as blocking Windows Feature Updates, deleting temporary files, deploying or removing Linux packages, restarting Linux and macOS endpoints, and more. You can also add your custom scripts to the list. For details, see Script Library.
