Multi-Factor Authentication
Action1 protects access to its resources by enforcing two-factor authentication for all our users by default. The multi-factor authentication compliments the traditional “login & password” sign-in procedure with an additional verification step. Currently, Action1 provides two types of MFA:
- Email-based MFA. The email-based multi-factor authentication is enabled by default. It is less secure than the app-based. With email-based MFA, you’ll get one-codes to your mailbox.
- App-based MFA. To enhance security, Action1 suggests leveraging an authentication app such as Google Authenticator, Twilio Authy, Duo Mobile, or Microsoft Authenticator.
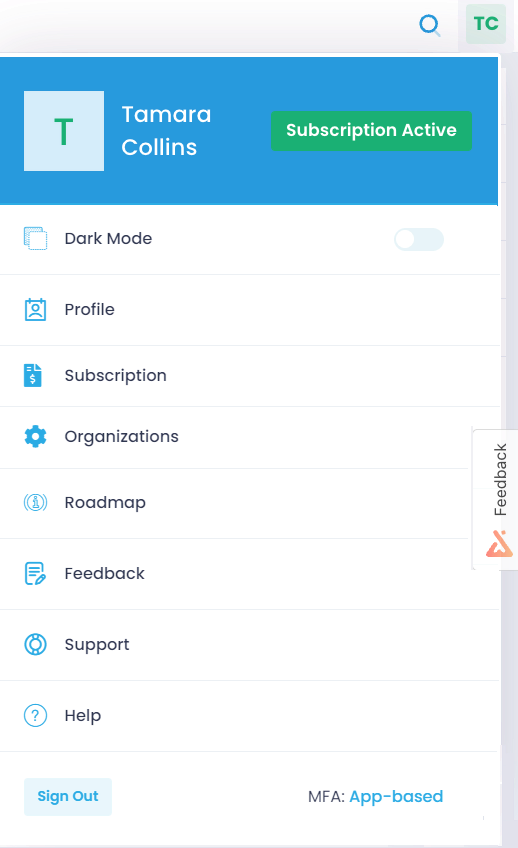
To check your current authentication method, click on your initials at the top-right corner. Click on the MFA link to see more details.
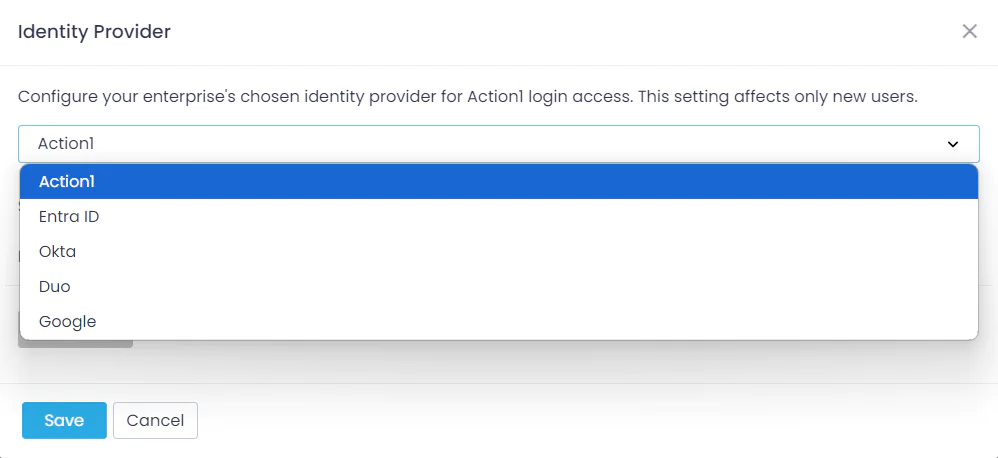
NOTE: The settings and procedures described below apply to Action1 identity provider only. To discover the identity provider type configured for your infrastructure, in Action1 console navigate to Configuration > Advanced and click Identity Provider.
Configuring App-Based MFA
To safeguard access to the enterprise account, make sure you have at least two Enterprise Admins before enabling the app-based MFA for any of them.
- Download and register with an authentication app of your choice.
IMPORTANT! Keep the app and device where it’s installed in a safe location. If you lose access to the authentication app (e.g., due to removing the app or losing the device), you will need to apply the recovery code, as described below.
- Scan a unique QR code with your authentication app to generate a one-time code. If you are unable to scan a code, copy the secret key.
- Supply the code to Action1.
- Select Enable App-based MFA.
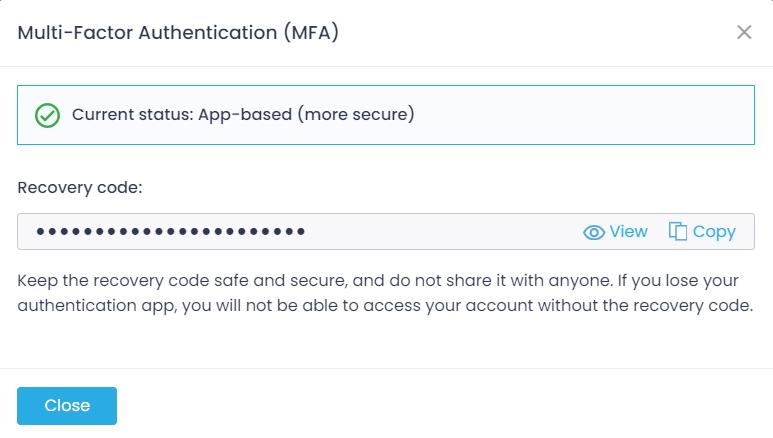
Then you should configure your MFA recovery code. This code will help you to log in to your Action1 account if you no longer have access to your authentication app (for example, due to removing the app or losing the device). The recovery code is generated automatically. You should keep it in a secure, safe location without sharing it with anyone.
- Click View or Copy to save the code to the clipboard and store it in a secure, safe location.
- Click Close.
NOTE: If you only click View to show your code, then you should save it manually (for example, make a hard copy) and confirm saving.
Updating MFA recovery code
If you are logged in, and you want to generate a new recovery code, follow the steps described below.
NOTE: Once you have generated a new recovery code, the old recovery code becomes inactive.
To update the recovery code:
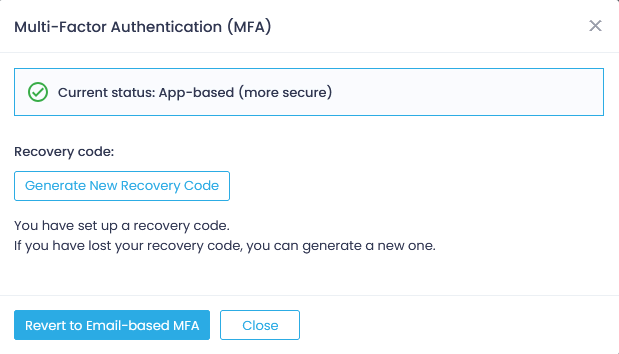
- Go to your User profile and open the Multi-Factor Authentication dialog.
- Click Generate New Recovery Code.
- When prompted, confirm new code generation. You will receive an email notification upon the code update.
- Save the new code to a safe location.
Using the recovery code to verify your account
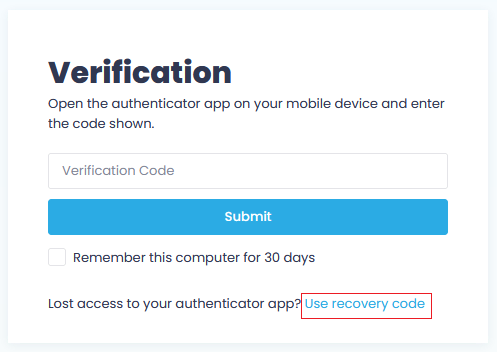
After the initial step of logging into Action1, you are prompted to enter a verification code from your authentication app. If you have no access to your authentication app, you can use your recovery code.
NOTE: The steps described below are skipped if you have selected Remember this computer for 30 days checkbox in Verification dialog at the previous login – if so, you can seamlessly access Action1 during that period without additional verification.
- In Verification dialog, click Use recovery code.
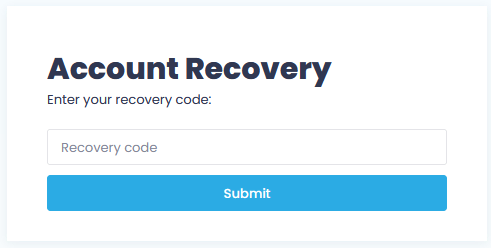
- Enter your current recovery code and click Submit.
- Provide the verification code sent to you by email.
- Configure multi-factor authentication anew, as described in “Configuring App-Based MFA” section above.
- Copy and save the new recovery code that has been generated automatically for the newly configured app-based MFA.
Learn More About Security
To learn more about security controls and ways to protect your data, see Security.
