Overview
Before you can start patching your endpoints, you should connect them to Action1 Cloud. For that, a lightweight Action1 agent should be installed on each endpoint you plan to manage. You can choose the deployment method that suits you best, including interactive installation, deployment via Microsoft Intune, and so on.
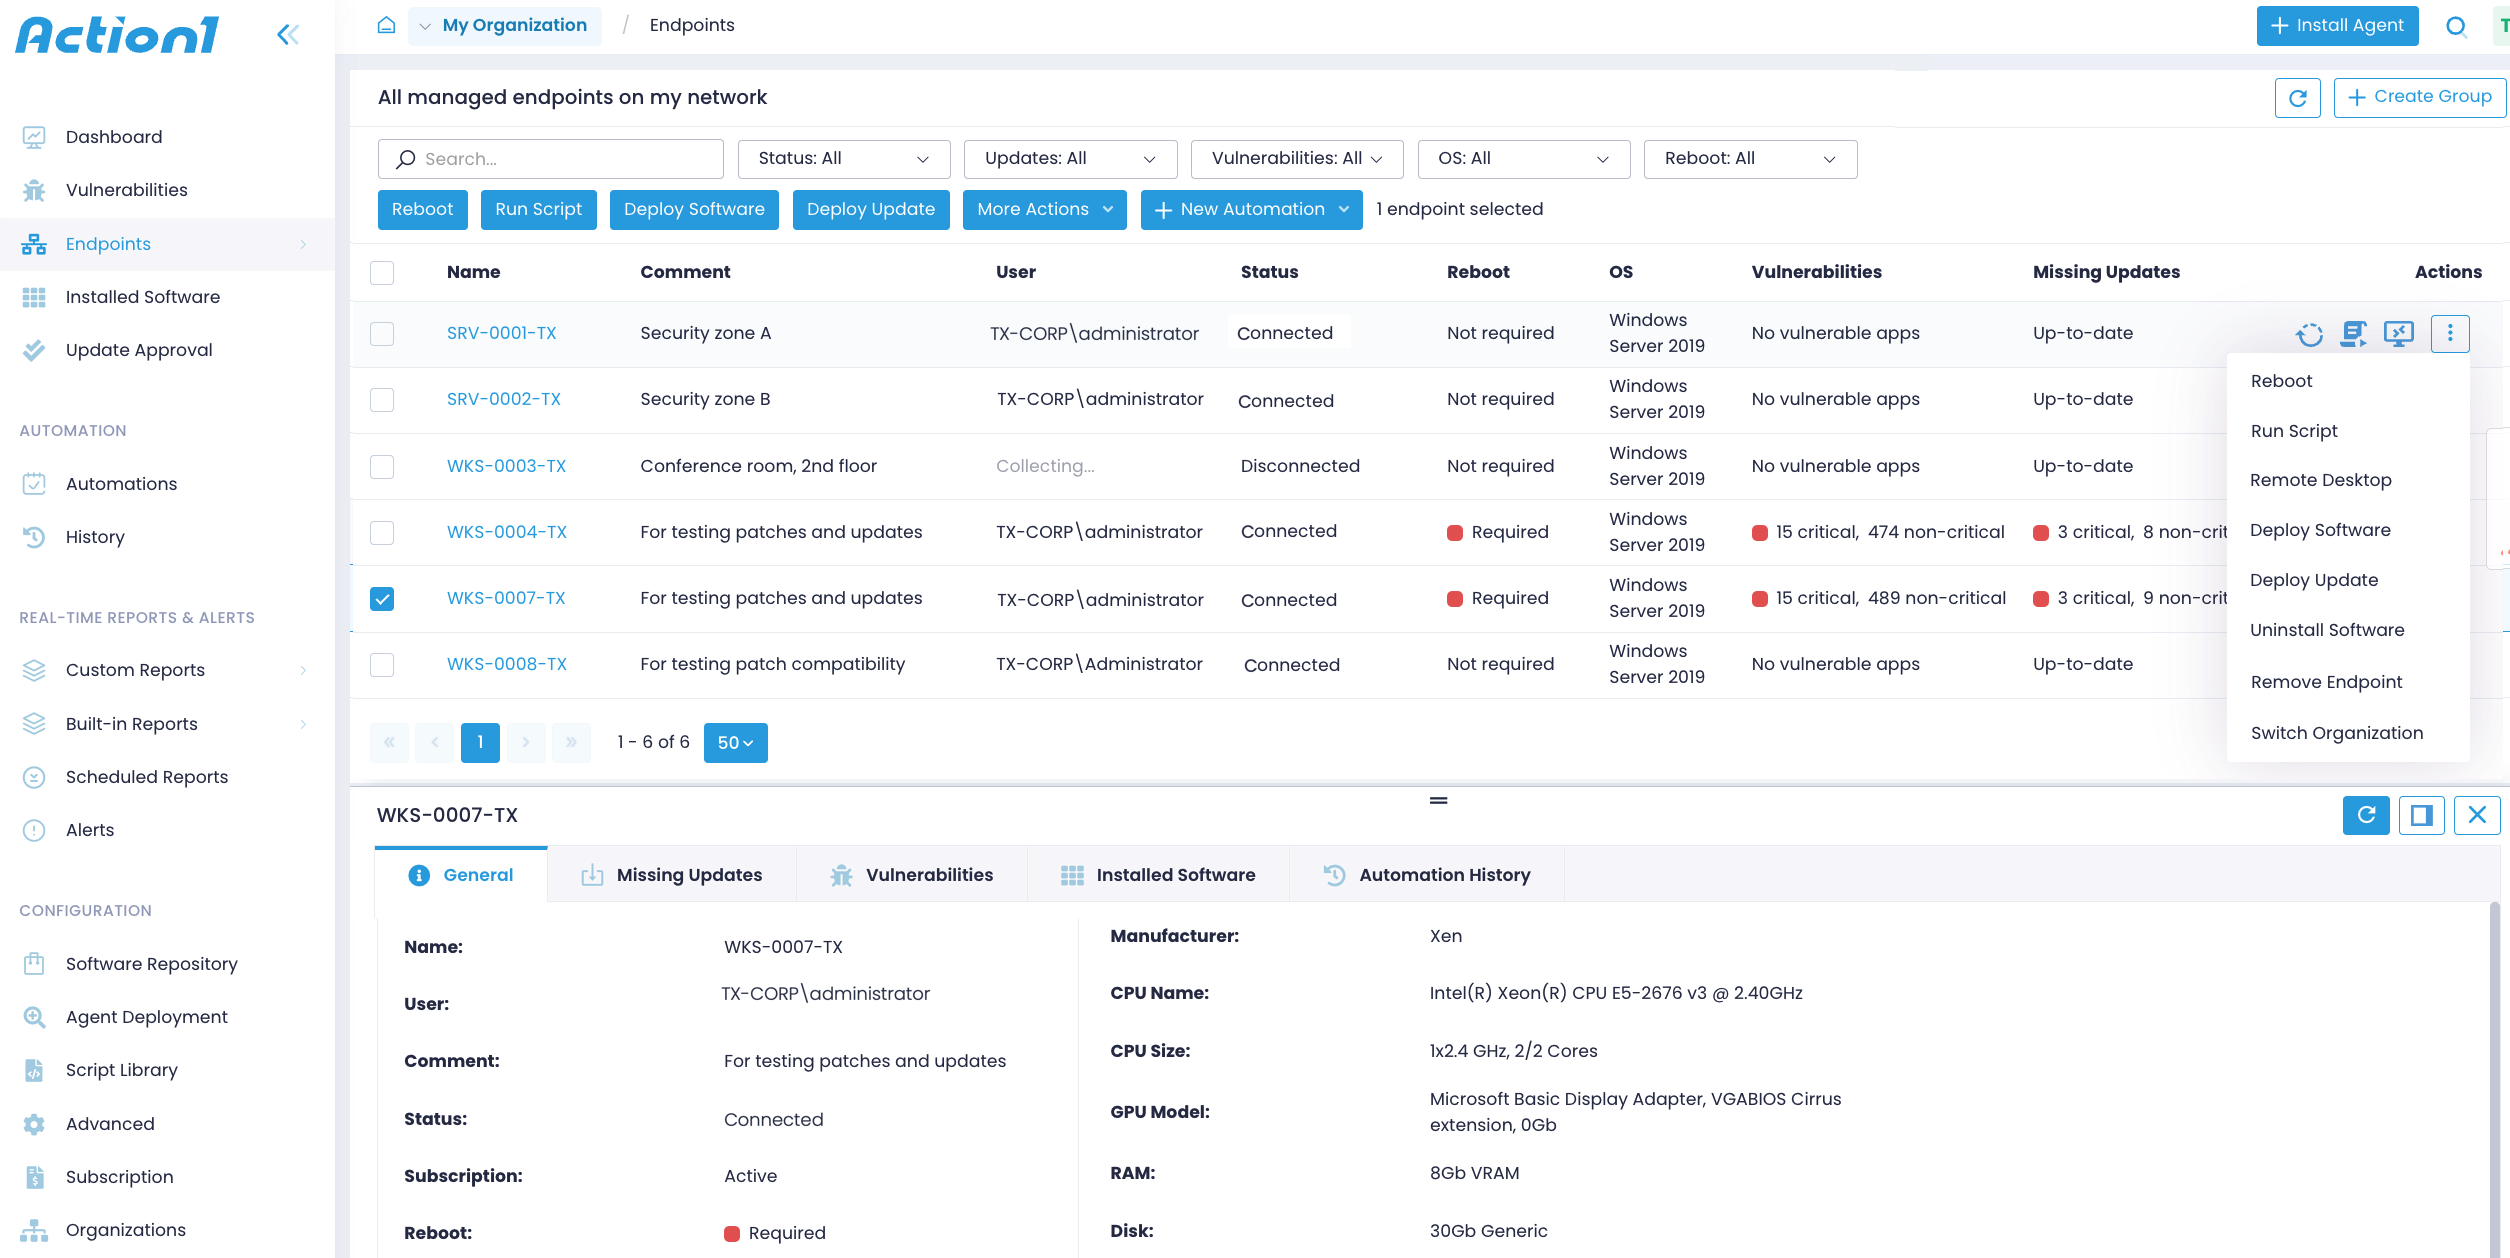
Once the agent is installed, it will securely connect to Action1 Cloud, and this endpoint will appear in the Endpoints view.
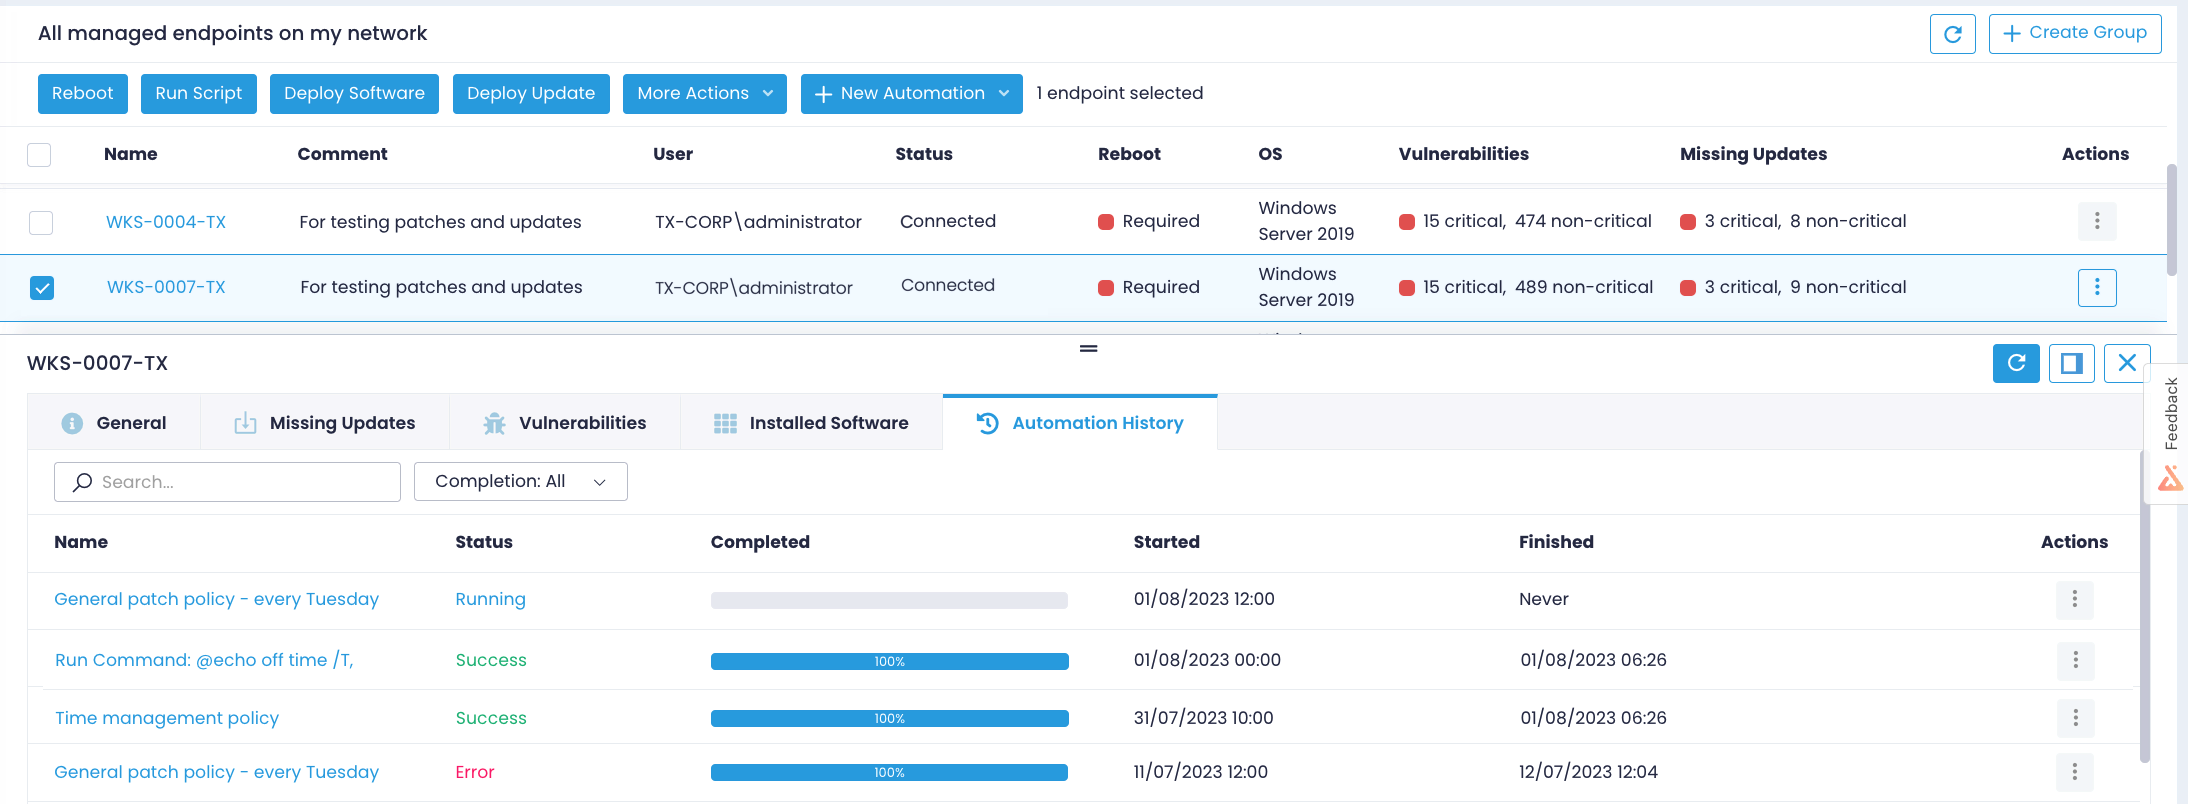
The Endpoints view lists all devices connected to your Action1 account. You can see all networked endpoints, their connectivity and patching status, as well as the operating system, the last logged-on user, pending reboot status, detected vulnerabilities, and missing updates.
Within this view, you can add comments, rename endpoints, and use filtering to locate required endpoints – for example, you can filter endpoints by their patching status, OS, connectivity status, and so on.
On top of that, you can start a remote desktop session, push updates to workstations and servers, install or uninstall software, or run scripts directly from the Endpoints page. For that, select an endpoint and click on the action button on top of the page, or invoke Actions next to the endpoint name and select an operation. Create automations to run these actions regularly.
If you have several organizations, you can switch from one organization to another, and the endpoints list will change accordingly. In addition, you can create custom groups and populate them with endpoints.
Adding New Endpoints
When you first start Action1, the Endpoints dashboard is empty. Before you can start managing your endpoints, make sure to add them to Action1 Cloud. For that, you can use the deployment method that suits you best. To learn more, see “Action1 Agent Installation”.
Learning More about Your Endpoints
The original endpoint name as well as its MAC, serial number, IP address, and other configuration details are available in the endpoint details. Double-click the endpoint to expand details and select the General pane.
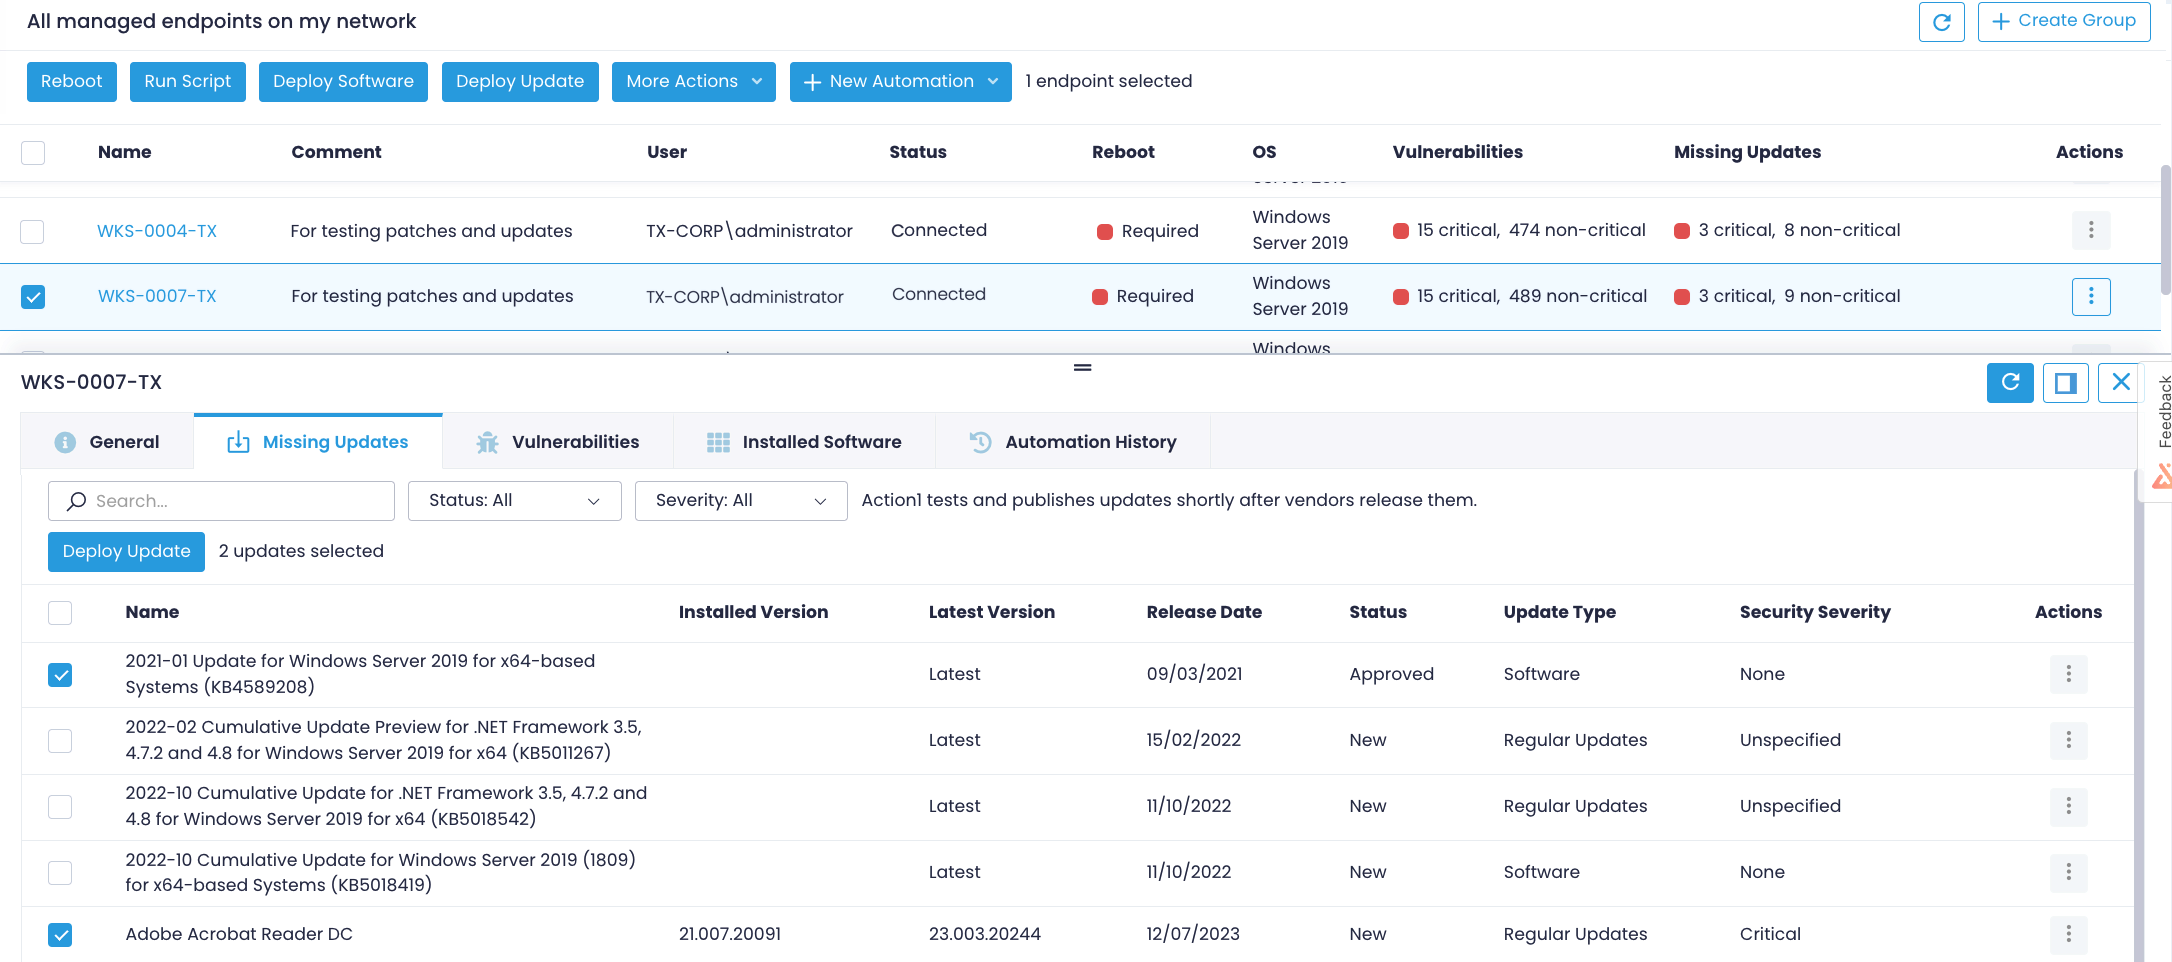
Navigate to the Missing Updates tab to see all pending system and 3rd party updates. While the main view informs you of the number of missing updates (first critical and then non-critical), the Details pane displays the exact patch names and enables you to deploy them right away.
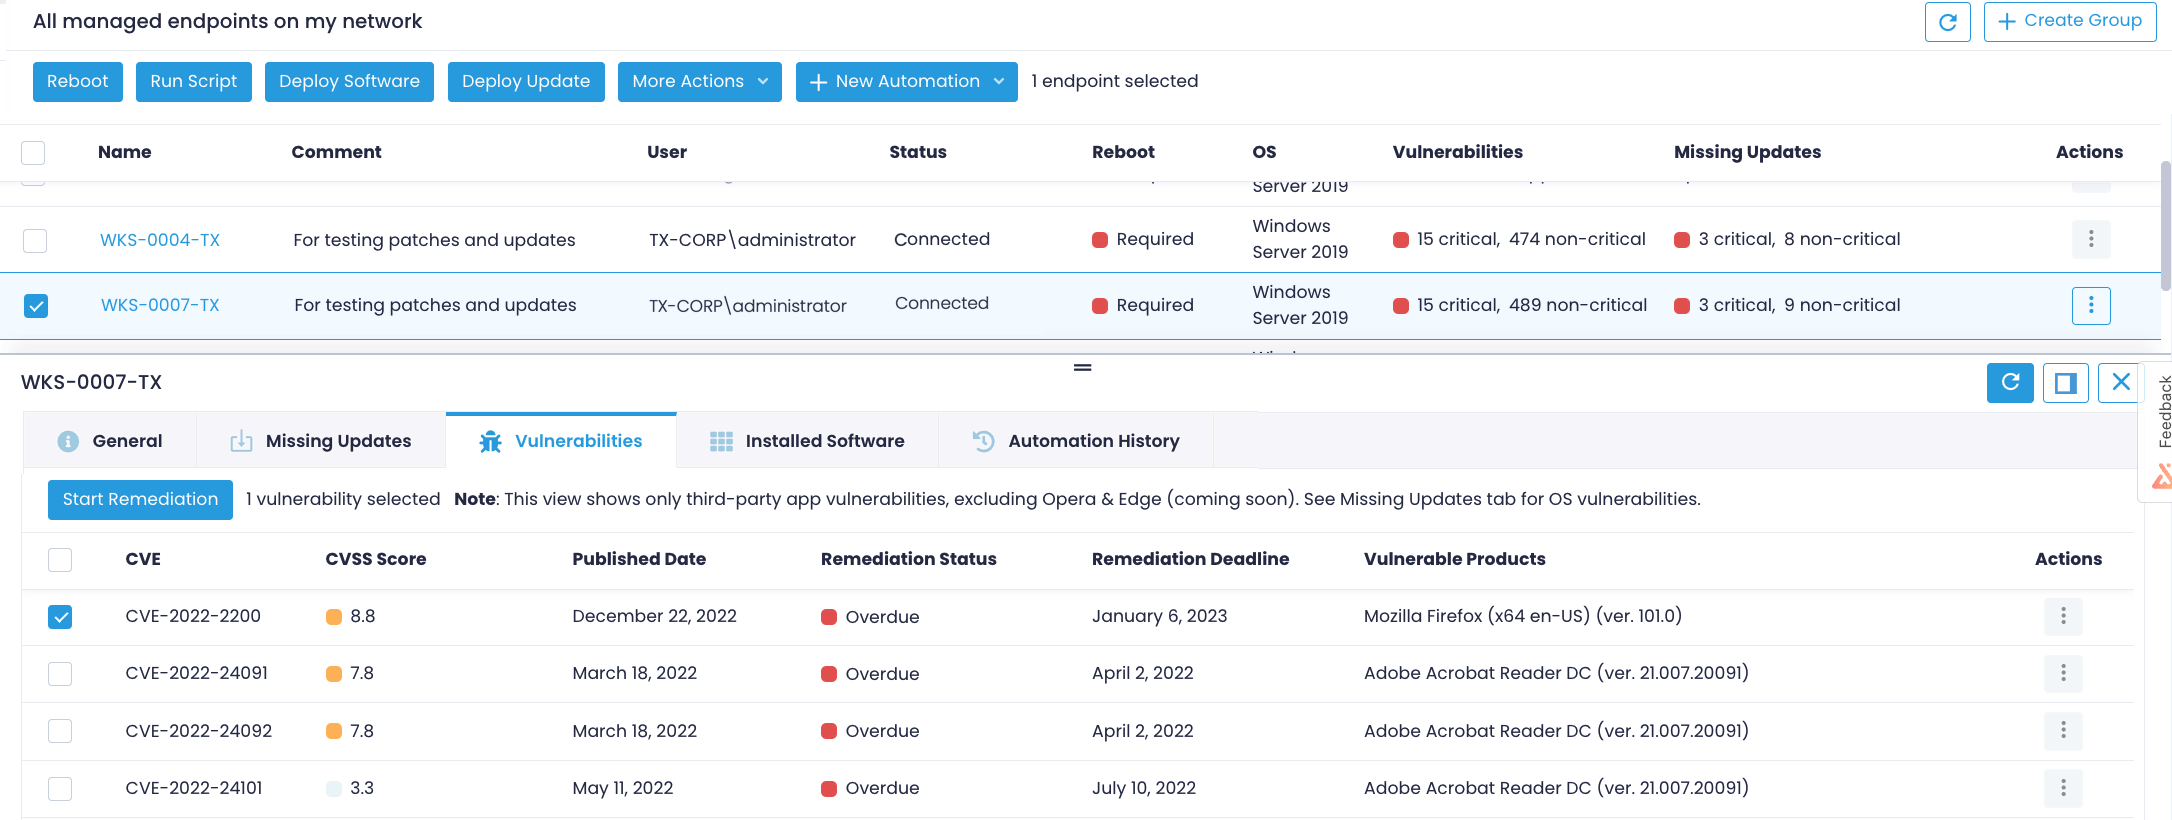
The Vulnerabilities tab lists known vulnerabilities and issues found in the third-party software that is installed on your devices. For each vulnerability, you can see a score, affected product, and remediation deadline. After reviewing vulnerabilities for your endpoint, you can opt-in to instantly address them.
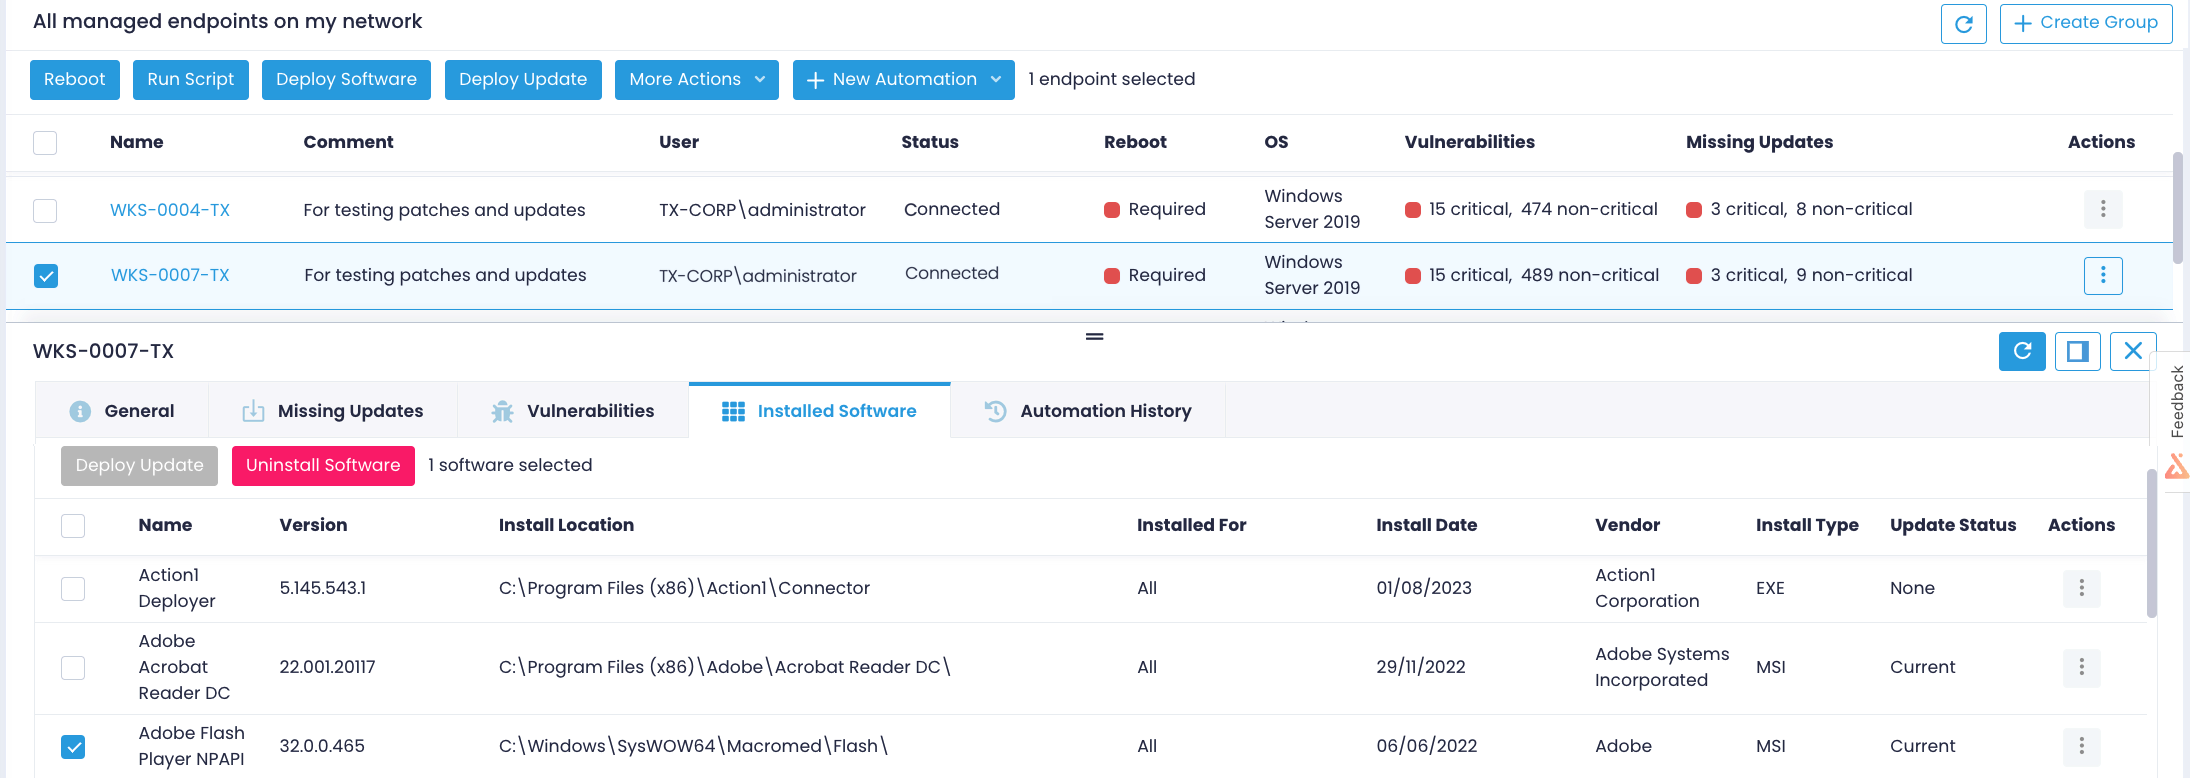
Proceed to the Installed Software tab to review the software inventory for the specific endpoint, deploy updates, or uninstall apps.
Finally, the Automation History tab enables you to review actions previously executed on a specific endpoint such as deploy update automation policies, restarts, scripts, along with the status for each action.

