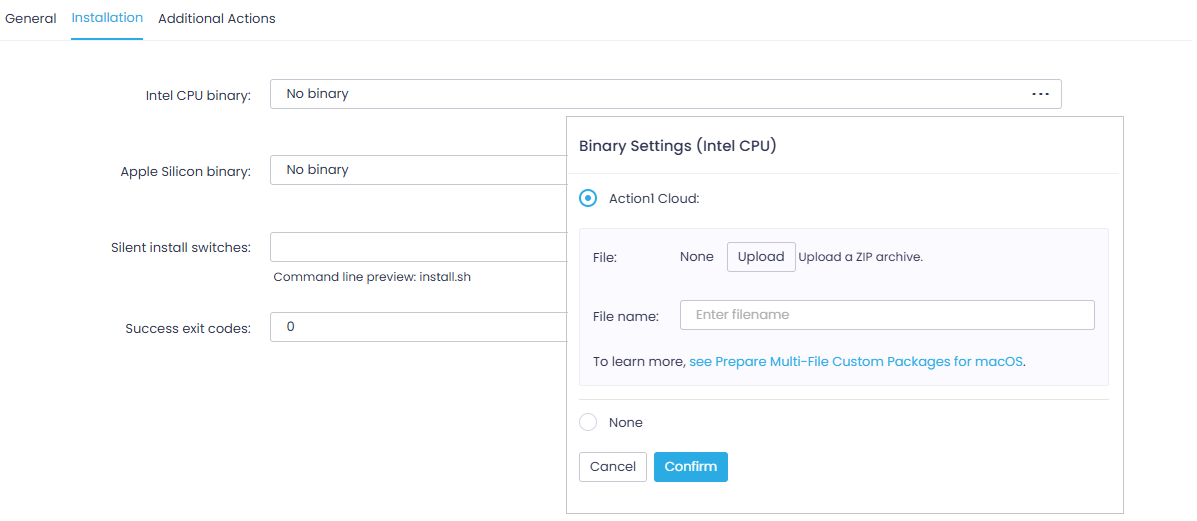
Mac App: Version Installation Settings
On the Installation tab of the app version settings, configure the following for your Mac app:
- Click on the required binary type – this can be Intel CPU binary or Apple Silicon binary.
- In the Binary Settings dialog that opens, select to upload files to a private Action1 Cloud.
- Then upload a ZIP file with the application setup — see Prepare Multi-File Custom Packages for macOS for more information.
- Click Confirm to save the settings and close the dialog.
- If you have two different setup packages (for Intel CPU and Apple Silicon), repeat steps 1-3 for the corresponding fields.
- If you have a universal setup package that works for both CPU types, you should provide it in both Intel CPU binary and Apple Silicon binary fields, repeating steps 1-3 for each field.
- Wait for the package upload process to complete.
- On the Installation tab, navigate to the Silent install switches field and provide those required for your app. For example, to stop the installation and issue an error if the app is open during the software update, enter
-s errorin this field.
Verify the command line using the Command line preview under this field. - Define Success exit codes for your installation. In most cases, the code 0 stands for a successful operation.
NOTE: You can double-check the success exit code with the app publisher.
Next, configure Additional Actions for your app, as described in Add Custom Packages to Software Repository.
