Congratulations on making it to part four and the last part of this release of ‘Getting the most out of Action1 with PSAction1’
This will be less step by step and more script related like part three, so we will not break the whole scripts down by line, but we will discuss their function at that level.
Thus far we have looked at getting the module set up and started, basic querying, basic changing, and some more advanced use cases like system integration. But what if you simply wanted to do more with the system directly, enhance its function without needing to dive into complex systems integrations. Things such as extracting more advanced data or using more advanced data for more advanced features. You can get as complex or as simple as you need; the whole point of this exercise is to demonstrate whatever the need is, if the systems CAN do it, we try to draw the shortest patch to getting it done. So, in this example it is a systems integration of a sort, but it is more self-integration of the system. In less technical terms, is “I wish the system did this in reference to these two features”. There is a chance that you specific need here will never be as much of a mainstream need as to make it part of Aciton1 as a platform, or maybe it is a feature that we have plans to integrate but, in the meantime, you just need it to work.
Hypothetical scenario, you would like to automate a configuration change for a group of systems that have a specific software product installed, how would you approach that? Well, you could program in a check into the automation script itself, run it on thousands of endpoints when it only needed to go to 10, and let the script sort it out? Or you could pull a software report of the systems that have that software and make a group based on that. What if you add remove more in the future, can it stay automated, you bet, but you cannot do it in the Action1 system native, this is where you go to the API and PSAction1.
So we start by looking at a software inventory report, and we will use Google Chrome as an example.
Step 1. In your Action1 console, on the left, navigate to [Built-in Reports / IT Asset Management / Software Inventory / Installed Software]
Step 2. In tools on the top right side, drop down and choose “Clone”. Choose yes (You wish to clone) Give it a name and description.

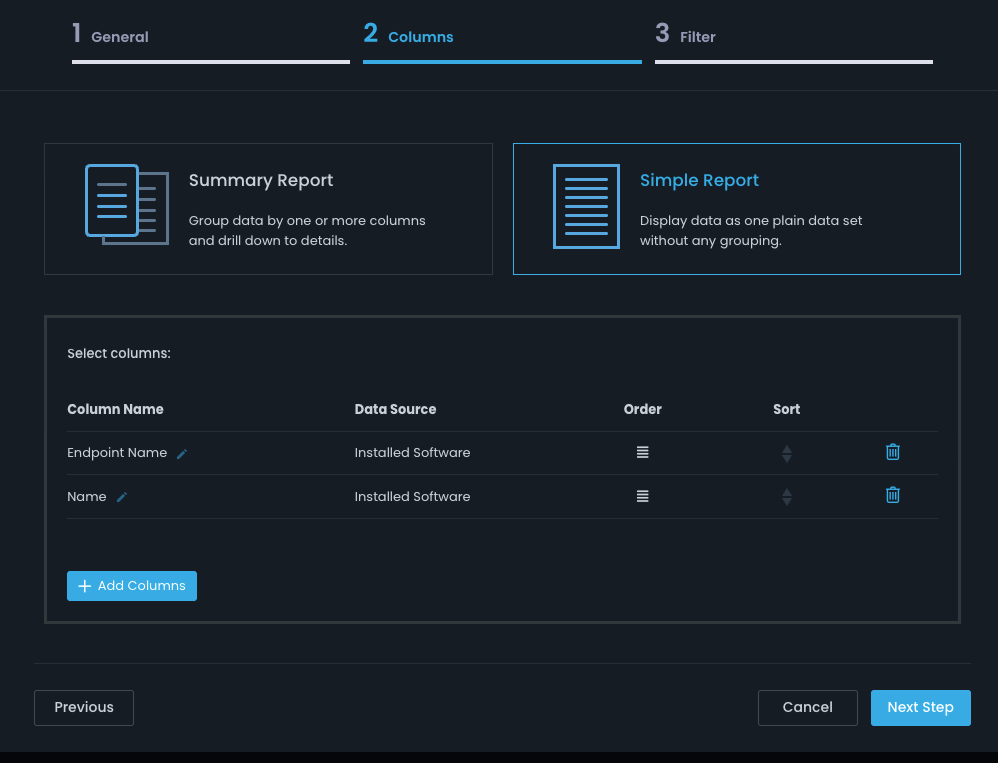
Step 3. On the next page change to “Simple report” and acknowledge the warning about columns being reset, then add columns “Endpoint Name” and “Name”.
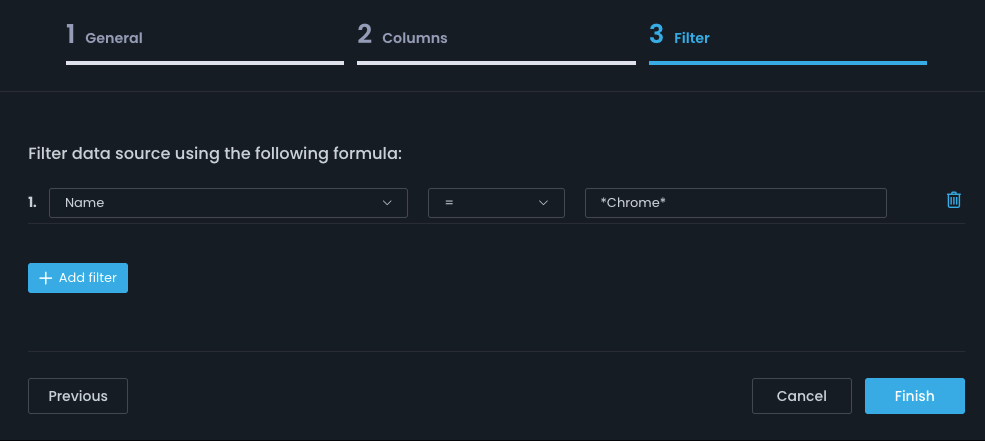
Step 4. On the next page choose to add a filter, and name = “*Chrome*”
Step 5. Finish and check the report output. What you should see is a two-column report displaying endpoints with Chrome installed.

Step 6. Take note of the report’s ID field from the URL.
Now that we know we have a solid data source, fire up your powershell and let’s get started on the next phase.
Step 1. Make sure you can see the report data.

Step 2. Verify you can drill in on the datapoint you need…

Alright! We have successfully created a source for our data, now let’s configure a destination. We will head back over to the Action1 console…
Step 1. From the left menu select “Endpoints” and from the right pane “+ New Group”

Step 2. Give the group a name and meaningful description. There is no need to include or exclude any endpoints at this time, just click create when you have set your options.
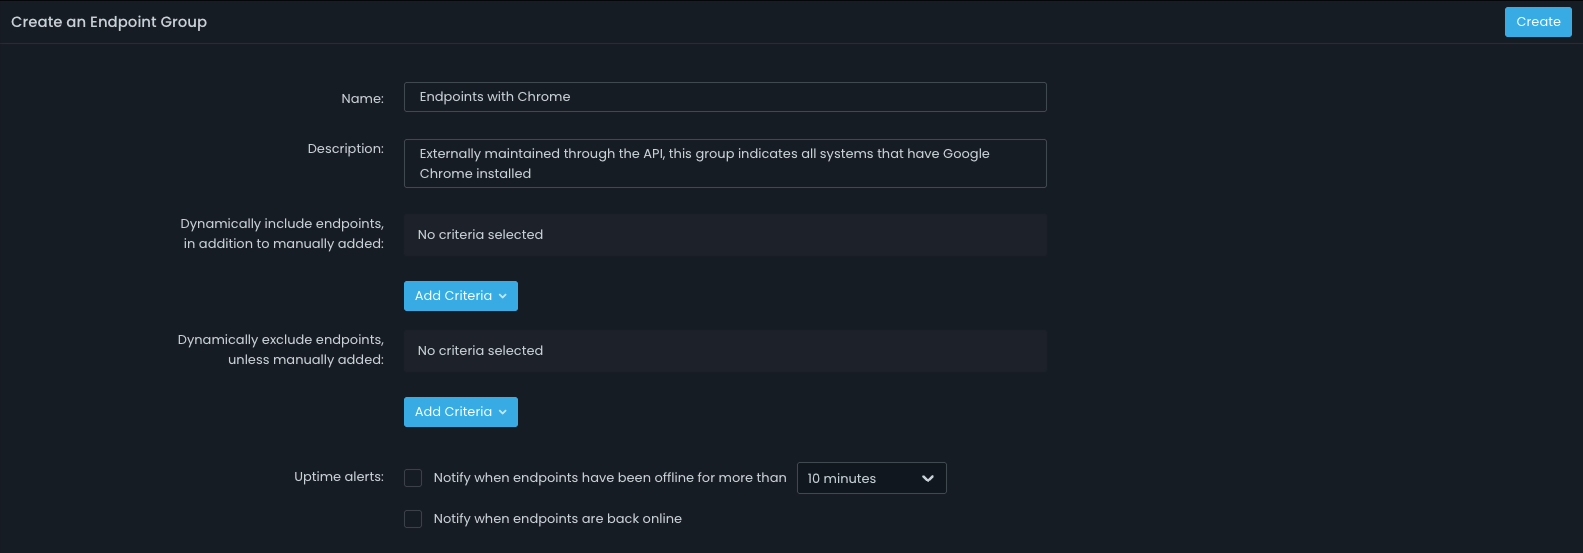
Step 3. Take note of the group’s ID field from the URL.
Now we will head back over to PowerShell. We are going to make sure we can get a clone of the target group‘s settingsl…

And boom, we now have everything we need to succeed! While broken out step by step like this it looks like a lot, you will soon see that mastering a few simple concepts makes this repeatable and scalable. So, let’s put it all together.
Which in psudocode reads “Get all the endpoint names form the report, get a clone of the group object, remove any existing filters, and add back only that which the report returns.
The end result is a group that looks just like your report.
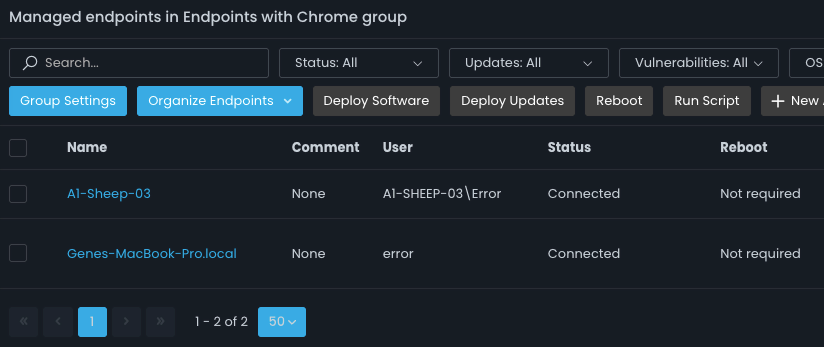

Now it is important to note there that like the dynamic grouping we did in part 2 this is a point in time snapshot. To keep items like this in sync, you need an automated task on your side running this automation integration as often as you anticipate is needed to maintain usable synchronicity.
So, I hope that you have enjoyed this series, and I hope more that you have learned a little more about how to get the most out of Action1using PSAction1!
