Table of Contents:
PowerShell module: PrintManagement
Installing a print driver in the driver store
Installing a new printer using PowerShell
Listing printers on a print server using PowerShell
Connect a network printer from PowerShell
Remove network printer using PowerShell
How to remove printer with PowerShell with Action1
What is the best RMM tool
Sometimes while installing or uninstalling a printer, you may face a wide range of unexpected errors:
- It might be impossible to remove the printer from the system.
- The printer cannot be uninstalled completely.
- New drivers fail to be installed.
- After installation, the error The driver is not fully installed” or “Some functions will be unavailable” shows up.
However disturbing it may look at first glance, there is no need to panic since the worst-case scenario is to format the computer’s hard disk and install the operating system and all the required software. In this article, we will go through some typical commands for managing printers, ports, and print drivers on such operating systems as Windows 10, Windows 8.1, and Windows Server 2012 R2 / 2016 / 2019 by using PowerShell. You’ll also find how to add or remove network printers.
Let’s Get Acquainted with PowerShell Module: PrintManagement
Along with the release of Windows 8.1 and Windows Server 2012 R2, Microsoft has unveiled a new version of PowerShell 4.0 (included in the Windows Management Framework 4.0), which significantly expanded a list of cmdlets for managing a Windows-based print server. To find out the whole list of cmdlets for managing printers, drivers, and print queues in the PrintManagement module on Windows 10 (PoSh v5), use the following command:
Get-Command –Module PrintManagement
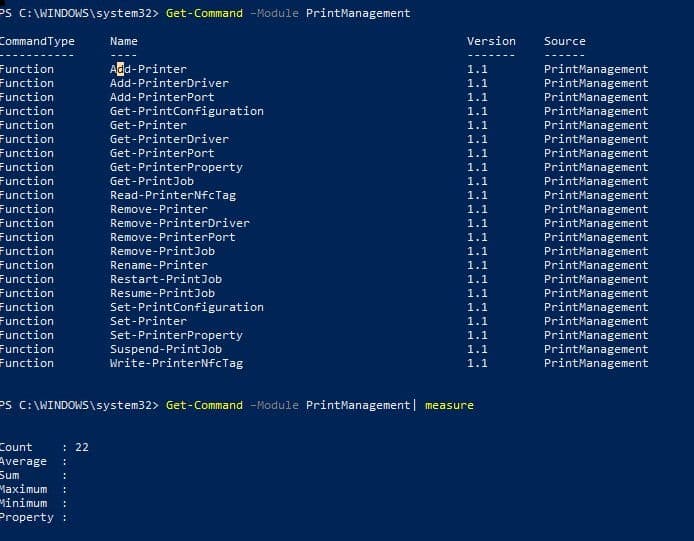
- Add-Printer — add (install) a new printer;
- Add-PrinterDriver — install a new print driver;
- Add-PrinterPort — create a print port;
- Get-PrintConfiguration — print printer settings;
- Get-Printer — display a list of printers installed on the computer;
- Get-PrinterDriver — list the installed print drivers;
- Get-PrinterPort — display a list of print ports;
- Get-PrinterProperty — show printer properties;
- Get-PrintJob — get a list of printer print jobs;
- Read-PrinterNfcTag — get the required printer information from an NFC tag;
- Remove-Printer — remove the printer;
- Remove-PrinterDriver — remove a printer driver;
- Remove-PrinterPort — remove a printer port;
- Remove-PrintJob — delete a print job on a printer;
- Rename-Printer — rename a printer;
- Restart-PrintJob — restart a print job;
- Resume-PrintJob — run a paused task;
- Set-PrintConfiguration — printer configuration settings;
- Set-Printer — update printer configuration;
- Set-PrinterProperty — change printer properties;
- Suspend-PrintJob — suspend a print job;
- Write-PrinterNfcTag — write information to the NFC tag.
To get detailed information on the syntax of a specific command, type the following:
Get-Help cmdlet-name -Detailed
Examples of using commands:
Get-Help cmdlet-name -Examples
Now let’s look at a few examples of typical printer management scripts on Windows 10 from PowerShell.
Installing a Print Driver in the Driver Store
To list the print drivers installed in the Windows driver store, here’s the command:
Get-PrinterDriver
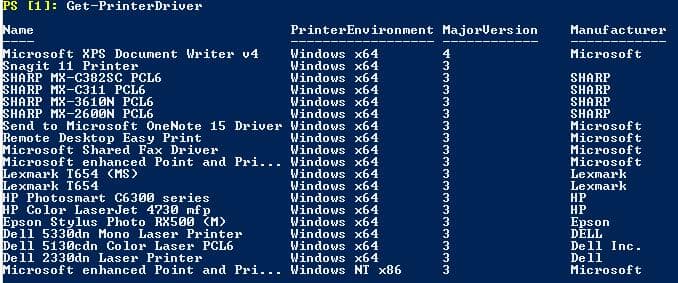
To illustrate the process of installing a new print driver, let’s take a concrete example of setting up HP Universal Printing PCL 6. According to the documentation, the PowerShell command for adding a driver is:
Add-PrinterDriver -Name “HP Universal Printing PCL 6” -InfPath “C:\Distr\HP-pcl6-x64\hpcu118u.inf”
However, when you try your best to install a driver this way, an error appears:
Add-PrinterDriver : One or more specified parameters for this operation has an invalid value.
At line:1 char:1
+ Add-PrinterDriver -Name “HP Universal Printing PCL 6” -InfPath “C:\Di …
+ ~~~~~~~~~~~~~~~~~~~~~~~~~
+ CategoryInfo : InvalidArgument: (MSFT_PrinterDriver:ROOT/StandardCimv2/MSFT_PrinterDriver) [Add-PrinterDriver], CimException + FullyQualifiedErrorId : HRESULT 0×80070057,Add-PrinterDriver
It turns out the driver from the INF file can be added under one specific condition — only if the DriverStore driver storage contains it. Logically, using the Add-PrinterDriver command to install a driver not available in the system driver storage is impossible. To install the driver in DriverStore, you can use:
The PnPUtil.exe utility. The format is pnputil.exe -i -a C: \ Distr \ HP-pcl6-x64 \ hpcu118u.inf (installs a specific printer driver) or pnputil.exe -i -a C: \ Distr \ HP-pcl6-x64 \ * .inf (installs all the drivers found in the INF files of the specified directory):

The Add-WindowsDriver cmdlet allows you to integrate drivers in an offline Windows image.
After adding a printer driver to the repository, you need to put the driver on the list of available print servers.
Add-PrinterDriver -Name “HP Universal Printing PCL 6”
Installing a New Printer Using PowerShell
To create an IP port for printing on a network printer (here, you can specify both an IP address of the network printer and a name of the remote print server):
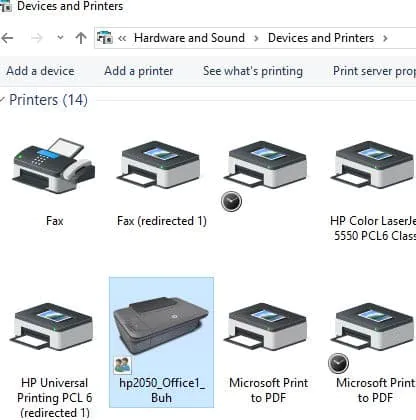
After executing the commands, you’ll see a new shared printer named >hp2050_Office1_Buh on the list.
Listing Printers on a Print Server Using PowerShell
How to display the full list of printers installed on this computer? Go by the instructions:
Get-Printer
As you can see in the picture below, the command displays such printers’ characteristics as Name, Type (local or network), Driver, Print Port. Also, we get information on whether printers are shared and published to AD or not (True or False).

200You can run most of the PrintManagement cmdlets to check out the status and manage printers, drivers, and print queues on remote computers. A remote computer’s or server’s name should correlate with the –ComputerName parameter.
By using PowerShell, you can get information about all the installed printers on a remote computer (print server) — just run the command:
Get-Printer -ComputerName msk-prnt1 | Format-List Name,DriverName
To display only a list of shared printers, use the command:
Get-Printer -ComputerName msk-prnt1 | where Shared -eq $true | fl Name
Connect a Network Printer from Powershell
To connect a printer from a print server, use the command:
Add-Printer -ConnectionName \\msk-prnt1\HPCL3020
Windows 10 uses the latest printer as the default printer. Do you want to use a fixed default printer? Then run the following command:
Set-ItemProperty -Path “HKCU:\SOFTWARE\Microsoft\Windows NT\CurrentVersion\Windows” -Name “LegacyDefaultPrinterMode” -Value 1 –Force
To set the default printer, go by these commands:
$wsnObj = New-Object -COM WScript.Network
$wsnObj.SetDefaultPrinter(%PrinterName%)
Remove Network Printer Using Powershell
To remove a printer, you need to run the following PowerShell command:
Remove-Printer -Name “hp2050_Office1_Buh”
You can remove a specific driver by using the Remove-PrinterDriver cmdlet:
Remove-PrinterDriver -Name “HP Universal Printing PCL 6”
How to Remove Printer with PowerShell with Action1
Firstly, create an Action1 account to start using the solution for free on 200 endpoints.
After logging into the Action1 dashboard, in the Navigation pane (the left column), select Managed Endpoints and mark the device to install the printer.
Then click on the More Actions button and select the Run Command option
In the window that opens, enter the command add-printer -name “ColorDell” -drivername “Dell Color Laser 1320c” -port “ToColor” to add a new printer.
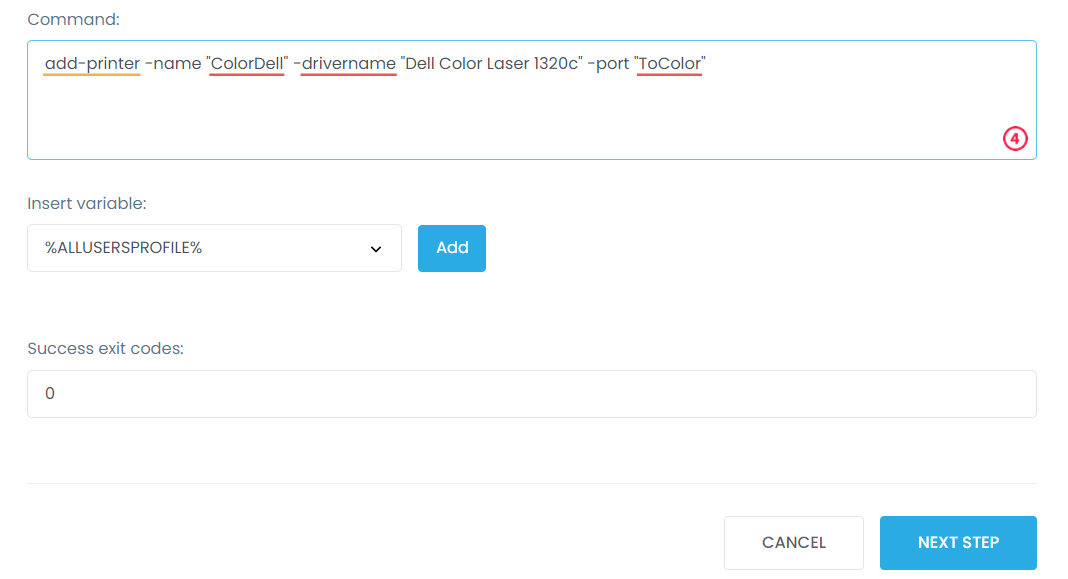
In case you need to delete the printer use this command remove-Printer -Name ” ColorDell”
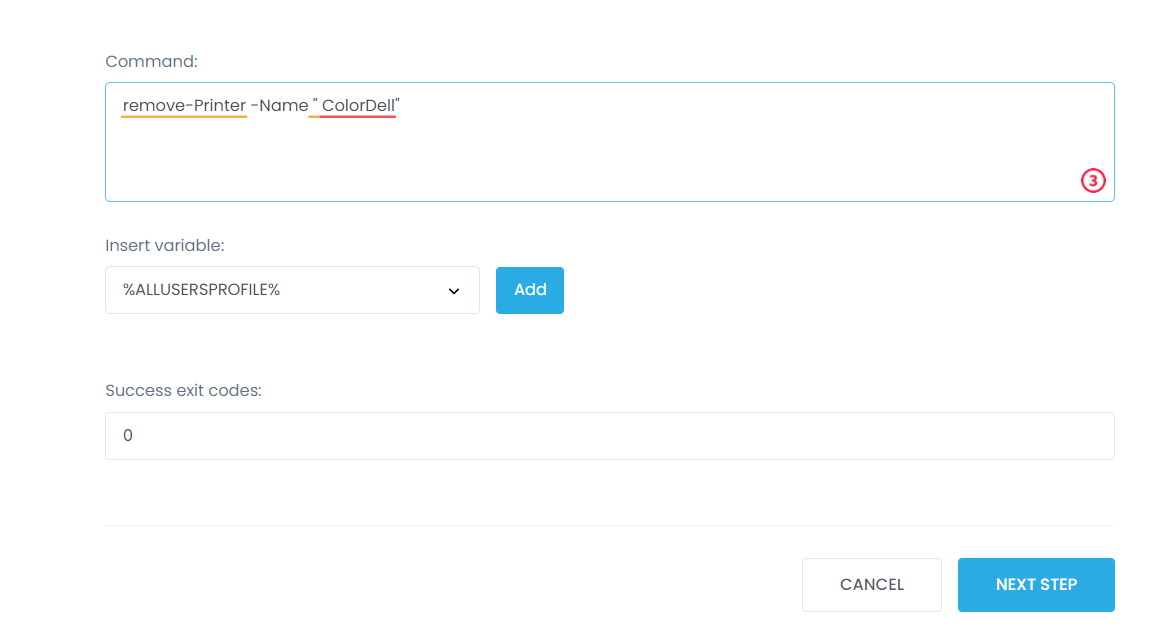
After clicking the Next Step button, you need to select the endpoints for which you are going to install or remove printer. To do this, click Add Endpoints and select the desired endpoint.
Click Next Step and in the next step you can schedule the execution time of your command. Then click Finish.
What Is The Best Endpoint Management Tool?
Staying competitive in the market is always a challenge, and loud words don’t do wonders for scaling up your business. But actions do! Understanding what is endpoint management and how to make the right choice for you is first essential step to optimizing your organization’s cybersecurity practices.
With Action1’s cloud-based endpoint management solution, your IT department will be keeping endpoints’ security in check, and timely warning about potential threats and interventions.
Among the many principal features available through the Action1 centralized dashboard are:
- patch management
- software deployment
- remote desktop
- remote support
- IT asset management
- endpoint security
- endpoint management
- network monitoring
Read the TechRadar review of our product or be the judge — try it out for free on 200 endpoints.


