The setup.exe installer in the Windows 10 distribution has a fairly large set of command-line options that may be of interest to the administrator for automating and managing updating the build (version / build) of Windows 10 on users computers using SCCM and other tools. In this article, we will show how to use the setup.exe parameters to upgrade Windows and check compatibility with the new Windows 10 build.
Content list:
- Setup.exe installer options in Windows 10
- Generate a relevant Windows 10 ISO image
- Compatibility Check (Upgrade Capabilities) Windows 10
- Automating Windows 10 Upgrade from the Command Line
Setup.exe Installer Options in Windows 10
The setup program Windows setup.exe is used to update the build of Windows 10. A typical start of setup.exe starts the graphical Windows 10 Upgrade Wizard, but this program has a numerous command-line options that can be used to automate OS updates on users’ computers. The general syntax and parameters for Setup.exe are listed below:
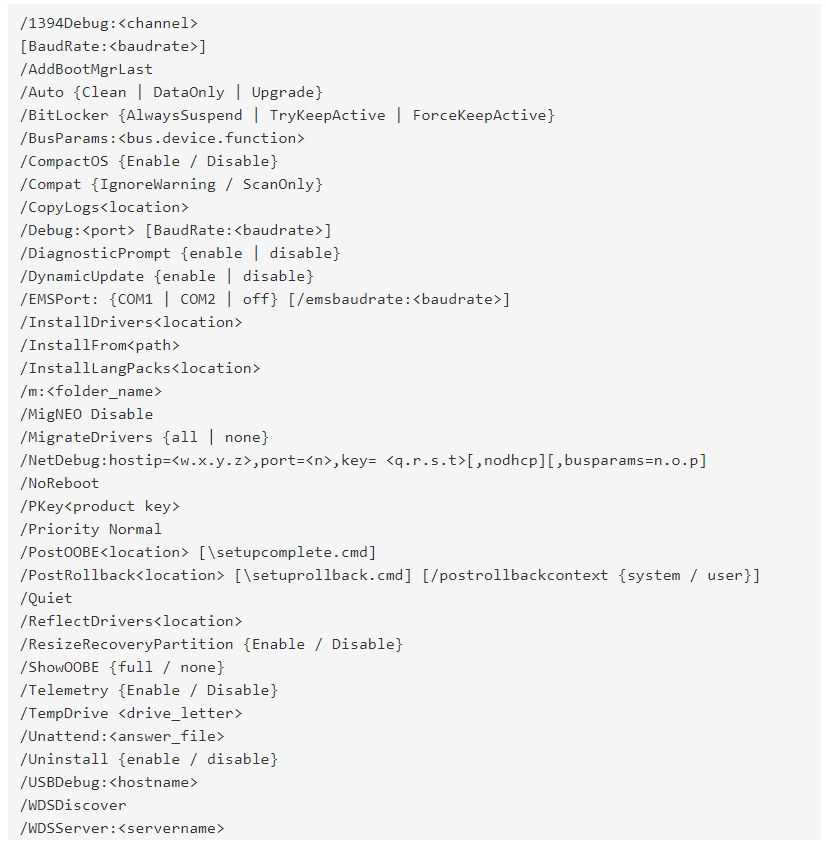
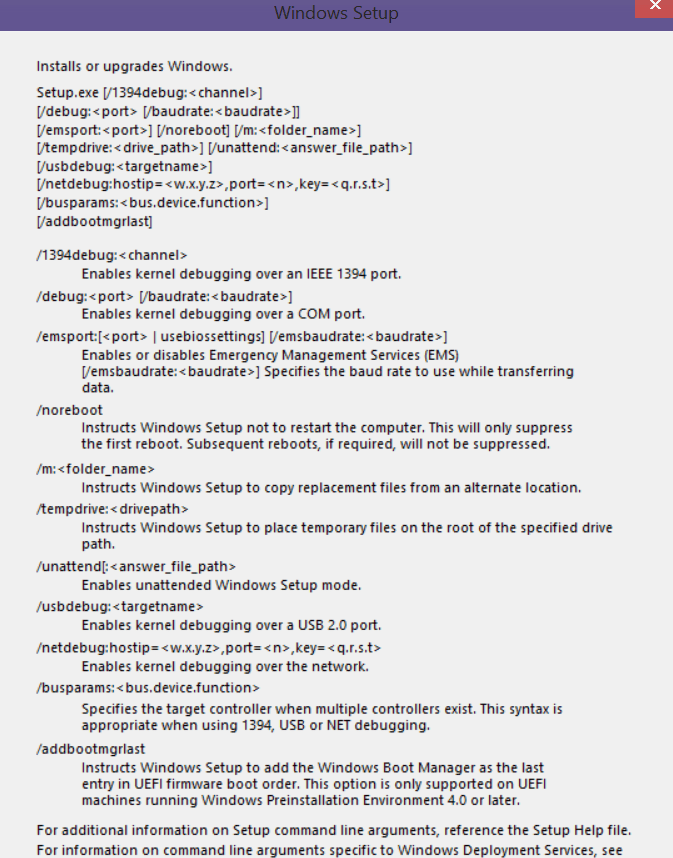
Detailed information about all setup.exe options and their values for Windows 10 can be found on the documentation page: https://docs.microsoft.com/en-us/windows-hardware/manufacture/desktop/windows-setup-command-line- options
Generate a Relevant Windows 10 ISO Image
To upgrade the version of Windows 10, you need to get the installation ISO image with the latest version of Windows 10. At the moment, this is Windows 10 1903.
You can create an ISO image with the current version of Windows 10 using the Media Creation Tool.
1. Download the Media creation tool (https://www.microsoft.com/en-us/software-download/windows10);
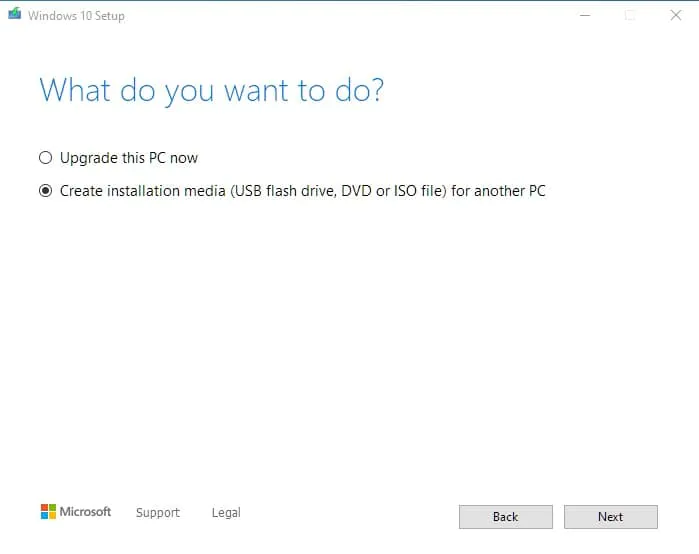
2. Run the MediaCreationTool1903.exe file and use the wizard to indicate that you want to “Create installation media (USB device, flash memory, DVD-ROM or ISO file)”;
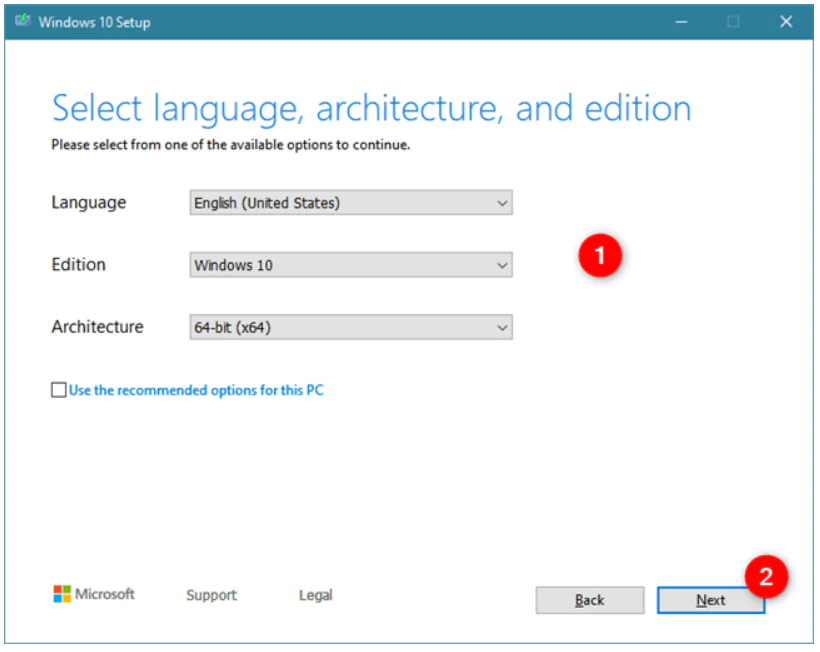
3. Select the language, edition, and architecture (x64 or x86) of the Windows 10 image that you want to create;
4. Indicate that you want to create an ISO file and specify the desired file name;
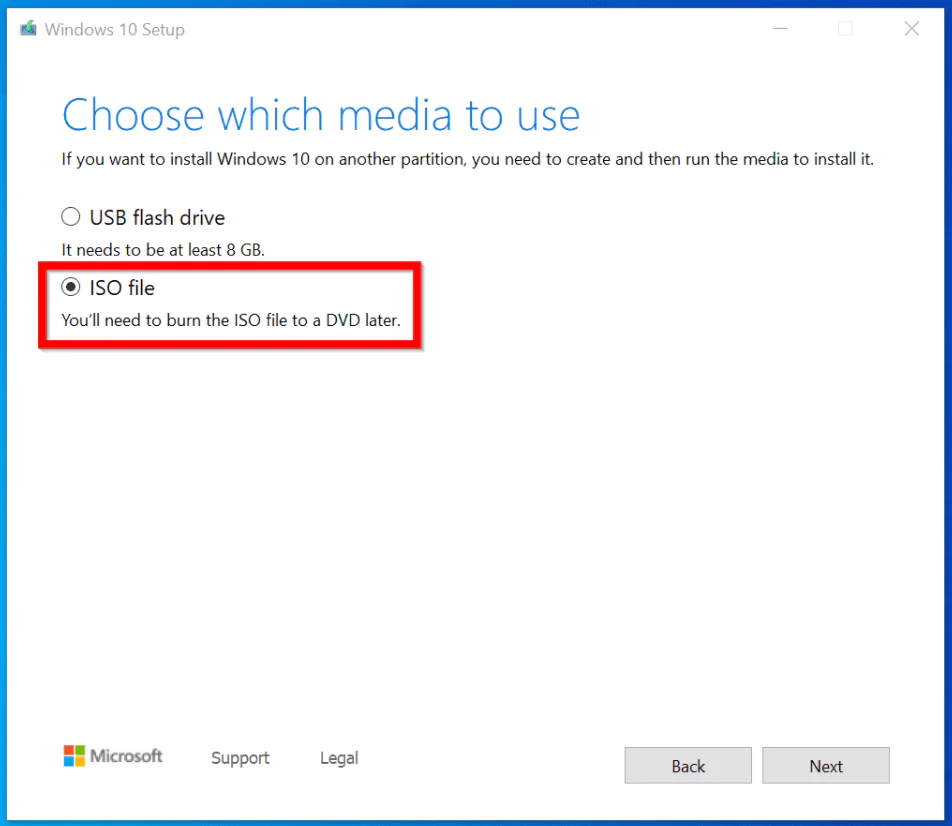
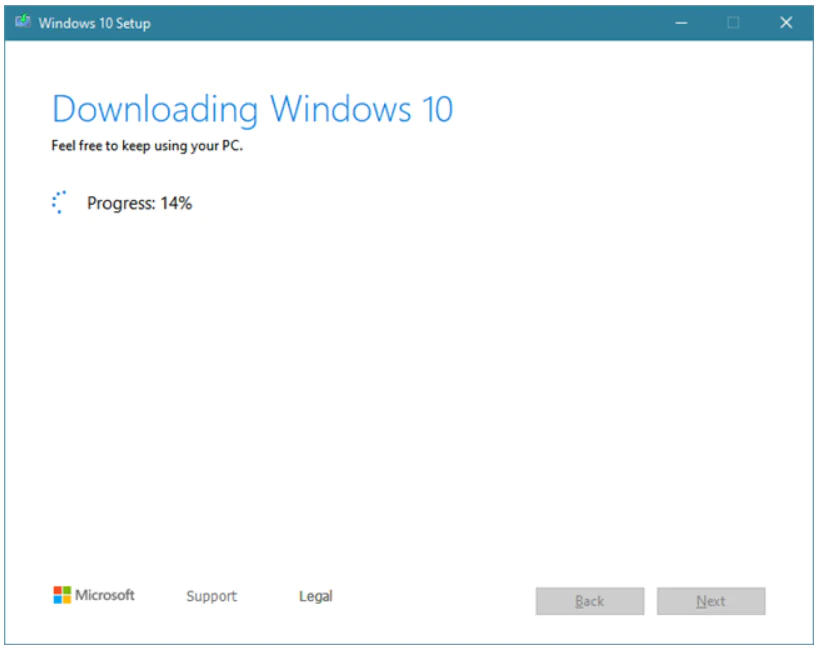
5. And wait until the Media Creation Tool finishes downloading the Windows 10 installation ISO image to your local drive.
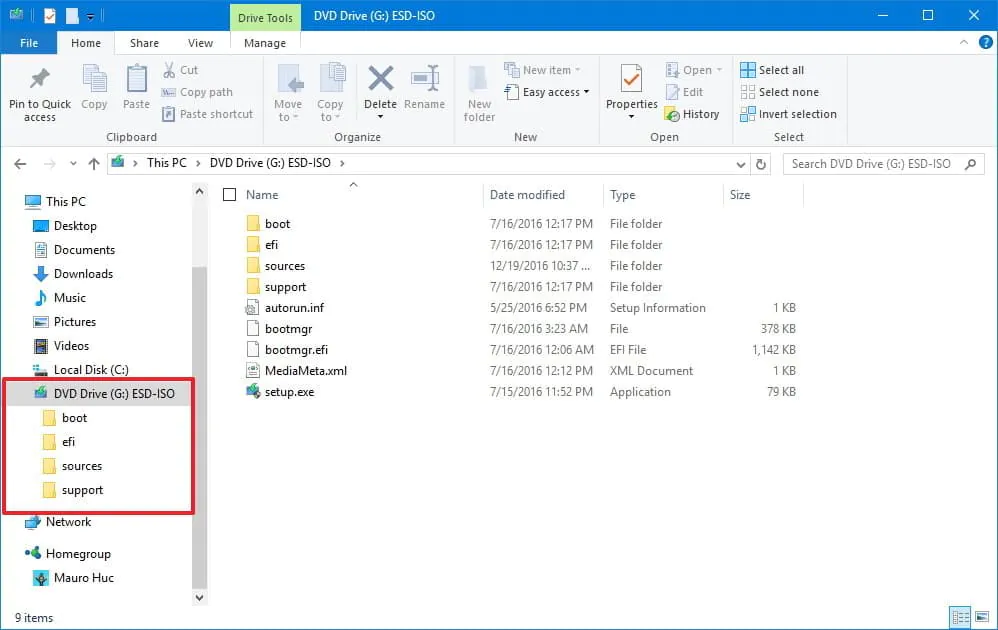
6. Unzip the contents of the ISO image to a file server.
Compatibility Check (Upgrade Capabilities) Windows 10
Before upgrading the version of Windows 10, you can check whether it is possible to upgrade your build of Windows 10 to the version that is contained in the specified image. To do this, run the command:
start /wait setup.exe /Auto Upgrade /Quiet /NoReboot /DynamicUpdate Disable /Compat ScanOnly

Parameters used:
- / Auto Upgrade — automatic upgrade mode;
- / Quiet — hide dialog boxes of the update wizard;
- / NoReboot — disable restarting the computer;
- / DynamicUpdate Disable — indicates that you do not need to download the latest updates through Windows Update;
- / Compat ScanOnly — Perform only a compatibility check, without performing an update.
Scanning a computer for compatibility with the new build of Windows 10 will take some time.
You can track the completion of the system scan using the file C: \ $ Windows. ~ BT \ Sources \ Panther \ setupact.log. Scanning is completed if the file contains the line:
Info MOUPG **************** SetupHost Logging End ****************

The results of the compatibility analysis are contained in the file C: \ $ Windows. ~ BT \ Sources \ Panther \ setuperr.log. Find the last line that looks like this:
CSetupHost::Execute(xxx): Result = xxxxxxxx

This is the verification result code.
In addition, you can get an error code when checking for update compatibility from the command line:
echo %errorlevel%
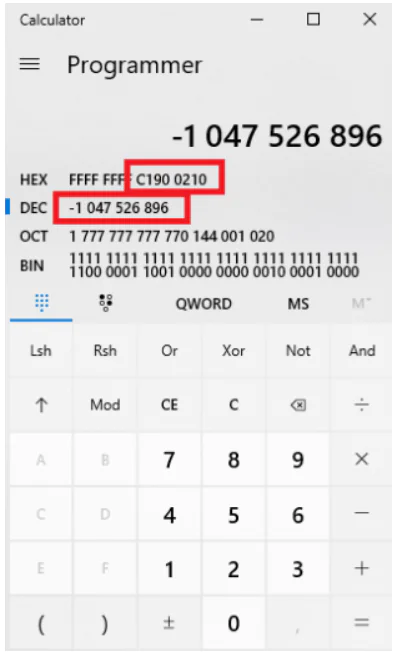
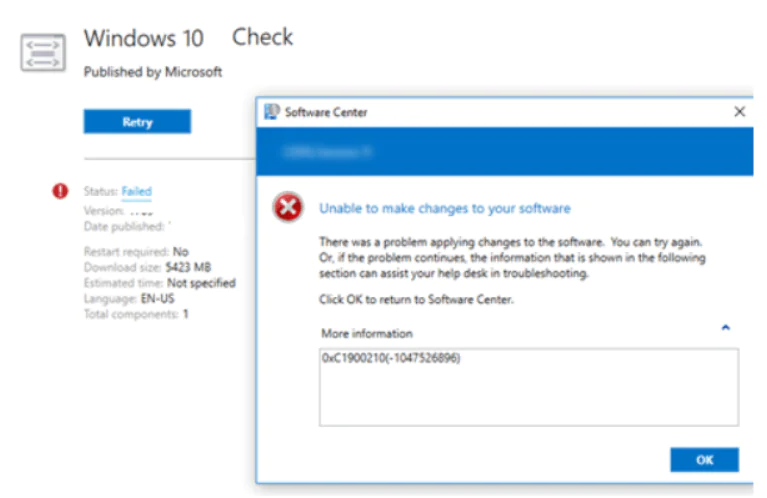
The resulting code must be converted to hexadecimal. For example, the command returned the code -1047526896 to you. You need to use the calculator in the “Programmer” mode to insert the error code in decimal mode (Dec). To get the hexadecimal error code, copy the value from the Hex field, discarding all F at the beginning and adding 0x to the beginning. For example, in my case the code 0xC1900210 turned out.
The most common OS compatibility check codes with the new version of Windows 10:
0xC1900210 — no problems found:
0xC1900208 — a compatibility issue has been identified;
0xC1900204 and 0xC190010E — automatic update is not possible (incorrect edition or Windows architecture);
0xC1900200 — computer does not meet the minimum requirements for Windows 10l
0xC190020E — not enough disk space;
0xC1420127 — Problem when disabling the WIM image file.
If you have SCCM, you can centrally collect errorlevel status values from users’ computers with a simple package using command:
setup.exe /Compat ScanOnly …
Automate Windows 10 Upgrade from the Command Line
If you have not identified compatibility issues that interfere with updating the Windows 10 build, you can run the update on your computer with a simple script. Create a simple bat file run_win10_upgrade.bat in the network folder with the unpacked Windows 10 distribution with the following code:
start /wait .\ W101903\Windows10x64-1903_ru\setup.exe /auto upgrade /DynamicUpdate disable /showoobe None /Telemetry Disable
In /Auto:Upgrade mode, all applications and user data are saved during the upgrade. You can also use the /auto:data mode if you want to save only user data, but not installed programs.
The/migratedrivers all option is used to force the migration of all drivers. If the parameter is not set, the installer makes decisions for each driver individually.
You can use other setup.exe options when upgrading Windows 10.
Starting with Windows 10 1607, you can specify installation parameters through the Setupconfig.ini file. This file should be in the directory with setup.exe and contain something like this, similar to the command above:
[SetupConfig]NoRebootShowOobe=NoneTelemetry=DisableDynamicUpdate=Disable
To start the Windows 10 update using the settings file, use the command:
Setup.exe /ConfigFile setupconfig.ini
Consider Using Action1 to Update Windows 10 if:
- You need to perform an action on multiple computers simultaneously.
- You have remote employees with computers not connected to your corporate network.
Action1 is an IT solution for cloud patch management, software deployment, remote desktop, software/hardware inventory, and endpoint management.


