Endpoint Groups
Action1’s patch management solution enables you to organize your endpoints into groups. A group is a subset of managed endpoints within an organization. By grouping endpoints, you can manage them with greater precision — for example, by operating system, business importance, or asset type. You can then create automation policies and run actions across the entire group simultaneously.
By default, Action1 creates two predefined groups:
- All — includes all managed endpoints listed on the Endpoints page.
- New Endpoints — displays newly added endpoints.
Groups vs. Endpoints List View
The Endpoints list view displays all endpoints in your organization. From there, you can invoke actions and target specific endpoints.
Groups allow you to manage endpoints that you have explicitly organized together. Managing groups lets you perform bulk operations such as:
- Rolling out updates
- Running scripts
- Creating automations
Creating a New Group
- On the Endpoints page, click + New Endpoint Group.
- Enter a group name and description, then click Create.
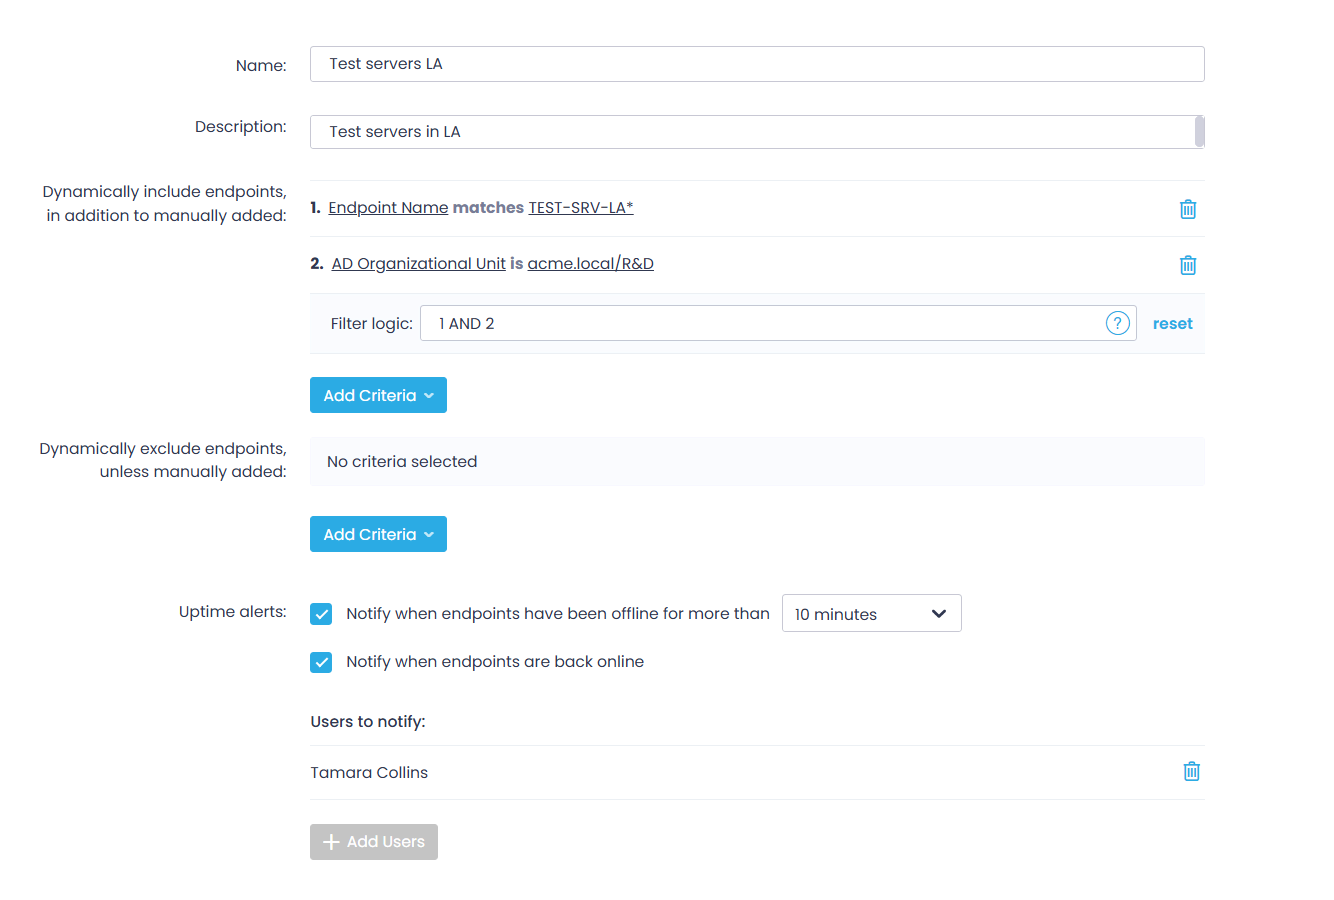
- Click Add Criteria if you want to automatically include endpoints that meet specific conditions.
-
- To create a nested group, select Endpoint Group, then choose the parent group.
- To include endpoints based on their properties (attributes), select the attribute (e.g., Endpoint Name, IP address, AD Organizational Unit) and specify the attribute value to filter out the endpoints, using a name, wildcard, or range.
-
- To apply multiple criteria, use Filter logic. Supported operators are AND and OR. To define the priority of evaluation, use parentheses.
For example, you can automatically add endpoints whose names start with WKS-LA OR that belong to the Test Servers group.
NOTE: You can always add endpoints manually.
- Similarly, you can define the excluding filter — for example, exclude endpoints that are members of a specific group.
- Optionally, enable uptime alerts to notify you when the endpoints are offline for a significant amount of time or when they get back online.
Adding Endpoints to Group
When adding endpoints to a group, you can use any of these methods:
- Select from the list — browse and manually add endpoints.
- Import a CSV file — upload a list of endpoint names to be added.
Important! To import a list in a CSV file, ensure that:
- Imported endpoints already have Action1 agents installed.
- The first column in the CSV file is labeled Endpoint Name.
To populate a group with endpoints:
- Select the required group, then click Organize Endpoints > Add endpoints. Alternatively, you can select the required endpoint from the list and click Organize Endpoints > Add to endpoint group.
- In the dialog displayed, choose your preferred option: Browse endpoints or Import from a CSV file.
- Click Add. The endpoint will appear in the target group.
Endpoints can belong to more than one group.
Moving to Another Group or Organization
NOTE: This capability is supported only for manually added endpoints. The following steps apply to moving Windows endpoints only. For macOS endpoints, refer to this section.
To move an endpoint:
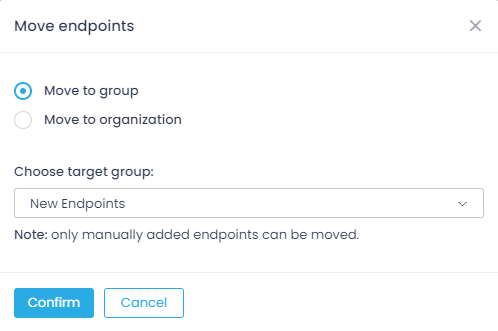
- Select the endpoint you need and click Organize Endpoints > Move selected to.
- Select the required target group or organization.
- Click Confirm.
NOTE: If moved from the group to another organization, the endpoint is included in the New Endpoints group.
Removing Endpoints from Group
- Select the group you need, select the endpoint, and click Organize Endpoints > Remove selected from.
- In the dialog displayed, choose the required scenario:
- Remove the endpoint from the group, but keep it managed with Action1.
- Uninstall the Action1 agent from the endpoint and remove it from Action1.
Important! If you select to uninstall the agent, the following will take place after confirmation:
- The endpoint will be removed from the list of managed endpoints and all the groups.
- Its name will be added to the exclusions list in the agent deployment settings.
- The subscription allowance will become available to use on other endpoints.
- If connected to Action1 at the moment, the agent will be uninstalled immediately; otherwise, it will be uninstalled as soon as it connects.
- Confirm the selected scenario.
Deleting a Group
- Select the required group under Endpoints.
- Click Endpoint Group Settings.
- Click Delete in the top-right corner.


