Example: Deploying Office 365 Package
This example shows how you can deploy the latest build of Office 365/Microsoft 365 Apps (former Microsoft Office) across all managed endpoints.
Step 1: Create a configuration file for the deployment package
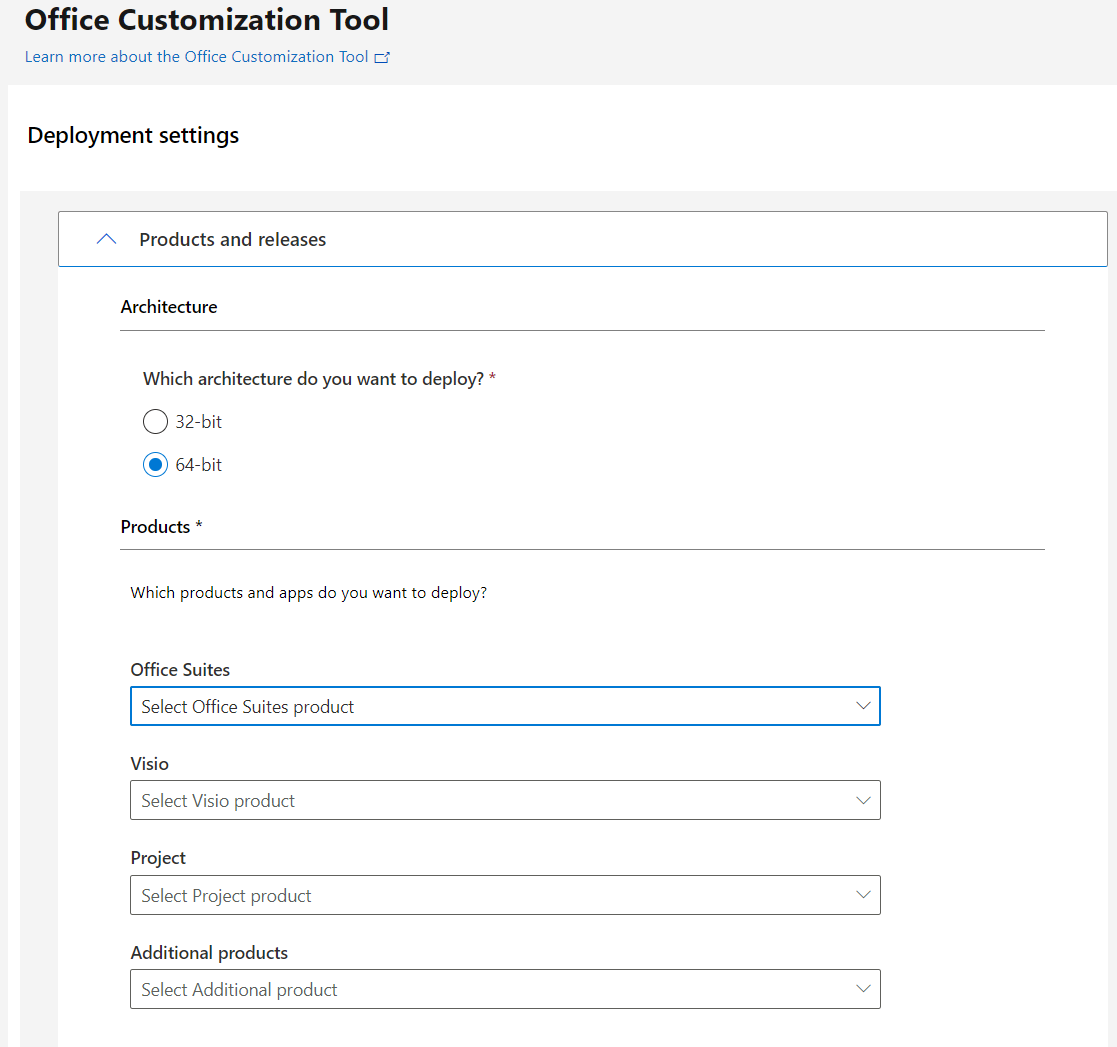
Navigate to https://config.office.com/deploymentsettings and create a configuration file with the settings you need.
- Select your target architecture.
- In the Products section, specify:
- Required edition of the Office suite, for example, Microsoft 365 Apps for enterprise.
- Additional products you want to deploy, for example, Visio.
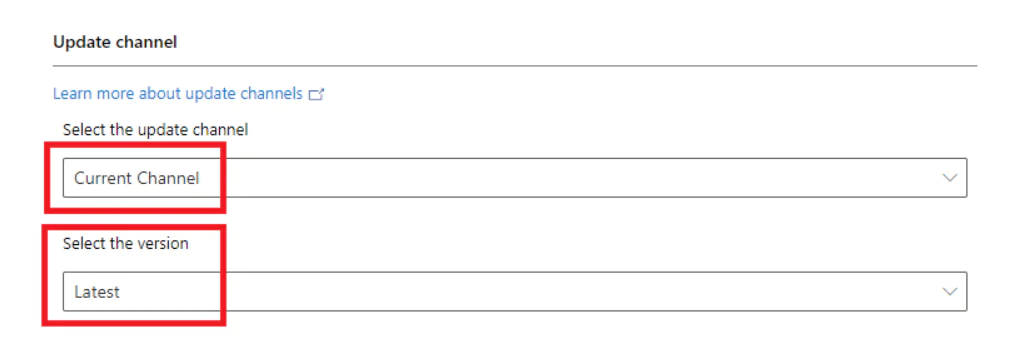
- In the Update channel section:
- Select Current Channel as the update channel.
- Select Latest version to be deployed.
Having this set, the deployment tool will operate as the online installer: it will always look for the latest released Office 365 version on the vendor’s site, download and install it automatically.
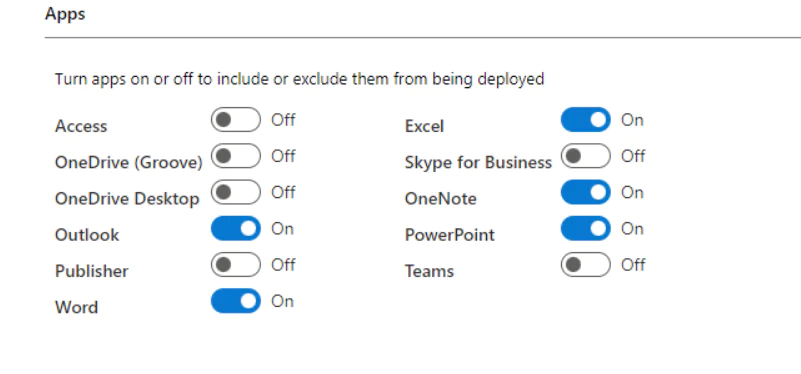
- Select the apps you need to include and configure other settings as required.
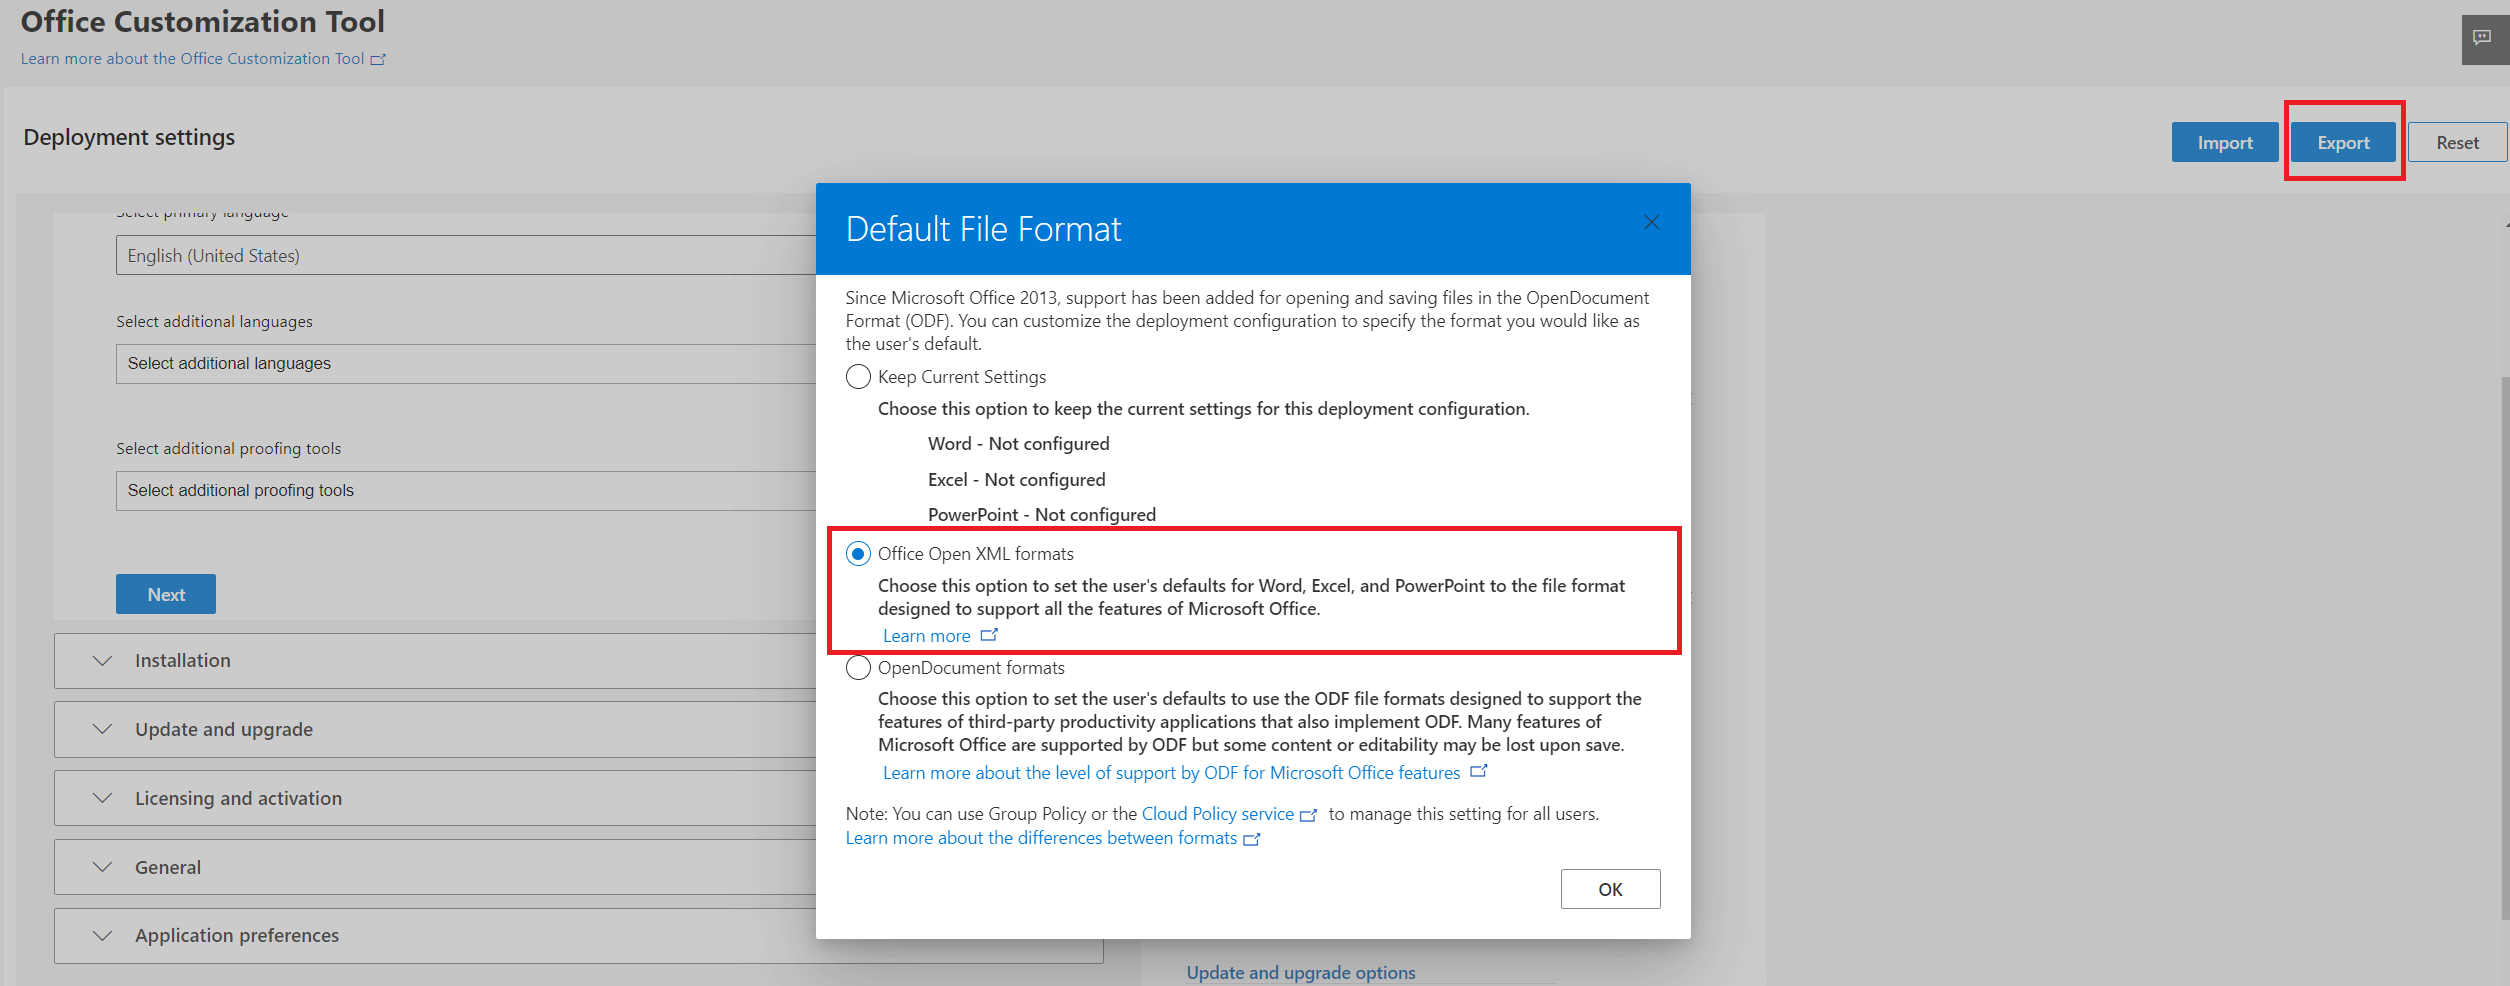
- When finished, verify the settings and click Export on the right.
- When prompted, specify the user’s default file format – select Office Open XML and click OK.
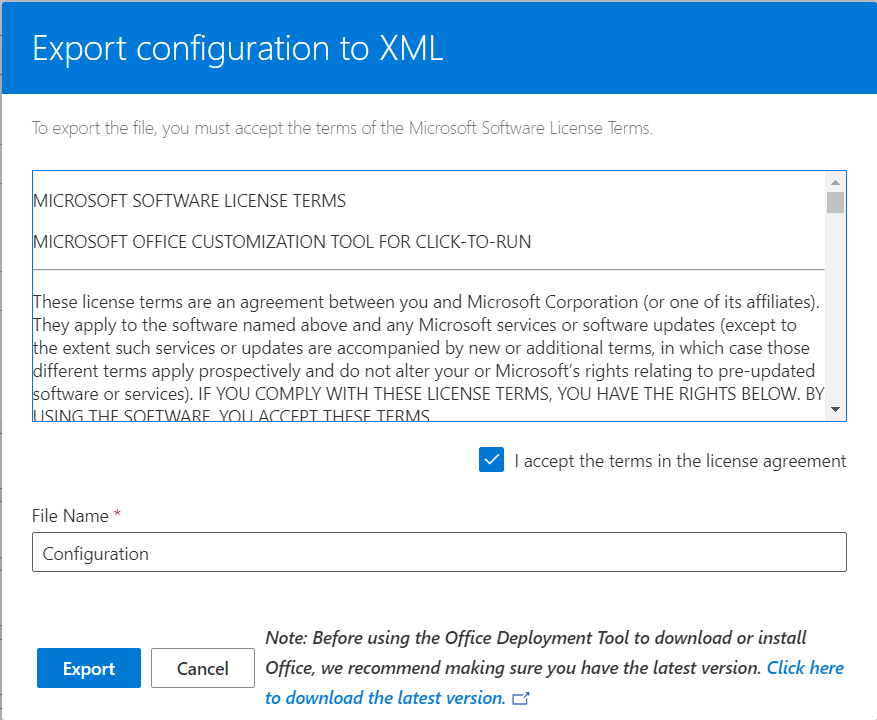
- Then specify the configuration file name, accept the license terms, and click Export.
Step 2: Prepare the deployment package
- Navigate to the Office Installer download page and download OfficeSetup.exe file.
- Run this OfficeSetup.exe file on any working endpoint to install Office 365. After the installation, go to Control Panel > Apps & Features on that endpoint and take a note of the Office 365 version number.
- Pack this OfficeSetup.exe file and your configuration file together into a ZIP archive, for example, officesetup.zip.
Being configured like this, the Office Installer (OfficeSetup.exe) will regularly check the vendor’s site for the product releases, download the latest released build, and install it on the target machine.
NOTE: This course of action follows Microsoft recommendation: “You should also connect to the Internet regularly to keep your version of Microsoft 365 up to date and to benefit from automatic upgrades.”
Step 3: Add deployment package to Action1 repository and install on managed endpoints
- In Action1 web console, navigate to Configuration > Software Repository and click on +Add to Repository.
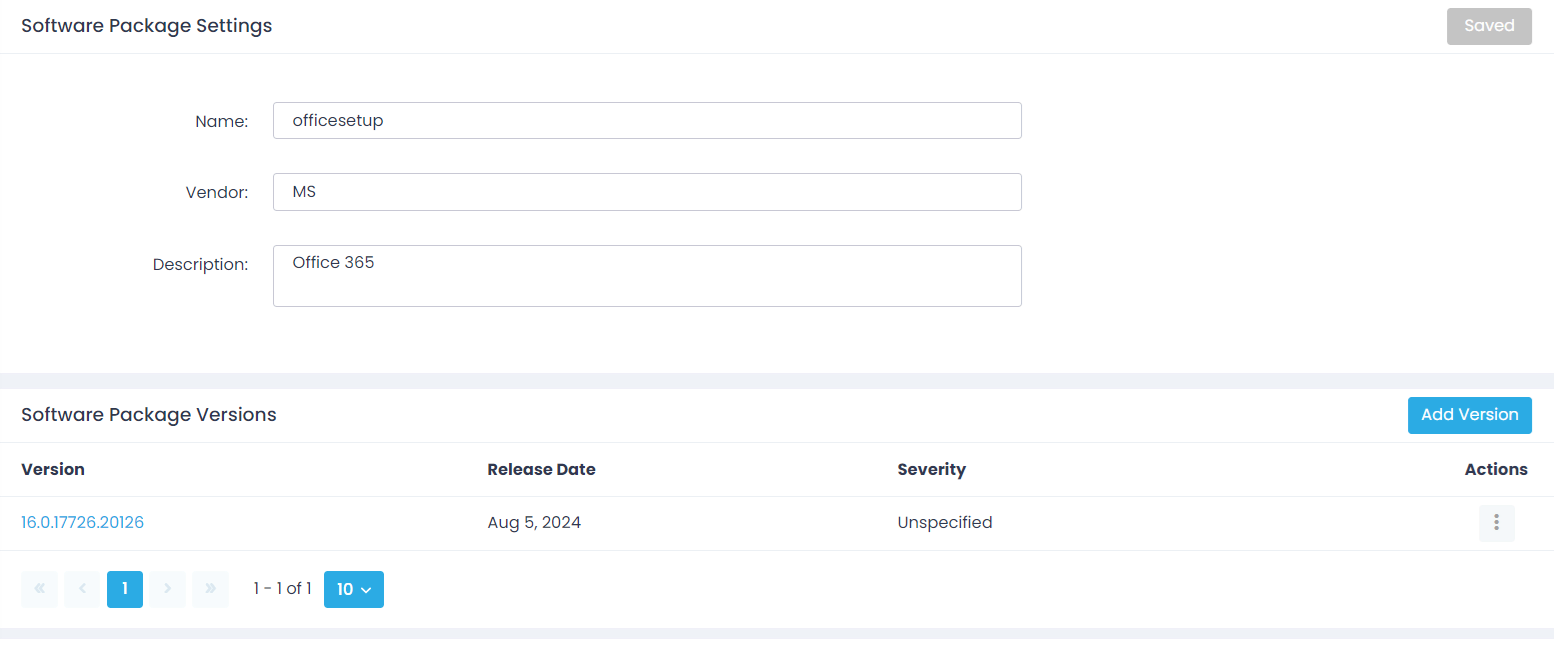
- Specify the Office deployment package name, vendor and description and click Save.
- Click Add version. The General tab of the package properties opens.
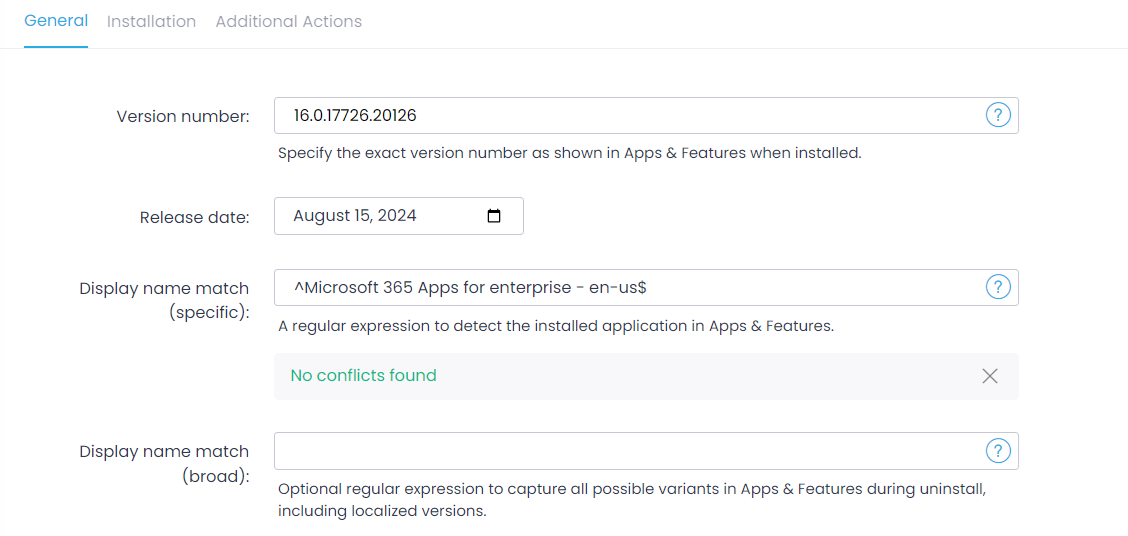
- On the General tab, specify package properties:
- Enter Version number as shown in the Control Panel > Apps & Features of the machine where you initially installed Office 365 (see Step 2 above).
- Set Release date to current date.
- In Display name match (specific), specify your Office 365 edition and language (as configured at Step 1) using the regexp syntax:
^<product_edition> - <product_language>$
For example:
^Microsoft 365 Apps for enterprise - en-us$
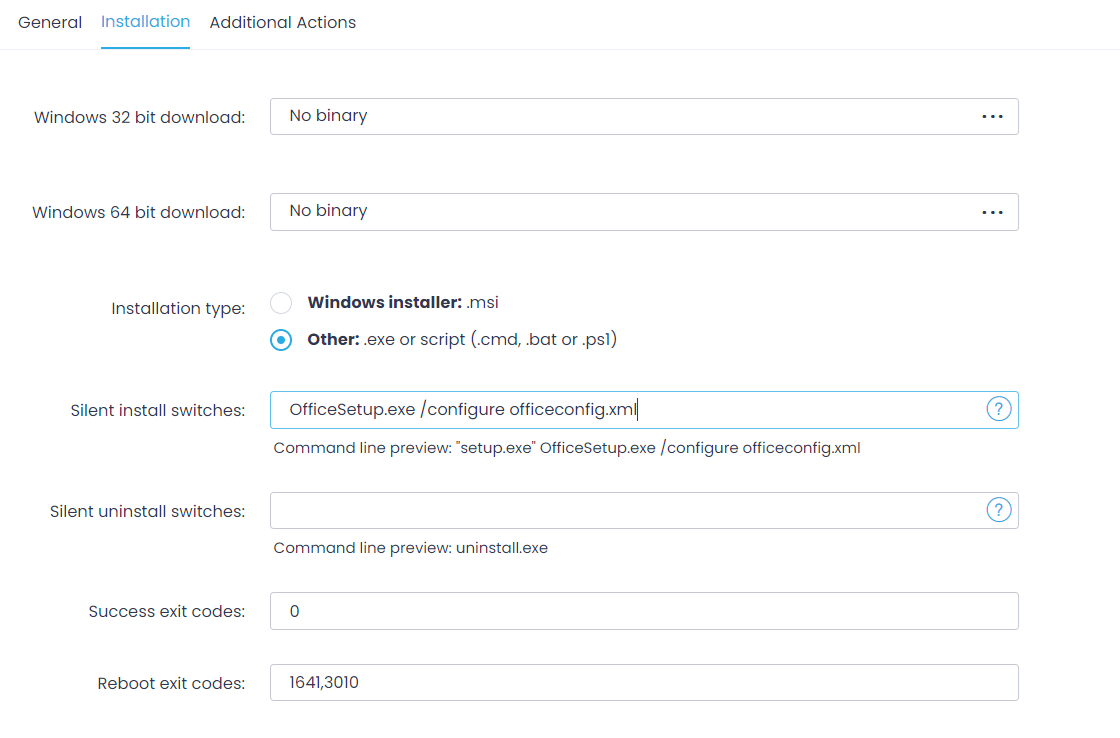
- Go to the Installation tab.
- Select Windows 64 bit download > Private P2P distribution via Action1 Cloud and upload the ZIP archive you created at Step 2.
- Set Installation type to Other: .exe or script.
- Specify Silent install switches as follows:
OfficeSetup.exe /configure configuration.xml
here OfficeSetup.exe and configuration.xml are example names and should be replaced with the actual files from the ZIP archive you created at Step 2.
- Save all settings.
Now Microsoft Office becomes available in the Action1 Software Repository as a custom app, and you can distribute it to your managed endpoints. Consider rolling out deployment to a test group first before scheduling a companywide delivery. For detailed instructions on how to roll out packages, see Deploy Software.
See also Prepare Multi-File Custom Packages.
Adjusting package properties (optional)
Since you specify the Office installer version and edition name manually, they may become out of sync with the latest Office version after it is downloaded automatically from Microsoft web site.
For example, you initially deployed Office 365 on June 30, with the build number 16.0.17726.20100. On July 1 a newer version of Office 365 with the build number 16.0.17726.20126 is released, automatically downloaded, and installed by Office Installer.
Then Action1 automatically starts deploying the latest downloaded version to the managed endpoints. However, if it detects that the latest downloaded build number and the number stored in the package properties are out of sync, it will issue a message like this:
The install of Microsoft 365 finished without errors, but instead of version 16.0.17726.20100, the following product changes were detected:
Microsoft 365 Apps for enterprise - en-us 16.0.17726.20126 installed. Please verify the version number and display name match parameters in the package settings.
Same message will appear if the Office edition gets a new name.
This message does not affect the package deployment and can be ignored. The latest downloaded Office 365 will be installed to the managed endpoints.
If you want, however, the package properties to be fully matched (that is, in sync) with the latest ones, you can do the following:
- Locate the Office 365 package in Action1 Software Repository, select it and click Add version.
- In the Version number property field, enter the latest build number – you can copy it from the message text, or from the Apps & Features on any machine where it was installed.
- If necessary, update the display name, too. Save the new settings.
See also Prepare Multi-File Custom Packages.
